Understanding Your Home’s Plumbing System
Identify the Main Water Supply Lines
Locating your home’s main water supply lines is a practical first step in DIY pipe inspection. These lines are the arterial highways delivering water to your entire dwelling. Becoming familiar with their placement allows you to swiftly control the water flow in case of a leak or when maintenance is needed. Remember, these supply lines usually feature robust materials capable of withstanding high pressure and are often located in basements, crawl spaces, or utility areas. Understanding how to spot and access the main shut-off valve is vital: this single control can halt water to your entire house. Becoming proficient in locating this valve before an emergency arises will ensure that you can act quickly to prevent widespread damage. The main shut-off valve is often found near the point where the main water line enters the home or near the water meter outside:
- Check near the perimeter of your house, where water supply lines typically enter.
- Inspect your basement or crawl space for a large valve on a prominent pipe.
- If your home is on a slab, the valve may be near your water heater or within a garage.
- The shut-off might be located in a utility closet or outside an access panel for homes with no basement.
Locate Shut-Off Valves Throughout the House
Beyond the main shut-off valve, your home’s plumbing network likely includes individual shut-off valves at various fixtures; these are your first defense against localized leaks or issues. Familiarize yourself with the shut-off valves for sinks, toilets, and water-using appliances like washing machines and dishwashers. Their proper use can prevent a small problem from escalating, saving you time and the expense of repairs. It’s a simple step: locate them, test them to ensure they turn quickly and teach family members their locations and usage.
Create a diagram with the shut-off valve locations for systematic inspection and maintenance. This map serves as a quick reference during emergencies, streamlining your response and minimizing the risk of water damage. Below is a suggested list to help you start:
- Look for valves under kitchen and bathroom sinks that control the hot and cold water supply.
- Behind toilets, typically where the water line meets the wall or floor.
- Near appliances like your water heater, washing machine, and dishwasher.
- Don’t overlook outdoor fixtures, which should have valves inside your home.
Periodically check these valves to ensure their functionality, as they can seize up over time. This proactive approach will give you confidence and control when performing DIY pipe inspections and routine plumbing maintenance.
Gathering Essential Tools for Inspection
Embarking on a successful DIY pipe inspection requires a reasonable selection of plumbing tools and safety equipment. As you assemble basic supplies, consider the significance of each tool’s role in the inspection process. Ensuring proper safety equipment is on hand safeguards your well-being and brings a professional edge to your DIY endeavor. The ensuing sections offer insights into the tools and gear essential for your plumbing inspection tasks.
Assemble Basic Plumbing Tools Needed
When you prepare for a DIY pipe inspection, having the right tools is not only helpful but also imperative for a thorough and safe procedure. You’ll need a quality pipe wrench to tackle stubborn fittings and a plumber’s snake to clear any obstructions you might encounter. Equipping yourself with these basic necessities enables you to confidently handle common plumbing tasks and swiftly address any complications that may arise during your inspection.
Moreover, having a reliable flashlight or a headlamp provides visibility in those darker, hard-to-reach spaces, ensuring no issue goes unnoticed. As you engage with your home plumbing system, remember that a well-chosen toolkit empowers you to diagnose and potentially remedy minor problems before they escalate to costly emergencies. Therefore, equip yourself thoughtfully and embrace the role of a savvy and prepared homeowner.
Ensure Proper Safety Equipment Is on Hand
When undertaking a DIY pipe inspection, your safety should be as important as the task at hand. You’ll need sturdy gloves to protect your hands from sharp edges and grime and safety goggles to guard against any unexpected spray or debris. These precautions are essential in preventing injuries and enabling you to work more effectively within the confines of your home’s plumbing system.
Additionally, be sure to equip yourself with non-conductive tools if you’ll be working near any electrical sources or appliances, as water and electricity are dangerous. With safety gear in place, you can focus on the job without undue concern for personal harm, thereby ensuring a safer and more efficient DIY plumbing experience.
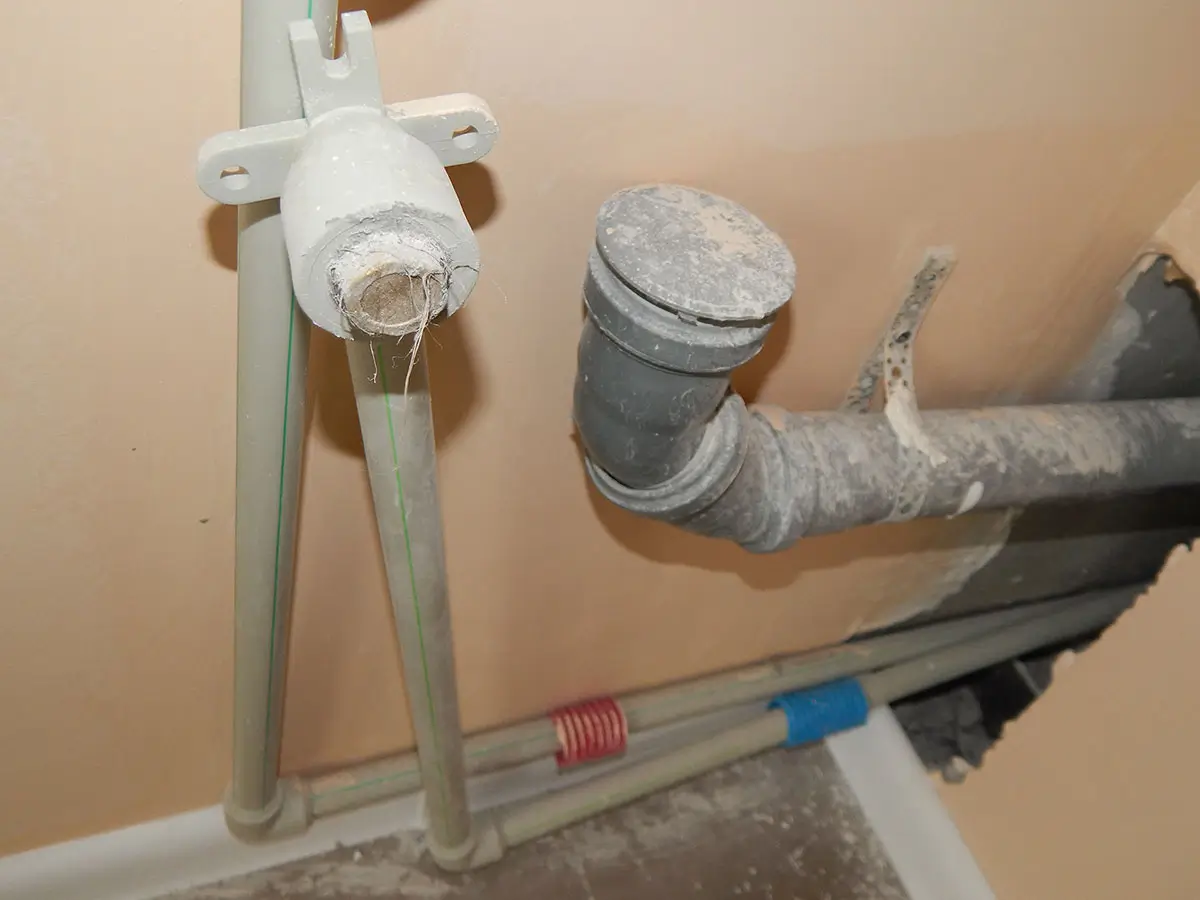
Inspecting Pipes for Visible Damage
Turning your focus to visible damage can prevent minor plumbing issues from escalating. Inspect leak-prone areas around fixtures and joints, and stay vigilant for signs of corrosion or wear on your pipes. These inspections can inform you of the structural integrity of your plumbing system and guide you in preventative maintenance. By examining these areas, you are taking a proactive stance to ensure the longevity of your home’s plumbing.
Check for Leaks Around Fixtures and Joints
You should vigilantly examine where leaks commonly occur, particularly around fixtures such as faucets and pipe joints. Visual cues, like moisture or discoloration, often indicate leakage. If you detect any dampness or anomalies on your fixtures or pipes, immediate attention is warranted, preventing the problem from worsening and causing extensive damage to your home.
During your inspection, carefully apply pressure to suspect pipe joints and observe for any give or seepage, which could signal a compromised seal. This practical tactic helps you to spot issues that might only be evident with closer scrutiny. By identifying these early signs of pipe deterioration or damage, you empower yourself to address them promptly, safeguarding your home’s structural integrity and avoiding costly repairs.
Look for Signs of Corrosion or Wear
During your pipe inspection, pay special attention to discoloration, puckering, or flaking on the pipe surfaces. These marks can indicate corrosion, a common issue that arises from chemical reactions between the pipes and water or exposure to corrosive household products. In the undesirable event that you encounter such wear, it’s essential to consider the age of your plumbing and the material of your pipes. This gestalt influences the urgency and type of repair required.
If you observe warping or bulging in your pipes, this may reflect internal damage or persistent pressure issues. Regular monitoring for these indicators is wise, as they can lead to leaks and bursts, offering a forewarning to take action. Dealing with these matters promptly spares you from the disruption and costs of extensive water damage repairs—a proactive approach places you ahead in maintaining your home’s plumbing health.
Detecting Hidden Pipe Issues
Moving beyond the visible, detecting hidden issues in your home’s plumbing is a nuanced skill. Leveraging your water meter can reveal leaks that would otherwise go unnoticed, a pragmatic approach in preemptive maintenance. Furthermore, attuning your ear to the acoustic signals of your pipes may alert you to anomalies that require your attention. These techniques provide invaluable insights into the health of your plumbing system, facilitating timely interventions.
Use a Water Meter to Spot Unseen Leaks
When dealing with the complexity of residential plumbing, the water meter is your unsung ally in identifying covert leaks. Observing the meter when all water use is suspended lets you detect unexpected fluctuations that signify leakage. This effective strategy allows you to pinpoint water loss, a critical step that leads to early resolution and prevents substantial waste and increased bills.
You may be concerned about stealthy leaks that bypass regular inspections. In such cases, record the water meter reading, refrain from using water for a few hours, and then recheck the reading. If you notice a discrepancy, this is a clear signal that a hidden leak exists within your home’s plumbing system, prompting a more detailed investigation.
Listen for Unusual Sounds in Pipes
As you venture deeper into DIY pipe inspections, heed the acoustic nuances your home’s plumbing emits. Unexpected noises such as whistling, banging, or hissing can betray the presence of air in the pipes, high water pressure, or a concealed leak. Recognizing these sounds early allows you to address potential issues before they exacerbate, reflecting diligent homeownership and preventive maintenance.
Attentiveness to unusual sounds originating from your walls or floors can help you uncover hidden problems within your plumbing system. For instance, a constant ticking or dripping sound when no water is used in the house might signify a leak in the pipes. Your proactive listening can lead to early detection, saving you from the inconvenience and cost of major repairs.
Maintaining Drainage Systems Effectively
Maintaining robust drainage systems is crucial in DIY pipe inspection and ensures the longevity of your home’s plumbing. Tackling debris in gutters and downspouts prevents blockages that can lead to water damage while keeping indoor drains clear to avoid disruptive clogs. This section helps you understand practical steps to protect and optimize your drainage, from the roof down to the sewer lines, maintaining a seamless flow throughout your home.
Clear Debris From Gutters and Downspouts
Ensuring your gutters and downspouts are debris-free is critical for maintaining the integrity of your home’s exterior drainage system. These channels, designed to direct water away from your foundation, can become clogged with leaves, twigs, and other detritus, leading to overflows that may cause water damage. Regular cleaning, especially after storms or during fall when leaves drop, prevents blockages and protects your property.
When you’re inspecting your gutters and downspouts, look for signs of sagging or separation from the house: these are indicators that repairs or reinforcement may be necessary. To keep them functioning optimally:
- Use a sturdy ladder to reach your gutters safely.
- Wear gloves to remove debris by hand or with a gutter scoop.
- Flush the gutters and downspouts with a hose to ensure water flows freely.
Mindful attention to these areas prolongs their lifespan and reduces the risk of costly water-related repairs to your home’s structure and foundation. Regularly clearing these pathways allows you to manage your property’s drainage confidently, knowing you’re taking proactive steps to safeguard against water damage.
Keep Indoor Drains Free of Clogs
Keeping your indoor drains free of clogs is a pivotal aspect of home maintenance that you can confidently manage. Regular checks for buildup and proactive clearing of materials such as hair, soap scum, and grease help maintain the unhindered flow of water. A simple routine that includes pouring boiling water down the drain weekly or using a mixture of baking soda and vinegar can dissolve minor blockages and prevent plumbing headaches.
Take note of slow-draining sinks and tubs, as these scenarios often signal an impending clog. Addressing these signs early can spare you from more extensive and disruptive repairs. For instance, employing a plunger or a plumber’s snake can be an effective method for dislodging obstructions, allowing you to restore full functionality to your drainage system without needing costly intervention.
Knowing When to Seek Professional Help
While embracing the DIY spirit can serve you well in basic pipe inspection and maintenance, recognizing problems that transcend your repair capabilities is crucial. Finding a qualified plumber for assistance is the next practical step if you encounter complex issues. This section will address when it’s time to transition from a do-it-yourself approach to professional intervention and how to select a reliable plumbing expert to efficiently address your home’s needs.
Recognize Problems Beyond DIY Repair
Suppose you’re delving into DIY pipe inspection and encounter shallow water pressure, recurrent clogs in multiple drains, or water stains on walls and ceilings. In that case, these red flags signal problems that may exceed a standard fix. These persistent issues generally hint at systemic troubles within your pipes, potentially demanding advanced techniques and equipment you might not possess. Acknowledging the limits of your DIY expertise is not a defeat; it’s a strategic decision to preserve your home’s plumbing integrity and avoid accidental worsening of the issue.
Partnering with a professional plumber becomes essential when you observe signs like persistent sewer backups, water pooling in unexpected places, or the ominous sounds of water running when no taps are open. Such symptoms often indicate complex problems within your home’s plumbing network—for example, sewer line defects or hidden pipe ruptures. When safety or the complexity of remedial actions makes DIY inspection untenable, seeking professional assistance ensures that comprehensive techniques, such as video pipe inspection or hydraulic tests, are deployed to effectively diagnose and remedy the underlying causes.
Find a Qualified Plumber for Assistance
When you’re faced with plumbing complexities that defy a straightforward DIY approach, securing the services of a qualified plumber is your most prudent course of action. Look for a licensed professional with a solid reputation and the necessary experience to handle intricate plumbing issues. An adept plumber will provide swift resolutions and ensure that any repairs comply with local codes and standards, ultimately prolonging the lifespan and efficiency of your home’s plumbing system.
To select a skilled plumber, solicit recommendations from friends or investigate online reviews to gauge customer satisfaction. You want a plumbing expert who is not only technically proficient but also communicates clearly about the issues and proposed solutions. Once you engage a plumber, observe their assessment methodology and tools used—this can provide you with valuable insights that may be helpful in your ongoing DIY maintenance efforts.
Conclusion
Actively inspecting your home’s plumbing through DIY methods is an invaluable preventative maintenance, reducing the risk of costly future repairs. By becoming familiar with your main water supply lines and shut-off valves and recognizing signs of damage, you empower yourself to take swift, informed action when needed. Regularly employing simple tools and techniques to check for leaks and clogs aids in maintaining the efficiency and longevity of your plumbing system. Understanding when to engage a professional plumber ensures that more complex issues are addressed properly, safeguarding your home’s plumbing health.
Frequently Asked Questions
Related Articles
Contact Form
Have questions? Fill out the form below and a member of our team will get back to you as soon as possible.