
Check Us Out On Our Social Media

Toilet Tank Repair

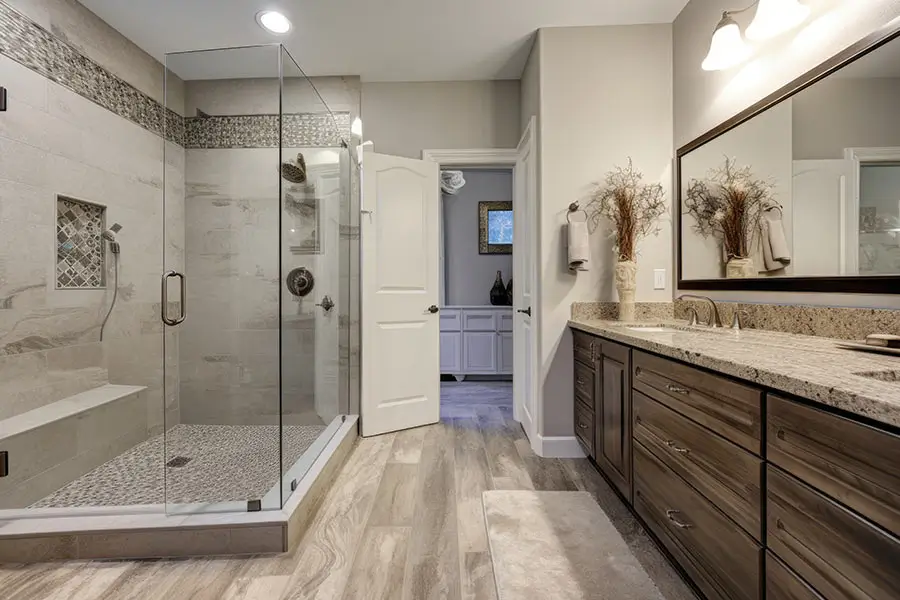
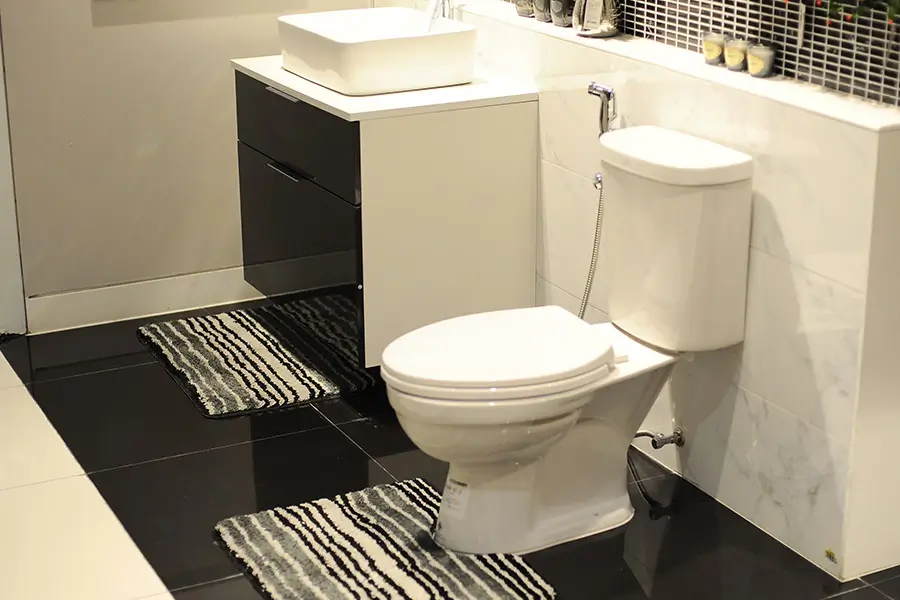
Why Is Your Toilet Running Constantly in New Harmony, UT?

Normally, when you flush the toilet, it stops running after a minute or so. This time, the sound of running water just won’t cease. All day long, it sounds like there’s a river running through your bathroom. You want a solution to stop the racket, and fast.

Below, learn why the toilet keeps running, then call our plumbers for toilet repair in New Harmony, UT.

The Anatomy of a Toilet Explained

Flushing toilets have been around since the late 1700s, and the design hasn’t changed all that much since then. Toilets are fairly basic, which means there’s a good chance you might be able to fix one yourself.

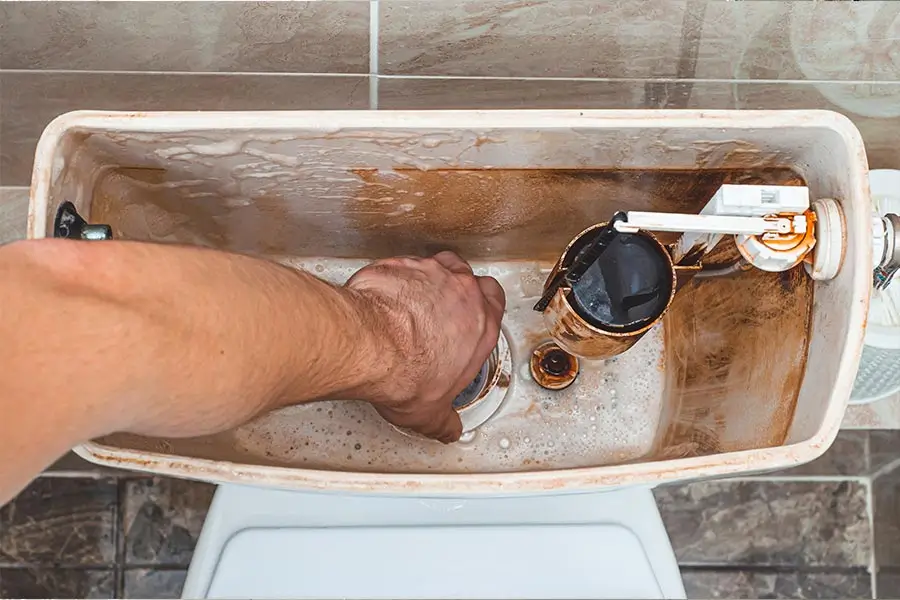
It’s smart to familiarize yourself with the inner workings of a toilet before you start working on yours. Lift the toilet tank lid, and let’s take a tour.

On the far left side, you’ll see a thin tube that kind of looks like a straw. This tube connects to the toilet handle. Look up a bit and you’ll see the pump, which is responsible for filling the tank up again after you flush. This is connected to a float, which goes up and down as the water level changes and tells the toilet when to stop filling.

Next to the pump is the overflow tube, which disperses excess water. This connects to the flapper valve, which prevents water from getting into the toilet bowl.

Any one of these parts could fail and cause your toilet to keep running.

Before Working on Your Toilet

Many toilet repairs are rather simple if you’re handy, and learning how to fix your toilet is a good skill to have. That said, if you’re not comfortable working on your toilet or don’t want to spend hours on such a project, it’s a good idea to call a plumber in New Harmony. Our plumbers are experts at diagnosing toilet problems. We’ll figure out why the toilet keeps running and have yours fixed in no time.

If you’d like to try fixing the toilet yourself, shut off the water supply before working. This will prevent the toilet from overflowing.

Top Reasons Why the Toilet Keeps Running in New Harmony, UT, and How To Fix Them

Why is your toilet running constantly? The cause could be anything from a loose flapper chain to a clog in your pipes. Below, we’ll cover the most common reasons why your toilet keeps running and how to resolve them.

The Handle Is Stuck

Let’s start with the easiest-to-fix cause of a toilet that runs constantly: a stuck handle. If your toilet handle is stuck, here’s what can happen:

  • The toilet might refuse to flush.
  • The toilet may continue to fill with water until it overflows.
  • If the handle is caught in the flush position, water will drain but not refill, leaving the tank empty.

Fixing a jammed toilet handle is simple. Lift the tank lid and look for the tube that connects to the handle. Wiggle this tube up and down a few times to unstick the handle.

This usually does the trick, but if it doesn’t, you may need to replace the handle. Here’s how:

  1. Shut off the water supply to the toilet if you haven’t yet done so. The water supply is usually located behind or under the toilet.
  2. Flush the toilet to remove water in the tank and relieve pressure from the toilet handle lever.
  3. Disconnect the flapper chain from the handle. Note which link in the chain the old handle was connected to.
  4. Use a screwdriver to remove the handle from the toilet. Some handles have a plastic mounting nut that you can remove by hand.
  5. Remove the O-ring and nut from the new handle. Insert the handle into the hole where the old handle was, then replace the nut and O-ring.
  6. Tighten the nut, ideally using a wrench for a snug fit.
  7. Reattach the flapper chain in the same position as before.
  8. Turn on the water supply and flush the toilet to test your handiwork.

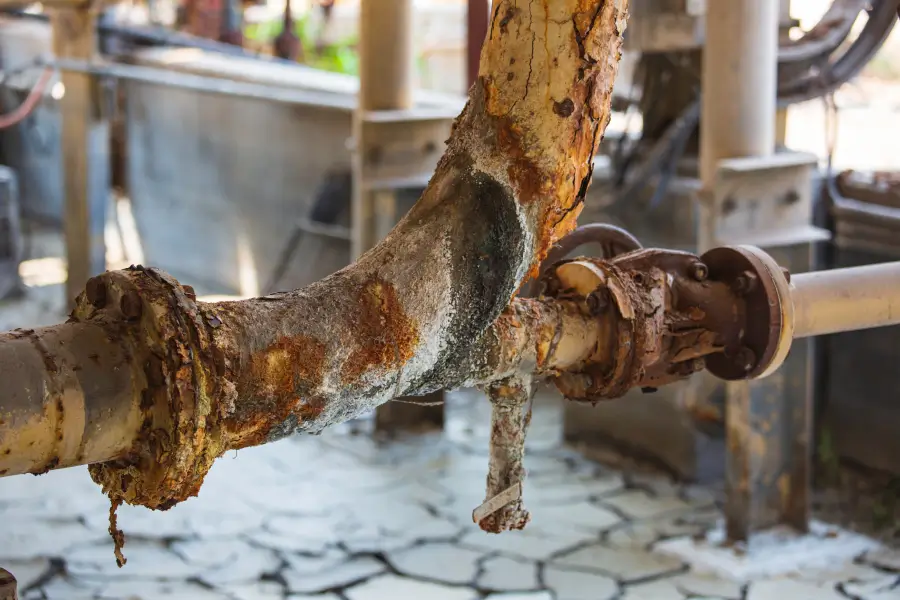
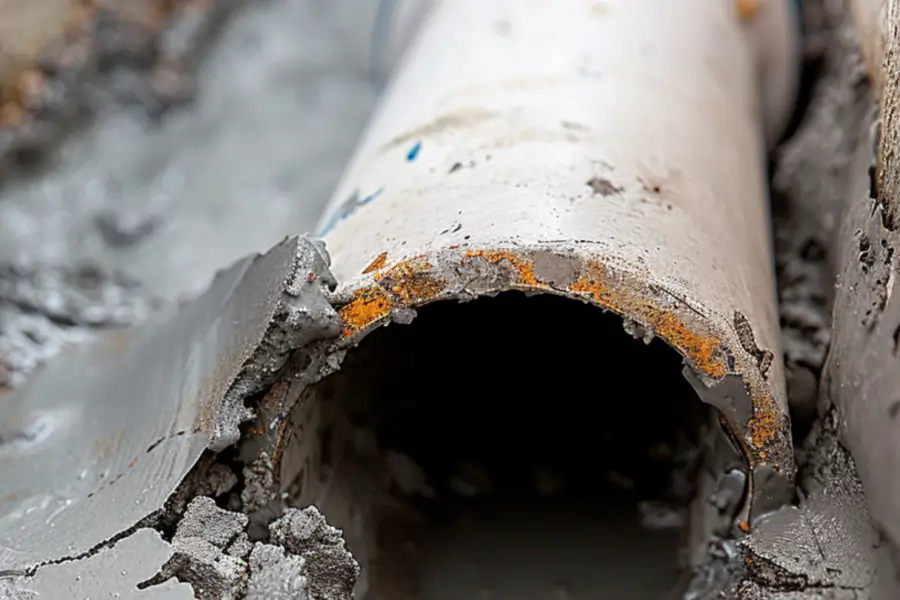
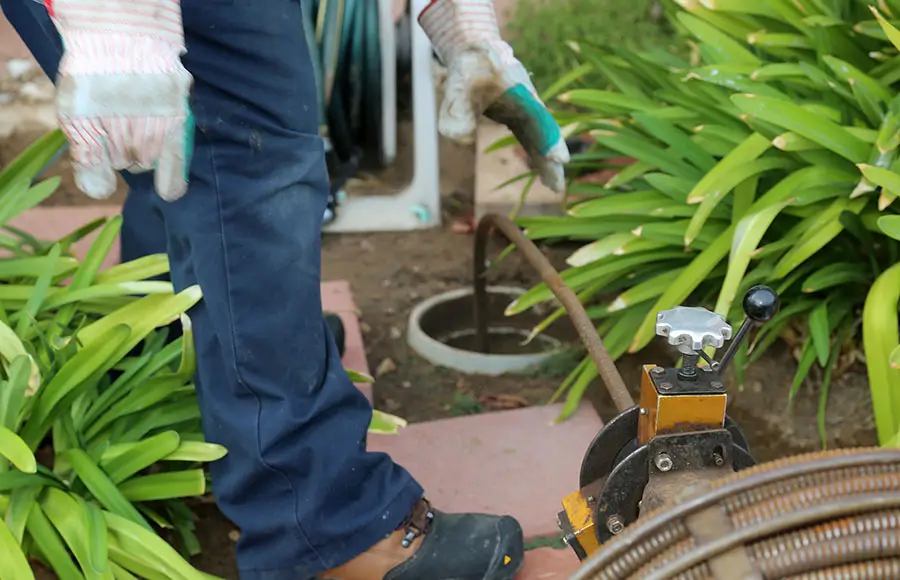
The Toilet May Be Clogged

If you’re wondering why the toilet keeps running, there may not be anything mechanically wrong with it. Rather, you might have a clog somewhere in your pipes. This will cause the toilet to run constantly because water and waste have nowhere to go.

There are several methods for unclogging a blocked toilet. One option is to use a plunger. Here’s how to use a plunger the right way:

  1. Ensure there is at least a little bit of water in the bottom of the toilet bowl. If the bowl is dry, add about a cup of water.
  2. Press the plunger firmly over the toilet drain to get a good seal. Push the plunger at a slight angle, not straight down, which will cause air pockets and render plunging ineffective.
  3. Push up and down vigorously until the water begins to drain.

If this doesn’t work, or you don’t have a plunger, try a hot water-soap mixture to loosen the clog. Fill a bowl or pitcher with very hot (not boiling) water and add a few drops of liquid dish soap. Pour the solution into the bowl and let it sit for 20-30 minutes. With luck, this will soften the clog and help it go down the drain.

If neither of these solutions work, it might be time to call a plumber.

The Flapper Chain Is Loose

Peek inside your toilet’s tank and look for a thin metal chain connected to the flapper. This chain’s job is to open the flapper when you flush the toilet. If it’s disconnected or the chain length is too short, the toilet will run nonstop.

Luckily, the fix for this problem is simple. If the chain has fallen off, reconnect it. You may need to reposition the chain a few times to get it right. If the chain is too short, disconnect and reattach it so it has more slack.

The Flapper Is Broken or Dirty

Toilet flappers, which are usually made of plastic or rubber, become worn and dirty over time. They usually last for about five to eight years, at which point you’ll need to replace yours. Here’s how:

  1. Shut off the water supply to the toilet.
  2. Remove the flapper chain from the toilet handle.
  3. Remove the flapper. If your flapper is made of rubber, it will slide off the pegs. If the flapper is made of hard plastic, it’ll snap off instead.
  4. Insert the new flapper and connect each of its ears to the pegs on the sides of the flush valve.
  5. Reconnect the flapper chain to the flapper and handle.
  6. Turn the water supply back on and flush the toilet to test your work.

You May Need To Make a Float Adjustment

A misaligned float is one of the most common reasons why toilets keep running. Your float needs adjustment if it sits just above water level or is angled all the way up.

Push the float down until it’s fully submerged in the water. In some toilets, you’ll need to loosen the adjustment screw on the float to reposition it. Once the float is in the right position, your toilet should stop running.

The Refill Tube Is the Wrong Size

The refill tube controls how many times the toilet flushes to push waste down the drain. If it’s either too long or too short, your toilet will run nonstop.

The top of the refill tube should sit about an inch below the fill valve. If it’s too long, you can either replace it or cut it down to the proper size. If it’s too short, replacing it is the only option.

Your Home’s Water Pressure Is Too High

Sometimes, toilets run constantly because the water pressure in a home is too high. If this is the case for you, your toilet’s flapper could get stuck open, causing the toilet to run ceaselessly.

The best way to resolve too-high water pressure is to install a pressure-reducing valve in your toilet. This valve will reduce the volume of water that your toilet uses for each flush.

Installing a pressure-regulating valve is a bit more complicated than the other fixes described above, so it’s best to hire a plumber for the job.

Should You Call a Plumber?

If, despite your best efforts, the toilet continues to run, it’s time to call a plumber from Iron Mountain Plumbing. Our highly trained plumbers can diagnose any problem with your toilet and fix the issue quickly.

In some cases, we might suggest replacing your toilet. This isn’t all bad news, though. Today’s toilets are much more efficient than older models, which can help you save a bundle on water bills.

Stop Stressing Over Why the Toilet Keeps Running and Call Our Plumbers in New Harmony, UT

If you’re still wondering why the toilet keeps running and none of the above solutions seems to help, reach out to our expert plumbers at Iron Mountain Plumbing. We’re pros at fixing gurgling toilets and toilets that run around the clock.

Call today to schedule service from a top plumber in New Harmony, UT.

Plumber installing a garbage disposal unit.

Five Reasons Your Garbage Disposal Stopped Working in Kanarraville, UT

If you’re like many homeowners in Kanarraville, you probably don’t pay much attention to your garbage disposal until it stops working. Having your garbage disposal fail is frustrating, but fortunately, these small appliances are usually fairly easy to fix. You may even be able to repair yours without calling a plumber.

Below, you’ll learn the most common reasons why your garbage disposal stopped working and how to resolve them. If you still can’t fix the problem, call us for garbage disposal repair in Kanarraville, UT.

Top Reasons Why Your Garbage Disposal Stopped Working

Garbage disposals, while tough, can fail for any number of reasons. Should your disposal kick the bucket, it’ll stop grinding food, leaving waste to rot in your drains. The disposal might make a humming noise or refuse to turn on at all. Needless to say, you want the issue fixed ASAP.

Here are a few common reasons why garbage disposals stop working.

1. You’ve Got a Nasty Drain Clog

When food gets stuck in your pipes, your garbage disposal will refuse to budge. Most often, clogs are caused by throwing things down the disposal that should go into the trash instead. That includes food waste such as:

  • Onions and potatoes, the skins of which can get stuck around the disposal’s blades
  • Rice and pasta, which turn into a thick paste that gums up the works
  • Eggshells, which feature an inner membrane that’ll wrap around the impeller
  • Coffee grounds as they become thick and sticky when wet

Essentially, don’t throw any sticky or fibrous food scraps down the disposal.

In some cases, clogs happen when you or someone else in your home drops a foreign object down the disposal. Our plumbers commonly find items such as forks, pieces of glass, and even wedding rings in customers’ disposals.

2. You’re Having Electrical Problems

Does your garbage disposal refuse to turn on at all when you flip the switch? If you hear nothing, not even a soft hum, you’ve likely got a power problem. There may be something wrong with either the unit or your circuit breaker.

If other devices connected to the circuit breaker work fine, the issue probably lies with the garbage disposal itself. You may need to call a plumber or replace the disposal.

3. The Flywheel Is Jammed

All garbage disposals feature a motor with a hopper or grinding chamber on top. Inside the grinding chamber is the flywheel, which looks like a little metal plate, plus a shredding ring that chops up food scraps.

If the garbage disposal turns on but only makes a humming sound, the flywheel is probably jammed. Luckily, it’s easy to fix. We’ll explain how to do so below.

4. The Unit Is Overheating

If your garbage disposal runs for a while but then shuts off without warning, it’s likely overheating. The disposal features an overload protector that forces the unit to shut off to prevent damage.

Overheating typically happens when homeowners run the disposal for too long. Let your disposal rest for a while, and it should cool down enough to be used again.

5. The Disposal’s Motor Has Gone Bad

Just like your car, a garbage disposal needs a motor to run and chop up food. With good care, your disposal’s motor can last anywhere from 10 to 15 years. After that point, the motor may burn out.

It’s possible to replace the motor, but given the relatively inexpensive price of garbage disposals, you may be better off replacing the unit.

Troubleshooting Your Garbage Disposal in Kanarraville, UT

If your garbage disposal stopped working, you’re probably wondering what to do about it. Follow these troubleshooting tips before you call a plumber.

Check the Power Supply

There’s a reason why so many customer support agents ask, “Have you tried turning it off and on again?” Such simple fixes may seem silly, but far too many people don’t bother with the basics. Starting with the little things is smart because it can save you hours of frustration.

To start, make sure the disposal is still plugged into the electrical outlet under your sink. The power cord may have fallen out while you were rummaging around in the cabinet. If the plug is disconnected, simply plug it back in, and you’re good to go.

Is your disposal tripping the circuit breaker? This is common in older homes when multiple appliances share the same circuit. The breaker can’t supply power to all of them at once, so it trips. A tripped breaker is likely the problem if other devices on the same circuit have stopped working as well.

The cheapest and easiest solution is to only run the disposal when you’re not using other devices on that circuit. Alternatively, you could upgrade your circuit breaker or run the disposal on its own circuit.

Reset the Disposal

Once you’ve confirmed that the disposal is receiving power, try resetting it. Like your phone or computer, disposals occasionally need to be reset when they stop working. Luckily, resetting the disposal is simple and doesn’t require you to take apart the unit.

Look at the bottom of the disposal and locate the reset button. It might be black or some other color. Press the button down firmly and release it. For some models, you might need to hold the button down for a few seconds.

Once you’ve pressed the reset button, try running the disposal.

Remove Food Clogs

As mentioned above, certain food items should never go down the disposal. If you’ve tossed something bad down your disposal, you’ll need to remove it.

First, try plunging the sink drain with a cup plunger. Pour a little water into the sink so the plunger can get good suction, then press the plunger firmly over the drain. Pull up and down on the plunger vigorously to dislodge the clog.

If this doesn’t work, try disconnecting the drain trap and discharge line. Set a bowl or bucket below the disposal before you do this to contain water spillage. Look for clogs in the line or trap and remove them.

Rotate the Impeller and Flywheel

We commonly get calls from customers asking, “My garbage disposal makes a humming noise but doesn’t work. What’s wrong?” Most likely, there’s a jam somewhere in the flywheel or impeller. Both of these parts are responsible for chopping up food debris. If a foreign object like a knife falls down the disposal, it’ll get stuck.

You may be tempted to reach your hand into the disposal and grab whatever’s blocking it, but never, ever do this. The blades of a garbage disposal are extremely sharp and can seriously injure you. You wouldn’t want to have your hand caught in the disposal if it somehow springs to life.

To fix a stuck impeller or flywheel, here’s what to do:

  1. Disconnect the disposal from the power outlet (or flip the circuit breaker if your unit is hardwired).
  2. Look for a small hole on the bottom of the disposal and in the very middle of the unit. Insert the garbage disposal key that came with your unit (or a 1/4-inch hex wrench) into the depression. Turn the wrench back and forth a few times to dislodge the object.
  3. If this doesn’t work, you can also try inserting the end of a broom handle into the disposal to dislodge the item. Once you’ve done that, use pliers to extract it.
  4. Plug the unit back in, run your faucet, and turn on the disposal to see if you’ve fixed it.

Find and Fix Leaks

Maybe your garbage disposal still works, but you discover a puddle of water below your sink every time you run it. If your disposal is leaking, first check the lines that run to and from the unit. If either of these lines is leaking water, simply tighten the connections. If that does not fix the problem, you will need to replace one or both lines.

If the disposal only leaks when the dishwasher runs, inspect the dishwasher drain line which is located near the top of your disposal. Again, try tightening the connections to see if this resolves the problem.

Replace the Garbage Disposal

It’s generally easy to fix most garbage disposal problems, but if your unit still won’t work, you might need to replace it. This is the case if your disposal has a burnt-out motor or is leaking from its casing.

Check your warranty to see if it will cover a new disposal. If not, you’ll pay anywhere from $75 to $950 to install a new one.

Wondering Why Your Garbage Disposal Stopped Working? Call Our Expert Plumbers in Kanarraville, UT

If you’ve tried these fixes and are still wondering why your garbage disposal stopped working, reach out to our pros at Iron Mountain Plumbing. We can resolve any issue with your disposal, from a jammed impeller to kitchen plumbing leaks. If your disposal is beyond repair, we also offer speedy and affordable garbage disposal installation.

Call Iron Mountain Plumbing to schedule service in Kanarraville, UT, today.

Severely rusted and corroded industrial pipe

What Causes Water Pipe Corrosion and How Can I Fix It?

Hundreds of gallons flow through your plumbing system every day. Over time, your pipes suffer wear and tear, but most of us don’t think about it until we discover a clog or a leak.

Oxidation, mineral buildup, and chemical reactions may all speed up pipe degradation. Learn more about what causes water pipe corrosion and what you can do about it.

Common Causes of Water Pipe Corrosion in Enoch, UT

Pipes have a long lifespan, but nothing lasts forever. Although iron, steel, and copper pipes are more durable than PVC, all plumbing systems will eventually need repair and, at some point, replacement. The following elements will chip away at your piping’s structural integrity. 

Hard Water

Most of Utah has hard water, i.e., water with a high concentration of calcium, magnesium, and other minerals. Any mineral concentration above 180 PPM counts as “very hard,” and the water hardness in Cedar City, located just 7 miles from Enoch, is generally far above that number. 

Thus, it’s no wonder that local homeowners struggle with mineral buildup that damages appliances and plumbing. As hard water flows through your pipes, calcium and magnesium form a layer of limescale, which gradually reduces pipe diameter, restricts water flow, and increases the pressure inside the pipes.

This increased pressure strains pipes and plumbing joints, so leaks and bursts are likelier to happen with time. Limescale can also trap moisture and accelerate corrosion in metal piping. 

Harmful Chemicals

Although hard water is alkaline (often with a pH above 8.5), some household chemicals, like toilet bowl cleaners, are highly acidic. When dumped into your plumbing system, they create corrosive water that can damage metal pipes. 

Drain cleaners also put your piping at risk. Often advertised as a solution to pesky clogs, they may help in the short term but will wreak havoc on your pipes if you use them too often.

Water Velocity

If you have a piping system that relies on a pump, like a circulating hot water system, water may move through your pipes too fast because of over-pumping and an uncontrolled flow rate.

Water turbulence increases with high speed, especially at plumbing joints and bends. The turbulent water blasts away inner layers exposes deeper layers, and accelerates water pipe corrosion, especially in metal pipes. 

Very Hot Water

High water temperatures will speed up pipe corrosion since chemical reactions like oxidation happen more quickly in hot water. Heat also causes hard minerals to build up faster on the pipe’s inner surface. In copper pipes, heat makes it easier for copper ions to separate, which will gradually thin out the pipe walls.

Electrical Currents

Stray underground electrical currents can hit buried metal piping and cause local corrosion. As the current passes through the pipe, an anodic reaction releases metal ions into the soil, compromising the pipe’s structure over time.

Sediment

When sediments like dirt, sand, or debris from renovations flow through your plumbing system, they act like a sander, mechanically wearing away the pipe walls. Sediment can also accumulate, obstruct pipes, and create high pressure and leaks. 

Bacteria

Various microorganisms in the plumbing system produce acids that eat away at pipes. For instance, sulfate-reducing bacteria make corrosive hydrogen sulfide, which degrades iron and steel. Iron-oxidizing bacteria generate acetic acid when they feed on organic matter, lowering the pH and speeding up corrosion.

Preventing Pipe Corrosion

As a homeowner in Enoch, UT, you can take several important steps to slow down water pipe corrosion. Water softeners, controlled water flow, and some basic precautions will extend your plumbing system’s life.

Install a Water Softening System

Water softeners trap calcium and magnesium ions. A water softener will reduce harmful limescale and rust in your plumbing system, protect your appliances, and dramatically improve water quality. Water will taste better, and you’ll no longer have to deal with hard water effects like dry skin and hair, soap scum, and dull laundry. 

Skip Harsh Chemicals 

Don’t resort to corrosive drain cleaners if your drains are slow: harsh chemicals will do more harm than good in the long run. You can often remove clogs using a basic drain snake. In more serious cases, it’s best to call your local plumber. 

Avoid Using Excessively Hot Water

Keep the water temperature setting at 180 degrees or lower. This will protect your pipes and prevent scalding and burns. It may also extend your water heater’s life and lower energy bills. 

Control Water Pressure

Pressure regulators help keep water pressure within a safe range (about 40-80 psi). A pressure regulator is a valve that constricts and creates reduced flow when the pressure is too high and opens when the pressure drops. This simple device can reduce strain on your piping, plumbing fixtures, and appliances. 

Check Your Pipes

Pay attention to warning signs like rusty or discolored water, strange gurgling noises in your pipes, or low water pressure. Schedule a plumbing inspection to catch any leaks, cracks, or worn-out pipes. A professional inspection is especially critical if you live in an old home with an outdated plumbing system.

Fixing Corroded Pipes

You’ll want to catch and fix advanced water pipe corrosion before you need emergency plumbing services in Enoch, UT. If your plumbing system has suffered significant wear and tear, a local plumber may recommend these options. 

Trenchless Pipe Repair

A damaged underground pipe is many homeowners’ nightmare. In conventional pipe repair, the crew digs trenches to access the plumbing line. It’s a messy, time-consuming process that can disrupt your life for a week or more and leave a ruined landscape behind. 

Trenchless pipe repair is a faster and less invasive approach that only requires digging an access hole at each end of the damaged pipeline. Trenchless repair includes two options: lining and bursting.

Pipe lining covers the entire interior of an existing pipe, including any cracks and holes. The liner is a soft, flexible resin that the plumber inserts into the damaged pipeline and then inflates using compressed air. The liner fits precisely against the pipe’s surface. Once it dries and hardens, it creates a watertight seal. Since the liner is thin, any reduction in the pipe diameter is negligible. 

However, in severely damaged pipelines, lining likely won’t be enough. In this case, you may opt for pipe bursting. The plumber will use a bursting head to tear the old pipe apart and instantly replace it with a new line. The downside of pipe bursting is that it leaves pieces of the old line behind.

Pipe Excavation and Replacement

In some situations, your plumber may recommend full excavation and replacement of the damaged pipeline. Traditional excavation-based methods will work better on badly deformed or totally collapsed pipes. Sharp curves or bends, severe tree root infiltration, or other obstacles may likewise be easier to handle via excavation. 

A professional plumber will always start the job with a thorough inspection. They’ll assess the type and amount of damage to your pipes and recommend the best repair method. If excavation is inevitable, the crew will dig trenches to access and remove the old piping and install the new line.

Choosing Pipe Material

If you’re replacing a damaged pipe section, it’s important to choose the right material for your new pipes. This decision will impact your pipes’ longevity and corrosion resistance. You’ll want to hit the right balance between durability, price, and ease of installation.

Galvanized Steel

Galvanized steel is strong, comparatively affordable, and suitable for a wide range of water temperatures. A layer of zinc coating protects these pipes from corrosion. Galvanized steel pipes can last for decades with proper maintenance. However, they will corrode over time once the zinc layer wears off. 

Copper

Copper pipes offer excellent longevity and resistance to corrosion. They’re a solid choice both for heating systems and supply lines. Properly installed and maintained copper pipes may last a lifetime. Copper’s main downside is its hefty price tag. 

PVC 

Polyvinyl chloride (PVC) is a lightweight, affordable material suitable for cold-water supply lines and drainage pipes. PVC is flexible, corrosion- and impact-resistant, and easy to install, which makes it popular with homeowners. However, it can become brittle when exposed to severe cold. PVC pipes may last 25-40 years.

CPVC

Chlorinated polyvinyl chloride (CPVCS) is a lot like PVC, but more resistant to high temperatures and thus better suited for hot water. CPVC pipes have an estimated service life of about 50 years.

PEX

Cross-linked polyethylene (PEX) pipes are versatile, simple to install, and fit for both cold and hot water installations. PEX is corrosion-resistant like PVC but more flexible and resistant to freezing. PEX pipes may last 40-50 years.

ABS

Acrylonitrile butadiene styrene (ABS) is durable, lightweight, and chemical-resistant, which makes it a good option for drainage systems. However, ABS pipes work less well for hot water lines.

Piping Problems in Enoch, UT? Call Iron Mountain Plumbing

Has water pipe corrosion compromised your plumbing? Don’t wait for an emergency. Contact us at Iron Mountain Plumbing to learn about trenchless pipe repair benefits or discuss other options for getting your plumbing system back in shape. Book a service call today. 

Emergency Plumbing Services in Parowan, UT

What Not to Put Down the Drain in Parowan, UT

Maintaining a tidy household or business often feels like a full-time job. For some, it certainly is! Yet, many property owners don’t know what not to put down the drain, which is just as important as sweeping the floors and wiping down countertops. 

Throughout our emergency plumbing services in Parowan, UT, Iron Mountain Plumbing has rescued clients from preventable overflowing drains. We decided to save our readers from the same fate by listing what you can and cannot rinse or flush down your fixtures. Continue reading below to learn whether you’re risking your plumbing system’s health and safety. 

What Not to Put Down the Drain of Your Sink

Let’s start with the sink, particularly the kitchen sink. This drain frequently becomes a catchall for unwanted food scraps and countless other materials. That goes double if you outfitted your sink with a garbage disposal.

However, your kitchen drain and garbage disposal are delicate mechanisms that you must treat with care. You’ll find substances that damage the drain pipes and disposal appliances below. 

Starches

How often have you scraped pieces of leftover pasta or rice into your sink drain? How about soggy bread crusts? Starchy substances like these are big no-nos. They go in the garbage can. 

Pasta, rice, bread, and similar menu items absorb water and expand. Pasta and rice, in particular, can become gelatinous in texture, enabling them to form a snug plug in the drain pipe. That’s the perfect recipe for a sink disaster. 

Gritty or Crunchy Things

Have you ever peeled some boiled eggs only to rinse the eggshells down the drain? Maybe you’ve dumped old coffee grounds into your sink because you ran out of trash bags. Neither substance can dissolve in water, retaining its constitution instead. 

Sure, you might break them down further with your garbage disposal, but they can damage the appliance by becoming wedged in its mechanisms. The ground-up particles can also mix with the starches or grease, making potential clogs even bigger and less water-soluble. 

Grease and Oil

Nothing beats an evening meal complete with freshly cooked meat. Savory chicken, smoky steak, and juicy burgers are favorites in many Parowan households. Unfortunately, grease and oil make terrible bedfellows for sink drains. 

They can solidify inside the pipes, and other debris can stick to the growing plugs or pipe coating. After cooking with oil or grease or making a piece of meat with lots of fat, try this instead:


    • Allow the cookware to cool completely.

    • Scrape the solidified oil or grease into a disposable container, like a paper bag. 

    • Throw the container into the garbage can.

    • Wipe the cookware with a paper towel to remove as much residue as possible. 

    • Use hot water and dish soap to wash any remaining residue off the surface. 

This approach limits the greasy substances that go down your drain. The dish soap can effectively dissolve small amounts of grease, so you shouldn’t have trouble when handwashing.   

Vegetable or Fruit Fibers

Fibrous materials can also form sizable clogs in sinks, especially if they become entangled with other materials. They pose a particular danger to your garbage disposal since the fibers can wrap around the blades and other components and throttle the appliance. 

Citrus fruits, leafy greens, and celery are examples of fibrous fruits and vegetables that can cause damage. Throw peelings and other undesirable parts in the garbage or, better yet, a compost heap. 

What Not to Flush Down the Toilet of Your Parowan Property

Knowing not to flush down the drain of a sink isn’t enough to protect your property’s plumbing in Parowan, Utah. You must also protect your toilet from inappropriate items. Technically, the toilet is also part of your drainage system, so it counts. Let’s examine what to toss in the garbage rather than flush down the commode below. 

Animal Substrates

If you share your home with pets, you likely handle their waste and clean up after them. Cats are common house pets that require their own toilets to stay hygienic and healthy. You likely clean the litter boxes at least every other day. 

Never flush used litter down the toilet even if the label says you can flush it! Litter clumps together. Those clumps form a solid clog that will destroy your drain lines. Pet owners should also stay vigilant about these other examples of what not to put down the drain of a toilet:


    • Aquarium gravel

    • Sand

    • Sawdust

    • Wooden terrarium substrate 

    • Moss 

    • Straw

These substances often line the bottoms of fish or reptile tanks. Some people use them for dog enclosures, too. 

Flushable Wipes

Let’s cut to the chase. Almost any item marketed as flushable probably isn’t, unless it’s toilet paper, and that includes wet wipes. Toss these thick, often fibrous cloths into the garbage can and keep them far away from your toilet. 

Facial Tissues

Yes, even some paper products shouldn’t go down your toilet. Facial tissues are thicker and more durable than toilet paper. They can form wads that expand when wet, and they don’t break down quickly. 

Paper Towels

Like facial tissues, paper towels have a more fortified structure than toilet paper. Fortunately, many paper towels are biodegradable and compostable, especially if you purchase chemical-free options. So, don’t feel guilty about allowing them to take up space in the garbage can. 

Cotton Balls

Cotton balls are highly absorbent and can expand inside your drain pipes. Plus, multiple cotton balls can stick together, forming a big plug in your toilet. You’ll face rising water levels in the porcelain bowl in no time if you don’t throw these seemingly innocuous items in the trash. 

Feminine Hygiene Items

Like wet wipes, manufacturers may tout many feminine hygiene products as flushable. However, this rarely proves true.

Tampons contain cotton that expands and contracts when exposed to dampness. Pads feature plastic and cotton-like materials, too. Plus, they are incredibly thick compared to the average drain pipe. The same goes for diapers, too! 

Never Flush Medicines, Chemicals, or Sticky Substances

Our lesson on what not to put down the drain isn’t quite finished yet. We still need to cover common household products, including:


    • Household cleaners: Many run-of-the-mill cleaning products contain harsh chemicals that kill the beneficial bacterial and plant life in local waterways. 

    • Chemical drain cleaners: Don’t let the name fool you; many drain cleaning products cause pipe damage and destroy natural water sources. 

    • Waxy substances: Melted wax always goes in the garbage. It’s like grease plugs but more stubborn and destructive. 

    • Paint: Some paints coat the drain’s interior, while others do the same with the added touch of disrupting our local ecosystems. 

    • Home improvement chemicals: Paint thinners, bleach, ammonia, and other concoctions used for home improvement projects wreak havoc on your plumbing and neighboring creatures. 

    • Prescription and over-the-counter medications: Although most medications can dissolve in water, they release their formulas into our waterways, causing friends and family to consume substances they want to avoid.

You shouldn’t rinse or flush the above-listed items down the sink or toilet drain. Many municipalities have facilities or programs for safely disposing of these substances. 

How to Care for the Drains in Your Home or Business

So, what can you rinse down your drains in Parowan, Utah? And how can you take better care of your plumbing system starting now? We’re so glad you asked. 

Clog prevention begins with consistently cleaning your drains. Our plumbers recommend stashing the following products in your bathrooms and kitchen:


    • Make boiling water and dish soap your monthly go-to. Pour a pot of boiling water down each drain to loosen debris. Squeeze one to two cups of your preferred dish soap and allow it to sit for half an hour. Then, chase the soap with one more pot of boiling water.  

    • White vinegar and baking soda are a powerful duo. If you have an active clog, pour a pot of boiling water down the drain followed by a cup of baking soda and a cup of vinegar. The pressure blasts debris free. 

    • Replace harsh drain cleaning products with an enzymatic drain cleaner. You should still use this sparingly, but it should help when vinegar and baking soda don’t cut it. 

    • A drain snake is incredibly user-friendly. It’s your best bet for removing hair from bathroom sinks, showers, and tubs. The hooks snag the strands, enabling you to pull them out. 

    • You can purchase plungers for sinks and toilets. Cover the drain opening with the rubber cup and apply intense pressure to loosen the clog. The water should begin draining once you’ve successfully plunged the fixture. 

You should also cover your tub, shower, and sink drains with drain traps during use. These metal traps collect debris before it flows down your drains, limiting potential blockages. 

Iron Mountain Plumbing Has Your Back with Drain Cleaning Services in Parowan, Utah

Now that you know what not to put down the drain, read through these clogged drain signs to learn when to act against plumbing blockages. Iron Mountain Plumbing offers drain cleaning services in Parowan, Utah, when your at-home methods fail. 

Leaking garbage disposal being wiped with a cloth

How to Tell If Your Garbage Disposal Is Broken and Needs Repair in St. George, Utah.

Sending food scraps down your sink drain may be second nature when you have a garbage disposal to pulverize them. This may not always be possible if your garbage disposal malfunctions. Find out how to tell if a garbage disposal is broken in this guide from Iron Mountain Plumbing. 

We’re the right team for the job when you need a trusted plumber in St. George, Utah, for garbage disposal repairs, installation, and more. Learn why these fixtures break down, the common signs that yours needs repair, and how you can keep your unit in good condition. 

Why Garbage Disposals Quit Working

Your garbage disposal might need some troubleshooting or repairs for several reasons. These plumbing fixtures can break down due to the following issues:

  • Power surges: Garbage disposals have electrical components that can overload if you’re not cautious. This can trip the circuit breaker that powers the appliance and leave you without a reliable power source. 
  • Water leaks: Even a minor crack or hole in your disposal can cause water to leak and affect the equipment’s function.
  • Excess strain: Filling the disposal with large amounts of material can be too much for it to handle and force you to schedule repairs. 
  • Blade misalignment or damage: Be mindful of the items you send down the sink as some tough food scraps like bones or eggshells can damage the blades. 

Once you know how to tell if the garbage disposal is broken, you can typically trace the issue back to one of these causes. Plumbers in St. George primarily tackle garbage disposal repair services that center around these problems. 

Six Signs You Need Garbage Disposal Repair in St. George, Utah

Continuing to use a malfunctioning garbage disposal can eventually lead to a total system failure. It’s crucial to recognize the signs that your unit needs repair and act quickly. Below are the most common signs that you need to have a plumber inspect and repair your garbage disposal. 

1. The Disposal Makes Strange Noises

Running your garbage disposal will emit a distinct sound of the blades running as they pulverize food scraps. However, you shouldn’t hear any abnormal sounds, such as:

  • Scraping sounds: This could be due to a metal utensil that accidentally ended up inside the disposal or indicates misaligned blades that scrape together. 
  • Humming sounds: A slight hum when you try to operate the disposal could represent jammed blades or insufficient power. 
  • Clanging noises: Your disposal might be trying to grind down tough food scraps that don’t belong there. 

Ask an expert how to tell if your garbage disposal is broken, and they’ll tell you that these unusual noises spell trouble for any homeowner. 

2. Your Unit Frequently Clogs

Garbage disposals are prone to clogging if you stuff too much material inside of them at once. However, if your system clogs despite running small loads, it could be due to a larger problem. Once an expert rules out a jam with the blades, they can examine other mechanical issues. 

It’s possible that your unit is unable to handle even small loads. Rather than repairing it every time it clogs, it could be in your best interest to upgrade to a larger, more powerful disposal. 

3. You Smell Foul Odors

You can regularly clean your garbage disposal by sending citrus fruits inside of it. This not only supports the blades but also leaves your drain with a fresh scent. If frequent cleaning doesn’t eliminate odors coming from your sink drain, the disposal could have some trapped food particles you need to flush out. 

Always let a plumber inspect the disposal if you want to get rid of persistent odors. DIY measures like chemical cleaners can create more damage to your plumbing system and only mask the odors. 

Stop using the disposal and call a professional right away if you notice a burnt smell wafting from the disposal’s outlet. Faulty electrical components can spark a fire and shouldn’t be ignored.

4. The Disposal Is Leaking Water

If you aren’t sure how to tell if a garbage disposal is broken, take a quick look beneath your sink. Any traces of water leaking from the unit are a telltale sign that you need to schedule a repair service. Leaks can occur for several reasons, including:

  • Damaged flanges
  • Worn-out gaskets
  • Broken seals
  • Cracks within the equipment

Don’t hesitate to call a trusted plumber serving St. George. Ignoring this issue not only makes the garbage disposal less effective but leaves you dealing with water damage in your kitchen. 

5. It Takes a While To Break Down Food

Modern garbage disposals usually only need to run for a few seconds to grind existing food scraps and send all wastewater down the drain. Is your unit taking a while to complete the job? Long lag times usually indicate problems with your blades. 

Plumbers will likely have to sharpen the blades or possibly replace them. Once you address the issue with your blades, the system should work properly and send all waste down your drain within seconds. 

6. You Must Reset the Disposal Frequently

The reset button located on your garbage disposal is a great way to help your system overcome clogs or power issues. Use this option when necessary, but bear in mind that frequently resetting your disposal is cause for concern. Have a qualified plumber inspect the system to identify issues that require frequent resets. 

Troubleshooting Faulty Garbage Disposal Systems

Knowing how to tell if a garbage disposal is broken allows you to act quickly and restore its function. Before you contact a plumber, you can try some basic troubleshooting tips to improve your disposal. 

If the unit won’t turn on, head to your home’s circuit breaker box. A power surge could trip the breaker, powering your garbage disposal and preventing it from operating. Switch a tripped breaker back on and monitor the disposal’s performance to see if the problem persists. 

You can try cleaning disposals that have gotten clogged or have foul odors. Natural solutions like baking soda, vinegar, and hot water will help disintegrate clogged food particles and freshen up the sink drain. You can also run the disposal with slices of lemons, limes, or other citrus fruits to combat odors.

How St. George Plumbers Fix Faulty Garbage Disposals

If you experience any of the problems listed above, you should contact a qualified plumber who specializes in garbage disposal repairs. Their service will depend on the exact issue affecting your unit, but repairs may include:

  • Tightening loose blades
  • Sharpening dull blades or replacing faulty ones
  • Patching leaks 
  • Replacing broken seals
  • Removing food particles that clog the drain
  • Checking all electrical components

Most repair services are fairly quick so you can continue using the disposal after a short disruption. In some cases, you might need to replace the equipment. Experts typically recommend replacing the unit if it has large cracks, irreparable damage, or if it’s not powerful enough to handle your normal loads. 

Garbage Disposal Maintenance Tips

It’s important to not only know how to tell if the garbage disposal is broken but also how to maintain it. You can keep your system working properly with the following tips. 

1. Use Smaller Loads

Don’t wait until your garbage disposal fills up to run it. Stuffing the disposal with large loads of scraps increases the chance of clogs and can create unwanted odors. Run the disposal more frequently with smaller loads. 

2. Keep Certain Items Out of the Disposal

You’re bound to have problems with your garbage disposal if you aren’t mindful about what you’re putting in there. These systems are safe for many food scraps but keep the following items out of them:

  • Eggshells
  • Coffee grounds
  • Animal bones
  • Tough, stringy produce like celery or corn husks
  • Starchy foods like pasta, rice, or potatoes
  • Cooking grease, fats, and oils

In addition, take steps to prevent utensils or sponges from ending up inside the disposal. Consider putting a mesh strainer over the sink drain to collect larger items and keep them from entering your garbage disposal. 

3. Clean the Disposal Regularly

One of the best ways you can maintain your garbage disposal is by cleaning it frequently. You’ll eliminate lingering odors as well as clear any clogs within the drain pipe by cleaning the disposal. This can be as simple as pouring equal parts baking soda and vinegar into the drain.

You can also put some ice cubes into the disposal and let it run. The ice helps strengthen the blades so they can cut through food scraps. 

Book Unbeatable Kitchen Plumbing Services in St. George, Utah, Including Garbage Disposal Repairs

Now that you know how to tell if a garbage disposal is broken, don’t delay finding the best plumbers in St. George and scheduling a repair service. Iron Mountain Plumbing is your go-to source for garbage disposal repairs and other kitchen plumbing solutions. We understand the complexities of these fixtures and can get yours working again quickly. 

Contact Iron Mountain Plumbing today to request immediate service. 

Modern bathroom with glass shower and wooden vanity

Can You DIY a Bathroom Remodel in Santa Clara, UT?

Eventually, it happens to all of us. You walk into your bathroom and wonder when the faucet started rusting and why the paint on your walls no longer looks like the colors you chose. With regular wear and tear from daily use and many features becoming outdated, it probably leads you to wonder, “Can I DIY a bathroom remodel?”

At Iron Mountain Plumbing, our #1 team offers bathroom remodel services in Santa Clara, UT, and surrounding areas. So, we know a thing or two about what you can update in one of the most relaxing rooms in your home. Below, we’ll explain why a remodel is necessary, what you can do with little to no renovating and plumbing skills, and when to call on the professionals. 

Why Is a Bathroom Remodel a Good Idea?

Did you know that in a nation where the average home value is $281,900, the houses in Santa Clara have a higher price point of $465,600? That means our city has an expensive housing market, where homes like yours are in high demand. Still, in order to keep your property value, you need well-designed rooms with updated appliances and fixtures, especially if you’re planning on selling.

Even if you’re claiming your current house as your forever home, you can still renovate it for your benefit. For instance, adding cabinets and islands in a larger bathroom fills holes in your floor plan while removing unnecessary clutter from your eyesight. Renovations also help with the following, which leads many to wonder, “Can I DIY a bathroom remodel?”

  • Solves current bathroom issues like fungal growth and plumbing problems
  • Increases functionality 
  • Enhances energy efficiency with updated Santa Clara fixtures

The First Step in Renovating Your Santa Clara Bathroom 

It can be easy to tell when a room in your home needs renovating, but one of the biggest concerns that plague residents is where to start. That’s why gathering inspiration from showrooms, magazine layouts, Pinterest, or other sources is ideal. It helps you better understand what you do (or better yet, don’t) want in your home and decide on the following.

Choosing Color Schemes 

From there, you can decide on details like color scheme. For instance, if you want a modern and sophisticated look, neutral colors like off-white and beige go well with soft pastel pinks, blues, and greens. However, if you’re up for something more trendy when considering, “Can I DIY a bathroom remodel?” deeper Hunter Green or Navy Blue accent hues sit beautifully over a white background. 

Determining the Right Water Fixtures 

After choosing your palette, decide if you want to stick with traditional white fixtures or segue into more vibrant colors that suit your Santa Clara color scheme. However, colors are far from the only thing you should think about when considering new fixtures. For instance, do you need a new sink, showerhead, or toilet? If so, are you repurchasing items similar to what you already have or trying something new? 

You may have a shower now but want a two-in-one shower and bath that allows you to have more spa nights. On the other hand, trading your existing bath for a standing shower might free up a lot of much-needed space. You can also opt for energy-efficient systems that use less water so that you have a smaller footprint and save on your monthly bills. 

Planning Your Layout

Now, you know the answer to “Can I DIY a bathroom remodel?” is a resounding yes, and you have your Santa Clara bathroom colors and fixtures in mind. The next question is, where is it all going to go? 

First, determine where all your plumbing pipes and bathroom wiring run so you don’t accidentally disturb them during your renovation. From there, decide where you want your cabinets, counters, storage shelves, and fixtures to go. 

The right layout is crucial to functionality and safety since everything needs to be properly spaced apart with distinct zones to avoid clutter and accidents. Those zones include separate toilet and shower areas alongside a sink and vanity space. Not only does that allow you to conduct activities, but it also makes cleaning your Santa Clara bathroom a breeze. 

The Process of Your Santa Clara Bathroom Remodel from Start to Finish 

After asking yourself, “Can I DIY a bathroom remodel?” it’s time to start wondering how to get started. If you’re doing a partial or full bathroom renovation, remove what you don’t need. That includes everything from the fixtures and appliances to the drywall when gutting. 

Out with the Old: Disposing of Items While Gutting 

Begin by turning off your water main and draining your toilet if you plan to remove it. Then, with the toilet out of the way, remove the tub and start uprooting the bath tiles on the walls, revealing the studs. That way, you can uninstall the plumbing pipes and prepare for new piping that accompanies your modern Santa Clara fixtures. 

If you have any insulation within these walls, wear gloves, masks, and safety goggles since the fibers can irritate and inflame the skin. Also, to ensure you’re not releasing particles into the air, cut out the panels with a reciprocating saw rather than tear into the walls with a hammer. Then you can rip out things left on remaining walls, such as cabinets, mirrors, and baseboards, alongside flooring and lighting fixtures. 

In with the New: Installing Updated Showers or Tubs

So, how can I DIY a bathroom remodel, starting with the tub? After you pull your new tub out of its box container, fully rest the leveling pad, which is on the outer base of the tub, on the subfloor. Once it’s flush and level, it should fit snugly. 

Use a pencil to mark lines along the studs before removing the tub once more. Add a stringer along this line to help support the tub. Then, you can install the overflow drain assembly and connect the drain before permanently reinstalling the tub or shower in your Santa Clara home. 

Finish Up the Walls 

It’s best to work from top to bottom when reconstructing so that you don’t damage your new flooring, so start by reinstalling new drywall. After measuring and cutting them to fit your walls, carefully nail the boards up one at a time. You can also go in and close all gaps and holes with drywall tape or mud. 

However, for walls in the shower or tub area, consider sturdier cement boards instead of drywall. Coat them with a waterproofing membrane like Redgard to further prolong their lifespan. However, you may be wondering, “How can I DIY a bathroom remodel without wall painting?” 

Luckily, this is your chance to add that once you lay down a primer that suits your paint type. Add two layers of paint with colors from your chosen color scheme. Otherwise, opt for tile or wallpaper finishes. 

Put Down Your New Flooring

Tile flooring is the most common type of bathroom flooring material, especially in Santa Clara homes. So, after you’ve chosen your tile and prepared the subfloor, measure the area to ensure you have enough tiles. You can also draw a layout on the subfloor and perform tile cutting to finish small or irregular areas. 

Then, prepare the mortar before laying and grouting tiles in sections. Opt for laminate or vinyl flooring if you need more cost-effective solutions. If you want, you can also install your new toilet now, although many prefer to install this last to prevent chipping while working around it. 

Add Sinks and Cabinets 

Here’s the part where you finish installing your water fixtures and their accompaniments. Starting with a vanity installation, caulk around the bottom lip of the underside of your sink basin and carefully fit it into the countertop. Use connective clips to hold it in place if necessary while you install a faucet and flange. 

Once you attach the tailpipe to the P-trap and connect your Santa Clara water supply, you can caulk the connections and turn on the water within 24 hours. But “How can I DIY a bathroom remodel without adding other fixtures?” From here, install the mirror and cabinets and add any trim around the tub or shower area you deem fit. 

Trust Iron Mountain PlumbingA Santa Clara Team with a Solid Foundation!

These above steps are easy enough for the average homeowner to conduct with little understanding of plumbing and general renovations. However, other tasks are better left to the professionals. That includes dangerous electrical wiring, tricky waterproofing, and massive structural changes (like adding or removing walls).

Our five-star team comprises licensed and insured contractors who are not only experienced in difficult tasks like these but also conduct them with optimal customer satisfaction in mind. Our team also builds trust, reliability, and integrity as strong as iron and steadfast as a mountain. 

So, when you need help finding the best plumbers in Santa Clara, UT, and the surrounding areas, look no further than Iron Mountain Plumbing. We’ll answer, “Can I DIY a bathroom remodel?” and more when you contact us today!

Iron Mountain Plumbing van parked in front of a house

Ensuring Your Business Meets Plumbing Code Requirements

When running a business, ensuring compliance with plumbing code requirements isn’t just about avoiding fines; it’s about safeguarding your reputation and safety. You need to be familiar with national and local codes, like the UPC and IPC, which dictate everything from pipe sizing to fixture placement. Regular inspections and maintenance play a vital role in preventing violations. But how do you stay ahead of changes in these codes, and what are the key areas that often trip up even the most diligent business owners? There’s more to uncover when keeping your plumbing in line.

Understanding Plumbing Codes

Guiding plumbing codes requires a thorough understanding of the regulations that govern the installation and maintenance of plumbing systems in commercial settings. You must familiarize yourself with national and local plumbing codes, as these dictate how your business must handle water supply, waste management, and sanitation. Start by examining documents like the Uniform Plumbing Code (UPC) or the International Plumbing Code (IPC), which provide a framework for guaranteeing safety, efficiency, and environmental compliance.

When approaching plumbing codes, pay attention to pipe sizing, water pressure, fixture installation, and backflow prevention. Each element is essential to maintaining a system that not only meets legal standards but also effectively serves your clients. You’ll want to review and update your knowledge regularly because codes can change, reflecting new technologies and environmental considerations.

Consulting with certified plumbing professionals or attending industry seminars can enhance your understanding. They can offer insights into best practices and common pitfalls to avoid. Remember, being detail-oriented helps guarantee that your plumbing systems support the health and safety of everyone relying on them. By mastering these codes, you’re not just following rules but safeguarding your community’s well-being.

Importance of Compliance

Ensuring compliance with plumbing codes is essential for maintaining legal standards and preventing costly fines or operational disruptions in your business. Adhering to these regulations safeguards your operations and guarantees a safe and reliable environment for your clients and staff. Understanding the importance of compliance can be broken down into several critical components:

  1. Legal Obligations: Meeting plumbing codes is a legal requirement. Non-compliance could result in significant fines, legal actions, or forced shutdowns, which could impact your ability to serve others effectively.
  2. Safety: Proper compliance guarantees the health and safety of everyone on your premises. Codes are designed to prevent contamination, leaks, and water damage, which could pose serious risks to health and property.
  3. Reputation Management: A compliant plumbing system reflects your commitment to professionalism and reliability. Clients and employees trust businesses that prioritize safety and legal integrity.
  4. Financial Protection: Investing in compliance can save you from future liabilities and repair costs. Avoiding code violations helps you maintain operational continuity and financial stability. 

Prioritizing these areas underscores your dedication to serving others responsibly and guaranteeing that your business operates smoothly and within the law. 

Key Areas of Focus

To effectively maintain compliance, focus on essential areas such as water supply systems, drainage and venting, backflow prevention, and fixture installation standards. Confirming your water supply system adheres to local codes involves verifying proper pipe sizes and materials to facilitate efficient water flow and prevent contamination. For drainage and venting, confirm pipes are correctly sloped and sized to remove wastewater efficiently while preventing sewer gases from entering the building.

Incorporate backflow prevention devices to protect the potable water supply from contamination due to reverse flow. Regularly test and maintain these devices to confirm they function correctly, thereby safeguarding public health. Follow precise installation standards for fixtures, confirming that sinks, toilets, and other plumbing fixtures meet the required heights, clearances, and accessibility standards specified by the codes.

Document all installations and inspections meticulously, keeping records demonstrating compliance with plumbing codes. Engage with professional plumbers who understand local regulations and can offer expert guidance. By focusing on these critical areas, you adhere to legal requirements and enhance the safety and functionality of your business’s plumbing system, ultimately serving your clientele more effectively.

Water Supply Standards

When addressing water supply standards, ensure your business complies with local regulations by using approved materials and correct pipe sizing to secure efficient and safe water delivery. Confirming proper compliance is not just about meeting legal requirements; it’s about serving your community effectively. Begin by evaluating the following significant areas:

  1. Material Selection: Choose corrosion-resistant materials approved for potable water. This will guarantee the longevity and safety of your water supply system.
  2. Pipe Sizing: Accurate pipe sizing is essential for maintaining adequate water pressure and flow rates. Oversized pipes waste resources, while undersized ones can lead to insufficient water delivery.
  3. Backflow Prevention: Install backflow prevention devices to protect the water supply from contamination. This is crucial in preventing potential health hazards to those you serve.
  4. Pressure Regulation: Use pressure regulators to maintain water pressure throughout your system. This prevents damage to plumbing fixtures and guarantees user safety.

Adhering to these standards fulfills regulatory obligations and demonstrates a commitment to quality service and community well-being. By prioritizing these elements, you invest in a plumbing system that supports your business and protects those you serve.

Drainage System Guidelines

Proper drainage system design is vital for maintaining hygienic conditions and preventing structural damage in your business premises. To comply with plumbing codes, guarantee that your drainage system efficiently removes wastewater and prevents backflow, which can contaminate clean water sources. You must install appropriately sized pipes to handle peak flow rates, preventing blockages and overflow. Slope your drainage pipes correctlytypically a quarter-inch per footto facilitate gravity-based flow.

Regulatory codes often require venting to equalize pressure and prevent siphoning of water seals in traps. Ensure you include vent pipes in your design, connecting them to the drainage lines. Using cleanouts at strategic points will make maintenance easier, allowing you to clear blockages without major disruption.

Materials matter; choose those that are durable and compatible with the waste your business generates. For example, corrosive waste may require specialized piping. Regular inspections and adherence to local plumbing codes are essential to guarantee compliance and system longevity. 

Fixture Installation Rules

Guaranteeing your business remains compliant with plumbing codes requires installing fixtures that meet specific standards for safety, efficiency, and accessibility. To serve your clients effectively, you must adhere to these fixture installation rules:

  1. Fixture Spacing: Verify proper spacing between fixtures. Codes often specify minimum distances to maintain accessibility and comfort. For example, the distance between a toilet and a sink should provide ample space for maneuvering, especially for those with mobility challenges.
  2. Water Conservation: Choose fixtures that optimize water use. High-efficiency toilets and faucets can greatly reduce water consumption, aligning with environmental regulations and demonstrating a commitment to sustainability.
  3. Backflow Prevention: Install backflow prevention devices to protect the water supply from contamination. These devices guarantee that waste or other contaminants don’t flow back into clean water lines, safeguarding public health.
  4. Material Compliance: Use approved materials that meet local and national standards. Non-compliant materials can lead to failures and costly penalties, so verifying that all pipes, valves, and fixtures meet the required specifications is essential. 

Common Plumbing Violations

In many businesses, common plumbing violations include inadequate fixture spacing, improper backflow prevention, and the use of non-compliant materials, which can lead to regulatory penalties and operational disruptions. To serve your clients effectively and guarantee smooth operations, it’s critical to understand these violations. Inadequate fixture spacing can violate code requirements, making maintenance and repair difficult and potentially posing health risks. Fixtures need proper spacing to allow for accessibility and compliance with ADA regulations.

Improper backflow prevention is another prevalent issue. Backflow can contaminate potable water sources, posing significant health risks to employees and clients. Ascertain your business installs appropriate backflow prevention devices and regularly maintains them to meet health codes and prevent costly penalties.

Using non-compliant materials is a common oversight leading to significant regulatory issues. Materials must meet local and national plumbing codes to promote safety and functionality. Using materials not certified for plumbing applications can compromise system integrity and lead to failures.

Regular inspections and a thorough understanding of local plumbing codes are essential in avoiding these violations. By addressing these issues proactively, you’ll guarantee your business remains compliant and continues to serve your community effectively. 

Hiring Qualified Professionals

Securing compliance with plumbing codes requires engaging professionals with the technical expertise and certifications necessary to address potential violations proactively. When running a business, it’s essential to ensure that your plumbing systems are up to code to prevent costly fines, protect your clientele, and maintain your business’s reputation. Here’s how you can hire qualified professionals effectively:

  1. Verify Licenses and Certifications: Confirm that the professional holds valid licenses and certifications specific to your state or locality. These credentials demonstrate their understanding of current plumbing codes and regulations.
  2. Evaluate Experience: Consider professionals with a proven track record in commercial plumbing. Experience in handling diverse and complex systems is imperative for anticipating issues before they arise.
  3. Check References and Reviews: Speak with past clients and read reviews to gauge the professional’s reliability, quality of work, and adherence to code requirements. This step is essential for securing peace of mind.
  4. Request Detailed Proposals: Obtain proposals that outline the scope of work, timelines, and how they plan to guarantee code compliance. This transparency helps you understand their approach and commitment to regulatory standards. 

Inspection and Maintenance

Regular inspections and maintenance of plumbing systems are vital for identifying potential code violations and preventing costly disruptions to your business operations. By scheduling routine checks, you guarantee compliance with local and national plumbing standards, safeguarding your business from legal penalties. Inspections help you detect leaks, corrosion, or blockages early, allowing for prompt repairs and minimizing water waste, which reflects your commitment to sustainability.

During inspections, focus on important components like backflow prevention devices, water heaters, and drainage systems. Verify each element functions effectively and adheres to code specifications. For instance, confirm backflow preventers are tested annually to protect potable water supplies. Maintaining detailed records of inspections and maintenance activities is significant, as they provide documentation of compliance efforts and simplify audits by regulatory bodies.

Perform regular maintenance tasks such as cleaning aerators, checking for leaks, and inspecting valve functionality. These actions extend the lifespan of plumbing systems and enhance efficiency and safety. Encourage your team to report any irregularities immediately, fostering a proactive approach to plumbing care. By prioritizing inspection and maintenance, you uphold high service standards, reflecting your dedication to serving others responsibly. 

Staying Updated on Changes

To guarantee compliance with evolving plumbing codes, you must actively monitor updates from local and national regulatory agencies. Staying informed guarantees you serve your clients effectively and maintain legal standards. Here’s how you can do it:

  1. Subscribe to Updates: Register for newsletters from bodies like the International Code Council (ICC) or your local plumbing board. These updates will provide the latest code changes and interpretations.
  2. Attend Workshops and Seminars: Participate in industry workshops or seminars. These events often cover new regulations and offer a platform for discussing practical implications with peers and experts.
  3. Consult with Professionals: Work with a licensed plumbing consultant specializing in code compliance. They can provide insights into complex changes and how they affect your specific operations.
  4. Regularly Review Code Publications: Keep the latest editions of the plumbing code manuals at hand. Regular review helps you understand nuances and align your practices accordingly. 

Conclusion

By ensuring your business complies with plumbing codes, you’re not just ticking boxes but safeguarding your operation and building trust. Remember, “an ounce of prevention is worth a pound of cure.” Regular inspections, attention to key areas like water supply and drainage, and hiring qualified professionals can prevent costly violations. Stay proactive by keeping current with code changes. This diligence protects you legally and enhances your reputation as a detail-oriented, reliable business.

Frequently Asked Questions

What Are the Consequences of Ignoring Plumbing Code Updates?
Ignoring plumbing code updates can lead to costly fines, legal liabilities, and potential harm to those you serve. You risk compromising safety, efficiency, and environmental compliance, ultimately affecting your business’s reputation and customer trust. Stay informed.
How Can Technology Assist in Maintaining Plumbing Code Compliance?
You can use technology like compliance software and IoT sensors to track plumbing code updates, automate inspections, and monitor system performance. This guarantees you’re always aligned with regulations, minimizing risks and maintaining service standards efficiently.
Are There Any Financial Incentives for Adhering to Plumbing Codes?
Complying with plumbing codes may result in tax credits, grants, or reduced insurance premiums. Financial incentives vary by region, so check local regulations. This not only saves money but also guarantees community safety and well-being.
How Do Plumbing Codes Differ Between Commercial and Residential Properties?
You’ll notice commercial plumbing codes demand higher capacity systems, stricter safety standards, and more frequent inspections than residential codes. These codes guarantee that your business effectively supports public health and safety and meets the community’s needs.
What Resources Are Available for DIY Plumbing Code Education?
Did you know 70% of DIY plumbers overlook code requirements? Explore resources like online courses, local workshops, and municipal websites. Immerse yourself in detailed guides and technical manuals to ensure your work meets regulatory standards and effectively serves others.

Plumbing tools and parts on a blueprint

Essential Regular Plumbing Maintenance Checklist

You’re probably aware of how essential regular plumbing maintenance is, but have you considered what your checklist should include? From checking for leaks in visible pipes to ensuring your water heater is rust-free, each task is critical in keeping your system efficient and long-lasting. But what about those less obvious tasks you might be missing? With so many components to take into account, it can be overwhelming. Discover a structured approach that could prevent costly repairs and unexpected issues before they arise. What’s the next step in securing your home’s plumbing health?

Check for Leaks

Begin by inspecting all visible pipes, fittings, and fixtures for any signs of water leakage, such as damp spots, corrosion, or pooling water. Pay close attention to areas under sinks, around toilets, and beneath any exposed piping. Use a flashlight to guarantee you don’t miss any hidden areas. Leaks can manifest as small drips or minor discoloration, so thoroughness is vital.

Next, check the joints and connections of the pipes. Confirm they’re secure and free of moisture. Sometimes, leaks can be subtle, causing only a slight dampness. Run your fingers along the joints to detect any moisture. If you feel any dampness, tighten the fittings or consider applying a plumber’s tape for a temporary fix.

Also, examine the condition of seals and caulking around your plumbing fixtures. Over time, these can degrade, leading to water seepage. If you notice any cracks or gaps, reapply the sealant to prevent future leaks. 

Inspect Water Heater

Once you’ve ensured all other areas are leak-free, inspect your water heater for any signs of corrosion, unusual noises, or temperature inconsistencies. Begin by visually examining the heater’s exterior. Look for rust or corrosion, particularly around the connections and valves. Corrosion can indicate a potential leak or impending failure. Listen for odd sounds like popping or rumbling, which may suggest sediment buildup.

Check the thermostat’s temperature setting; it should ideally be around 120 degrees Fahrenheit. A higher setting can pose a scalding risk or reduce the heater’s efficiency. If you notice fluctuations in water temperature during use, it might be time to assess the thermostat or heating elements.

Here’s a quick checklist:

  • Inspect for Corrosion: Examine the tank and connections for rust.
  • Listen for Noises: Unusual sounds can indicate sediment or mechanical issues.
  • Verify Temperature Setting: Confirm it’s set to a safe and efficient level.
  • Check Pressure Relief Valve: Lift the valve’s lever to confirm it’s functioning. 

Regular checks confirm your water heater operates efficiently, prolonging its lifespan and maintaining consistent service. By keeping it in top condition, you’re confirming comfort and serving the needs of those relying on you.

Test Sump Pump

After confirming your water heater functions ideally, it’s time to test the sump pump to prevent basement flooding and maintain dry conditions. Begin by locating the sump pump in your basement or crawl space. You’ll need a bucket filled with water for the test. Carefully pour the water into the sump pit until the float rises, triggering the pump. Listen attentively for the sound of the pump activating. It should start pumping water out of the pit immediately.

Observe the discharge line outside your home to confirm the water is expelled efficiently and away from your foundation. If the pump doesn’t engage, check the power source and reset the circuit if necessary. Inspect the float switch and confirm it’s not obstructed or tangled, as this can prevent operation. Regular sump pump testing confirms it’s ready for heavy rains or melting snow, safeguarding your home from potential water damage.

Remember to check the battery backup system to see if one is installed. This backup system provides peace of mind during power outages, confirming continuous protection. By maintaining your sump pump, you’re protecting your home and serving your family and community by preventing unnecessary water damage. 

Clean Drain Pipes

To maintain ideal water flow and prevent clogs, regularly clean your drain pipes using a mixture of baking soda and vinegar. This natural solution helps dislodge build-up and keeps your plumbing running smoothly. Start by pouring half a cup of baking soda down the drain, followed by equal vinegar. Allow the mixture to fizz and work its magic for about 15 minutes. Then, flush the drain with hot water to clear away loosened debris.

When cleaning drain pipes, it is crucial to be methodical:

  • Frequency: Perform this cleaning routine monthly to guarantee optimal drainage and avoid the accumulation of grease, hair, and soap scum.
  • Safety: Wear gloves to protect your hands from any residue that might come into contact with your skin.
  • Tools: If you encounter stubborn clogs that the baking soda and vinegar cannot dissolve, use a drain snake or wire hanger.
  • Prevention: Install a drain strainer to catch larger particles before they enter the pipes, reducing the likelihood of future clogs.

Examine Water Pressure

Evaluating your home’s water pressure is essential to confirm your plumbing system operates efficiently and prevents potential damage to pipes and appliances. High water pressure can cause leaks, wear out fixtures, and increase water bills, while low pressure may indicate blockages or pipe corrosion. To measure your water pressure, use a pressure gauge, which you can attach to an outdoor faucet or hose bib. First, verify all water outlets in your home are off. Then, screw the gauge onto the faucet, turn it on fully, and read the measurement. Ideal residential water pressure ranges between 40 to 60 psi.

If your reading falls outside this range, consider taking corrective actions. Installing a pressure-reducing valve (PRV) can protect your plumbing system from high pressure. Check for clogged aerators or partially closed shut-off valves if the pressure is low. Examine your pressure regulator if equipped, as it might need adjustment or replacement. Regularly monitoring your water pressure extends the life of your plumbing system and confirms a reliable water supply for daily tasks, allowing you to serve others more effectively by maintaining a comfortable and efficient home environment. 

Inspect Toilet Components

Begin by removing the tank lid to examine each toilet component for wear or damage, verifying everything functions correctly to prevent leaks and inefficiencies. First, check the flapper valve, as it’s essential for a proper seal. If it’s warped or cracked, it needs replacing to avoid water wastage. Next, inspect the fill valve and float; they regulate the water level in the tank. Confirm they move freely and are adjusted to the correct height for peak performance.

Look for corrosion or mineral buildup within the tank. These can lead to malfunction or damage over time. Clean the components with a gentle brush to remove any deposits. Pay attention to the flush handle and chain, too. Confirm the chain has the right slack; excessive slack may prevent a complete flush, while too little might keep the flapper open.

Here’s a quick checklist for inspecting toilet components:

  • Flapper Valve: Look for cracks or deformation.
  • Fill Valve and Float: Check operation and height.
  • Corrosion or Mineral Buildup: Clean as needed.
  • Flush Handle and Chain: Adjust chain slack, confirming proper flush.

Check Faucet Functionality

When evaluating faucet functionality, confirm that water flows smoothly and the handles operate without resistance or leaks. Begin by turning the faucet on and off to check for ease of motion. Listen carefully for unusual sounds, such as squeaking or grinding, which might indicate worn-out components. Examine the faucet’s aerator for buildup that can affect water flow; unscrew it and clean any debris using a small brush or vinegar solution to guarantee peak performance.

Inspect the faucet’s base and spout for any signs of leaks or corrosion, which could lead to water damage or inefficiency. If you notice any drips, tighten fittings or replace washers and O-rings as needed. Pay attention to the temperature mixture; if the water isn’t reaching the desired temperatures, the issue might lie within the faucet’s cartridge or valve, which might require replacement.

Consider the faucet’s age and material. Older or inferior models might need more frequent maintenance or replacement. Always use high-quality components to extend the life of your faucets. Maintaining your faucets effectively confirms a reliable water supply, enhances your household’s efficiency, and promotes sustainability. 

Inspect Sewer Lines

While ensuring faucets function smoothly, inspecting sewer lines to prevent blockages and costly repairs is equally important. By maintaining sewer lines, you’re safeguarding your home and serving others by preventing potential neighborhood disruptions. A practical approach involves a thorough evaluation to catch issues early. Here’s a technical checklist to guide you:

  • Check for Slow Drains: If water is draining slowly, it might indicate a developing clog. Pay attention to all drains, including sinks, bathtubs, and toilets.
  • Listen for Unusual Sounds: Gurgling sounds in pipes can signal air trapped due to a blockage. These noises often precede more severe issues.
  • Look for Unpleasant Odors: Foul smells from drains suggest waste isn’t moving efficiently through the sewer system, pointing to a possible obstruction.
  • Inspect Cleanout Points: Regularly examine sewer cleanout points outside your home. They should be free from debris and easily accessible for emergencies. 

Examine Outdoor Plumbing

To guarantee your outdoor plumbing systems are operating at their best, meticulously inspect hoses, faucets, and sprinkler systems for leaks, corrosion, and damage. Begin by examining all hoses for cracks or brittleness, which could lead to water wastage and inefficient operation. Replace any compromised hoses immediately to prevent further damage. Check faucet handles and spouts for leaks; a simple test is to turn on the faucet and observe any water escaping from unintended areas.

Next, scrutinize your sprinkler system. Confirm that each sprinkler head is free from obstructions and functioning correctly. Misaligned or clogged heads can waste water and reduce coverage, harming plant health. Adjust or clean them as needed. Inspect the sprinkler control valves and system pressure, confirming these components operate smoothly and without leaks.

Don’t overlook the outdoor drains and gutters. Clear any debris blocking the flow, as clogged drains can lead to pooling water that damages your property. Check drainage slopes to confirm water flows away from structures, preventing damage to foundations and landscaping. 

Review Water Bill for Anomalies

Carefully analyze your water bill for unexpected spikes, as they can indicate hidden leaks or inefficiencies in your plumbing system. By doing so, you’ll save money and conserve a precious resource, allowing you to serve others better. Begin by comparing your current bill to previous months. Look for patterns or anomalies in usage. If there’s a significant increase that you can’t account for, it’s time to investigate further.

Start by checking the following:

  • Meter Reading Errors: Verify the meter reading on your bill matches the actual reading on your water meter. Mismatches can lead to incorrect billing.
  • Irrigation Systems: Inspect your irrigation system for leaks or malfunctions, which can often go unnoticed and contribute to higher water usage.
  • Leaking Fixtures: Examine all faucets, showerheads, and toilets for drips or leaks, even small ones, as they can accumulate significant water loss over time.
  • Invisible Leaks: If you suspect a problem but can’t identify the source, consider hiring a professional to check for leaks in hidden pipes or underground lines.

Conclusion

It’s no coincidence that a well-maintained plumbing system runs smoothly. You catch issues before they escalate by routinely checking for leaks, inspecting your water heater, and testing your sump pump. Cleaning drain pipes and examining water pressure guarantees efficiency while checking faucet functionality and sewer lines prevents surprises. Don’t overlook outdoor plumbing or unusual water billsthey’re often early warning signs. Regular maintenance saves money and keeps your home’s essential systems in prime condition.

Frequently Asked Questions

How Often Should You Schedule Professional Plumbing Inspections?
You should schedule professional plumbing inspections annually. This proactive approach helps you identify potential issues early, ensuring your system’s efficiency and longevity. Regular checks also inform you, allowing you to serve better and maintain your household’s needs.
What Tools Are Essential for DIY Plumbing Maintenance?
Imagine fixing a leaky faucet and saving your neighbor’s dinner party. You’ll need an adjustable wrench, plunger, pipe cutter, and plumber’s tape. These tools help you tackle basic plumbing issues and serve others efficiently.
How Can You Prevent Plumbing Issues During Winter Months?
Insulate your pipes to prevent freezingseal leaks in windows and doors to maintain warmth. Drain outside faucets and hoses to avoid bursts. Run water regularly through seldom-used lines to prevent ice blockages.
What Are Common Signs of Plumbing System Aging?
You’ll notice aging plumbing with frequent leaks, low water pressure, rust-colored water, and slow drains. Check for corroded pipes, water stains, and increased water bills. Address these signs promptly to prevent more significant issues and serve effectively.
How Can You Improve the Energy Efficiency of Your Plumbing System?
Did you know upgrading to low-flow fixtures can save you up to 60% on water usage? Insulate pipes to reduce heat loss, maintain your water heater, and fix leaks promptly to boost energy efficiency and help others.

Hand turning off a faucet with a water drip

Solving Low Water Pressure in Your Faucets

Low water pressure in your faucets can feel like trying to fill a bucket with a leaky spoon. You might shrug it off as a minor inconvenience, but understanding its root causes can be surprisingly simple. Start by checking if the problem is isolated to one fixture or widespread. Confirm aerators aren’t clogged and verify that your water supply valves are open. Yet, if the issue lingers, you might face more complex culprits like a faulty pressure regulator or corroded pipes. So, where do you go from here?

Identifying Low Water Pressure

To accurately identify low water pressure in your faucets, check if the issue affects a single fixture or is present throughout your home. Begin by turning on each faucet, one at a time, and observe the flow rate. Take note of any notable differences in water pressure between fixtures. If the problem is isolated to one faucet, it may indicate a localized issue. However, if multiple faucets are affected, the issue may be systemic.

Next, assess whether the problem is consistent across hot and cold water. Run each tap individually, switching between hot and cold settings. If low pressure is present in both, it might suggest a problem with the main supply line. Conversely, if only the hot water is affected, there could be an issue with your water heater or its related piping.

Additionally, check for any visible leaks in your plumbing system, as leaks can greatly reduce water pressure. Examine exposed pipes and connections for drips or moisture. Listen for any hissing sounds, which might indicate a hidden leak. By systematically examining these factors, you’ll effectively gather critical information to address and resolve your water pressure concerns.

Checking Faucet Aerators

One of the simplest and most effective steps in diagnosing low water pressure issues is inspecting the faucet aerators for blockages or buildup. These small mesh screens at the tip of your faucet are essential in controlling water flow and preventing debris from entering the stream. Over time, minerals, sediment, and other particles can accumulate, restricting water flow and reducing pressure.

To check the aerator, carefully unscrew it from the faucet tip using a pair of pliers or a wrench. Be mindful of the aerator’s components, as it typically consists of multiple parts, such as the screen, washer, and housing. Disassemble these parts and soak them in a solution of equal parts water and white vinegar for about 30 minutes. This helps dissolve any mineral deposits.

After soaking, use a small brush or an old toothbrush to gently scrub away any remaining debris. Rinse each component thoroughly with water. Once clean, reassemble the aerator and screw it back onto the faucet. By ensuring the aerator is free of obstruction, you’ll likely see a noticeable improvement in water pressure, enhancing your ability to serve others efficiently. 

Inspecting Water Supply Valves

Guarantee ideal water pressure by inspecting the water supply valves under your sink. These valves might be partially closed or obstructed, restricting the flow. Begin by locating the valves, typically found beneath the sink. You’ll usually see two valves: one for hot water and another for cold. Turn each valve counterclockwise to confirm they’re fully open, allowing maximum water flow. If turning the valves doesn’t resolve the issue, proceed with a more detailed inspection.

To investigate further, turn off the main water supply to prevent leaks while you work. Using an adjustable wrench, unscrew the valve handles to access the valve stem. Check for mineral buildup or debris around the valve seat; these obstructions can greatly reduce water pressure. Carefully clean any visible debris using a small brush or a cloth.

If the valve mechanism itself appears damaged or corroded, consider replacing it. Choose a high-quality valve to guarantee longevity and consistent performance. Once you’ve completed the inspection, reassemble the valves and turn the main water supply back on. Test the faucet to see if the water pressure improves. Maintaining these valves guarantees reliable water service for those you serve.

Cleaning Clogged Pipes

After ensuring the valves are fully operational, focus on cleaning clogged pipes. Mineral deposits and debris can greatly reduce water flow and pressure. Begin by shutting off the water supply to prevent flooding during the cleaning process. You’ll need a few tools: a pipe wrench, a bucket, and a wire brush.

Here’s a concise plan to get started:

  • Disassemble the Pipes: Carefully unscrew each section, starting from the faucet and returning to the main supply line. Make sure to place a bucket underneath to catch any residual water.
  • Clean the Pipes: Use a wire brush to scrub away any visible mineral build-up inside the pipes. Pay special attention to elbows and joints where debris tends to accumulate.
  • Reassemble and Test: Once cleaned, reattach the pipes securely and slowly turn the water back on to test for improved pressure. 

Implementing these steps requires attention to detail and patience, but the reward is a well-functioning faucet. By maintaining clean pipes, you’re enhancing the water system’s efficiency, ensuring that everyone in your home or facility receives adequate water pressure for their needs.

Examining Water Pressure Regulator

Evaluating the water pressure regulator is crucial, as it maintains consistent water pressure throughout your plumbing system and can greatly impact overall water flow. Start by locating the regulator near the main shut-off valve where the water supply enters your home. You’ll need to check if it’s functioning correctly, as a faulty regulator can lead to low water pressure issues.

First, a pressure gauge measures the water pressure at an outdoor faucet. Attach the gauge and turn on the water. An ideal reading should be between 40 and 60 psi. If the pressure is considerably lower, your regulator might need adjustment or replacement.

To adjust, locate the adjustment screw on the regulator. Turn it clockwise to increase pressure and counterclockwise to decrease it. Make small adjustments and recheck the pressure with the gauge. If adjustments don’t rectify the issue, the regulator may be defective.

Replacing a faulty regulator requires shutting off the main water supply and then removing and installing a new regulator. Always verify you follow the manufacturer’s instructions for proper installation. By addressing the regulator, you ensure that your system delivers consistent water pressure, enhancing your service to others. 

Addressing Leaks in Plumbing

While ensuring your water pressure regulator is functioning properly, it’s equally important to check for leaks in your plumbing system, as even minor leaks can greatly reduce water pressure and efficiency. Start by inspecting visible pipes and connections for any signs of moisture or corrosion. Leaks commonly occur at joints, valves, and fittings. A small drip might seem insignificant but can escalate quickly, affecting the entire system.

To efficiently identify potential leaks, consider these steps:

  • Check your water meter: Turn off all water in your home and observe the meter. If it continues to move, you likely leak somewhere in your system.
  • Use leak-detection dye tablets: Drop these into your toilet tank. If colored water seeps into the bowl without flushing, it indicates a leak in the flapper.
  • Inspect under sinks and around appliances: Look for water stains, wet spots, or mold, particularly in areas not frequently checked. 

Addressing these leaks promptly will enhance water pressure and conserve water. Proactively maintaining your plumbing will serve others by preventing costly repairs and ensuring your home functions efficiently. Don’t underestimate the impact of a sound plumbing system on your overall water pressure. 

Investigating Whole-House Issues

To tackle low water pressure affecting your entire home, examine the main water supply line for blockages or damage that could restrict flow. Locate the main shut-off valve near your water meter or where the line enters your home. Turn off the water supply and inspect the pipe for any visible kinks, leaks, or signs of corrosion. If you discover any obstructions or damage, repair or replace the affected sections promptly.

Next, check the pressure-reducing valve (PRV) if your home has one. The PRV is usually located near the main shut-off valve. Over time, these valves can wear out or get stuck, leading to reduced water pressure. Adjust the valve’s screw to see if you can increase the pressure, but be cautious not to exceed safe levels. If adjustments don’t help, consider replacing it. 

Testing for Pipe Corrosion

Curious about whether pipe corrosion is the culprit behind your low water pressure? Begin by inspecting your pipes to identify signs of corrosion. It’s essential to approach this task methodically, ensuring you don’t overlook potential problem areas. Here’s how you can conduct a preliminary test:

  • Visual Inspection: Check exposed pipes for discoloration, flaking, or dimpling. Corroded pipes often appear rusty or greenish, especially around joints and fittings.
  • Water Quality Testing: Collect a tap water sample and observe its color and taste. A metallic taste or reddish tint indicates possible corrosion within your pipes.
  • Flow Rate Measurement: Use a bucket to measure the amount of water flowing from a faucet in a specific time frame. If flow rates are noticeably lower than expected, it might suggest internal pipe blockage due to corrosion. 

Consulting a Professional Plumber

When your attempts to diagnose low water pressure hit a dead end, don’t hesitate to call a professional plumber for expert assessment and solutions. Plumbers possess the specialized tools and knowledge to identify hidden issues that might escape your notice. They can thoroughly inspect your plumbing system, checking for leaks, blockages, or any outdated components that might be causing the pressure drop. With their technical expertise, they’ll pinpoint problems such as faulty pressure regulators or issues with the main water supply line that you might not have the ability or equipment to address. 

Preventing Future Pressure Problems

Regularly inspect your plumbing system for signs of wear or corrosion to guarantee consistent water pressure and address potential issues before they escalate. Committing to routine checks can prevent minor problems from becoming costly repairs. Focus on areas prone to leaks or damage, such as joints and valves.

To maintain your system in prime condition, consider implementing the following practices:

  • Install Pressure Regulators: These devices control the water pressure entering your home, protecting your pipes from undue stress. They’re beneficial if you experience fluctuating pressure from your municipal supply.
  • Flush Your Water Heater Regularly: Sediment build-up can restrict water flow, impacting pressure throughout your home. Regular flushing removes these deposits, maintaining efficient operation.
  • Clean Aerators and Showerheads: Mineral deposits and debris can clog these components, reducing flow. Regular cleaning ensures unobstructed water passage.

Taking these steps not only enhances the longevity of your plumbing but also contributes to a more stable water pressure experience. As you serve others, remember that maintaining your plumbing system is essential to providing a reliable and satisfying water supply. Proactively addressing these potential issues ensures everyone benefits from a well-functioning home environment. 

Conclusion

You’ve checked every faucet and valve, and right as you clean the aerators, you notice a sudden improvement in water pressure. Coincidence? Perhaps, but it highlights the importance of regular maintenance. Don’t forget to inspect pipes for corrosion and monitor that pressure regulator. If problems linger, it might be time to call a professional plumber. Keeping up with these tasks guarantees that your faucets deliver peak water flow, preventing future pressure headaches.

Frequently Asked Questions

Can Low Water Pressure Affect Water Heater Performance?
Yes, low water pressure can affect your water heater’s performance. It reduces flow rates, causing insufficient heating and inefficient energy use. To serve others better, guarantee ideal pressure for consistent hot water delivery and system longevity.
How Does Weather Impact Water Pressure in Faucets?
‘Every cloud has a silver lining,’ but extreme cold can freeze pipes, reducing pressure. Heat can cause expansion and leaks. Understanding these impacts lets you guarantee consistent service, helping others maintain their water systems efficiently.
Are There Eco-Friendly Solutions to Improve Faucet Water Pressure?
Yes, you can use aerators and water-efficient fixtures to improve water pressure. They reduce water waste while providing a satisfying flow. Look for WaterSense-labeled products, which guarantee efficiency and performance, benefiting both users and the environment.
What Are Common Misconceptions About Water Pressure Problems?
It’s a coincidence you’re asking this! You might think low pressure is always due to faulty pipes, but often, it’s clogged aerators or valves. Understanding these can help you serve others by efficiently resolving their water issues.
Can Water Pressure Issues Be Related to Water Quality Concerns?
Yes, water pressure issues can relate to water quality. Sediment buildup restricts flow, reducing pressure. Regularly clean aerators and check pipes for mineral deposits. Addressing these concerns guarantees peak performance, benefiting those you serve with reliable water delivery.

Plumber using a drain snake to clear a sewer line

Warning Signs Your Sewer System May Fail

You might not think about your sewer system until something goes wrong, but it’s essential to recognize the warning signs before a small issue turns into a costly disaster. Imagine walking into your home and being hit by an unpleasant odor or noticing your drains clogging more often than usual. These are just a few indicators that your sewer system could be on the brink of failure. But what about those unexpected lush patches in your yard or your toilet’s gurgling sounds? Each of these symptoms tells a story. Are you ready to uncover what they mean?

Unpleasant Odors Indoors

If you notice a persistent foul smell inside your home, pinpoint its origin by checking areas prone to sewer gas leaks, such as drains, toilets, and vents. Start by inspecting all drain traps. Confirm water is present in the P-traps, as evaporation can allow gases to seep through. Simply running water for a few seconds in unused sinks or floor drains can restore the water barrier.

Next, examine the toilets. To identify any rocking or instability, check the wax seal beneath each toilet. A compromised wax ring can allow sewer gases to escape, necessitating replacement. Verify the toilet is securely fastened to the floor to maintain an airtight seal.

Vents are another potential source of odor. Inspect the vent pipes, usually located on the roof, for blockages caused by debris or nests. A clogged vent can create a vacuum effect, disrupting proper drainage and causing odors. Safely remove any obstructions using a plumber’s snake or high-pressure water.

Frequent Drain Clogs

Frequent drain clogs indicate a buildup of debris or foreign objects in the pipes, requiring immediate attention to prevent further complications in your sewer system. You understand the importance of maintaining a well-functioning household as someone who serves others. Start by evaluating the situation: identify which drains in your home clog most often. This may help pinpoint specific problem areas like kitchens or bathrooms.

To address the issue, consider using a plumbing snake or auger. Insert the tool into the problematic drain, rotating it to catch and remove the debris. This method is effective for dislodging stubborn blockages without harming the pipes. Additionally, enzyme-based drain cleaners can offer a chemical-free solution by gradually breaking down organic material.

Regular maintenance is key. Implement a weekly routine of flushing your drains with hot water mixed with vinegar and baking soda. This combination helps dissolve potential clogs before they become significant problems. Remember, prevention is more efficient than repair. Educate your household on proper waste disposalavoid pouring grease down the sink and use sink strainers to catch larger debris. These proactive measures will extend the life of your sewer system and enhance your home’s functionality. 

Slow Draining Fixtures

In addition to frequent clogs, slow-draining fixtures often signal underlying issues in your sewer system that demand prompt investigation and resolution. When you notice your sinks, bathtubs, or showers taking longer than usual to drain, it’s essential to address the problem before it escalates. Begin by checking for localized blockages in the traps or pipes. Use a drain snake or plunger to dislodge any debris. If the issue persists, it may indicate a more severe blockage within the sewer line.

To diagnose the problem accurately, consider employing a sewer camera inspection. This technique visually assesses your pipes, revealing obstructions like tree roots or sediment buildup that impede flow. Additionally, hydro jetting can be a proactive solution. This method uses high-pressure water to clear blockages and improve drainage efficiency, ensuring your system operates effectively.

Regular maintenance is important. Implement a routine schedule for cleaning your drains and sewer lines. Encourage household members to avoid flushing inappropriate items and use drain covers to catch hair and debris. By taking these steps, you’ll not only resolve slow-draining fixtures but also extend the lifespan of your sewer system, ultimately enhancing the well-being of those you serve. 

Gurgling Toilet Sounds

You might occasionally hear gurgling sounds from your toilet, often indicating air trapped in the sewer line due to blockages or venting issues. This acoustic anomaly suggests that wastewater is encountering an obstruction, causing pressure imbalances. It’s vital to address this promptly to prevent potential sewer system failure.

First, inspect your plumbing vents for blockages like leaves or debris. Clogged vents can exacerbate these sounds by restricting airflow. Use a plumber’s snake or a high-pressure water hose to clear any obstructions. If venting issues persist, consider consulting a professional plumber to assess your system’s ventilation adequacy.

Next, assess your drain lines for potential blockages. Utilize a plunger to create suction and dislodge minor clogs. If unsuccessful, deploy an auger to reach deeper into the pipeline. Always remember to wear gloves and protective eyewear for safety.

Consider enlisting the help of a professional who can conduct a thorough camera inspection of your sewer lines. This proactive step helps identify the exact cause and location of blockages. By addressing these gurgling sounds methodically, you’re resolving an annoyance and preventing more severe sewer system malfunctions.

Water Pooling in Yard

If you’ve resolved indoor issues like gurgling toilets but still notice water pooling in your yard, suspect a sewer line break or blockage beneath the surface. First, identify the location of the pooling. This area could be directly above where the sewer line runs. Utilize a soil probe to detect any saturated soil that indicates potential leakage.

Inspect nearby trees or shrubs; their roots might have invaded your sewer line, causing damage or obstruction. Use a sewer camera inspection to visually confirm the condition of your pipes. This tool provides a real-time feed of the pipe’s interior, helping you pinpoint the exact problem area.

Once identified, consider hydrojetting or snaking to clear obstructions. Hydrojetting uses high-pressure water to remove debris and roots, while snaking involves a flexible auger to dislodge blockages. If the issue stems from a pipe break, consult a professional for trenchless repair options like pipe bursting or relining. These methods minimize landscape disruption and efficiently restore your system. 

Lush, Green Patches

Spotting unexpectedly lush, green patches in your lawn often signals a sewer line leak. The leaking sewage acts as a fertilizer, promoting rapid grass growth. Identifying these anomalies requires a keen eye for contrast in your landscape. Look for areas where the grass appears more vibrant and grows faster than surrounding patches. This could indicate nutrient-rich wastewater escaping from a compromised pipe.

To address this issue, first, conduct a thorough visual inspection. Walk the perimeter of your property, and note any inconsistencies in grass color or height. Use a soil probe or spade to check the moisture level underground. Excessive dampness might confirm a leak.

Once you’ve identified a suspicious area, it’s essential to contact a professional plumber who can perform a sewer camera inspection. This procedure involves inserting a specialized camera into the sewer line to pinpoint the leak’s location and severity. Professional intervention guarantees precise diagnostics and effective repair.

As someone committed to serving others, remember that timely action prevents further environmental damage and protects public health. Educate your neighbors about these signs, fostering a community mindful of potential sewer issues. By acting swiftly, you contribute positively to neighborhood well-being. 

Foundation Cracks

Foundation cracks often signal underlying sewer system issues, demanding immediate attention to prevent structural damage and costly repairs. When you notice these cracks, assess the situation promptly. Begin by examining the size and direction of the cracks. Horizontal cracks indicate a more severe problem with water pressure against the foundation, often linked to sewer line issues. Vertical cracks might be less severe but still require inspection.

First, inspect the basement or crawl space for any signs of moisture or leaks near these cracks. Use a moisture meter to quantify the level of dampness. If you detect a musty odor, this could be a further indication of sewer problems. Next, check the exterior foundation for any displacement or misalignment, which could suggest shifting caused by leaking sewer lines.

To address potential sewer issues, employ a professional plumber who can conduct a video inspection of your sewer lines. This will help identify any breaks or blockages. Don’t delay in addressing these findings; early intervention can prevent further deterioration of your foundation. Collaborate with a structural engineer if necessary to guarantee the integrity of your home’s foundation while repairs are underway. Your proactive approach can safeguard your property and the well-being of those you serve. 

Insect and Rodent Infestations

Experiencing a sudden increase in insect and rodent activity inside your home often indicates a breach in the sewer system, as these pests are attracted to the moisture and waste from leaking pipes. To mitigate this, first conduct a thorough inspection of your property’s perimeter and basement. Look for any visible cracks or gaps in the foundation that could serve as entry points for these unwanted guests. Seal these openings with durable material like silicone caulk or expanding foam.

Next, inspect your plumbing system for leaks. Check all visible pipes, especially those in the basement and under sinks, for signs of moisture or corrosion. If necessary, utilize a moisture meter to detect hidden leaks. Repair or replace any damaged sections promptly, as this will reduce the attractants for pests.

Utilize traps or bait stations for immediate pest control, but remember these are temporary solutions. For a long-term impact, engage a pest control professional to apply treatments designed explicitly for sewer-attracted pests. Finally, maintain a proactive maintenance schedule for your sewer system, including regular inspections and cleaning, to prevent future breaches and guarantee a safe and healthy environment for you and those you serve. 

Sewer Backups

Address sewer backups promptly by identifying blockages in your plumbing system and utilizing a drain snake or hydro-jetting to clear obstructions effectively. Begin by diagnosing the cause of the backup. Use a drain snake for minor clogs, inserting it into the affected drain and rotating it to dislodge blockages. For stubborn obstructions or when multiple drains are affected, hydro-jetting is a superior method. This technique employs high-pressure water to scour the pipe interiors, removing debris and buildup efficiently.

To avoid recurring issues, guarantee regular maintenance of your plumbing system. Here’s why timely action is essential:

  1. Prevent Property Damage: Overflowing sewage can seep into floors and walls, causing costly structural damage and health risks.
  2. Maintain Sanitation: Backups can lead to unsanitary conditions, posing health hazards to your household.
  3. Preserve Peace of Mind: Knowing your sewer system functions properly alleviates stress and worry. 

Assisting others in maintaining their plumbing systems safeguards their homes and supports community well-being. By proactively addressing sewer backups, you contribute to a healthier and safer environment for everyone. Prompt action and proper maintenance are your best defenses against sewer system failures.

Increased Water Bills

If you notice an unexplained spike in your water bills, inspect your sewer system for hidden leaks or inefficiencies that might contribute to increased consumption. Start by conducting a thorough visual inspection of your plumbing fixtures, including faucets, toilets, and visible pipes. Look for signs of water seepage or dampness, which may indicate a leak.

Next, employ a water meter test. Turn off all water-using appliances and check your water meter reading. Wait for one to two hours without water, then recheck the meter. Any change in the reading signifies a leak within your system.

Check the integrity of your sewer connections. Loose or damaged joints can lead to water loss. Consider enlisting a professional plumber for a video inspection to assess the internal condition of your sewer lines. They can identify root intrusion, pipe corrosion, or blockages causing inefficiencies. 

Conclusion

You’ve learned the warning signs, but how can you prevent a sewer system disaster? Regular inspections and maintenance are your first line of defense. Don’t ignore unpleasant odors or odd soundsaddress them immediately. Keep an eye on your water bill for unexpected spikes, and inspect your yard for unusual wet spots. By staying proactive and vigilant, you’ll save money and guarantee your sewer system runs smoothly. Isn’t peace of mind worth the effort?

Frequently Asked Questions

What Are Common Causes of Sewer System Failure?
Root intrusion, pipe corrosion, and blockages are common causes of sewer system failure. Regular maintenance, proper waste disposal, and tree root barriers can mitigate these issues effectively, ensuring continuous service to others.
How Often Should I Have My Sewer System Inspected?
Like clockwork, inspect your sewer system every 1-2 years. Regular checks prevent blockages and costly repairs. Hire a qualified technician to conduct thorough inspections, ensuring all pipes and components operate efficiently and seamlessly, serving your household’s needs.
Can Tree Roots Damage My Sewer Lines?
Yes, tree roots can infiltrate sewer lines, causing blockages or breaks. Regularly inspect your lines, use root barriers, and consider root-killing chemicals. If damage occurs, consult a plumber to promptly assess and address the issue.
How Can I Prevent a Sewer System Failure?
To prevent sewer system failures efficiently and responsibly, you should schedule regular inspections, use enzyme-based cleaners, and avoid flushing non-biodegradable items. You should also install backflow prevention devices, maintain proper landscaping, and educate others about proper disposal.
What Materials Are Best for Durable Sewer Pipes?
Imagine a sewer system lasting over 100 years. Choose vitrified clay pipes for durability; they resist chemical erosion and tree roots. Inspect annually, ensuring proper installation. Serve your community by investing in long-term, reliable infrastructure solutions.