
Check Us Out On Our Social Media

Author: office@ironmountainplumbing.com

Leaking faucet repair Leaking faucet repair

Step-by-Step Guide: Urgent Leaking Faucet Repair

A dripping faucet can seem harmless, but did you know it can waste up to 3,000 gallons of water a year? In this step-by-step guide to urgent leaking faucet repair, you’ll learn how to diagnose the type of faucet you have and follow straightforward repair instructions. By addressing this common plumbing issue promptly, you not only prevent water waste but also enhance your home’s comfort and customer satisfaction. Equip yourself with the knowledge to tackle this problem and potentially avoid emergency service calls, helping you save time and money.

Understanding the Urgency of Leaking Faucet Repair

Recognizing the signs of a serious faucet leak is crucial for any tenant. Ignoring a leaking tap can lead to significant water waste and damage over time. Prompt repairs preserve your plumbing and save you money on potential replacement costs. Understanding these factors emphasizes the importance of seeking reliable plumbing services from a trusted company.

Recognizing the Signs of a Serious Leak

Identifying a serious leak in your faucet is essential before it escalates into a plumbing emergency. Common signs to watch include water pooling around the base of the faucet or dripping noises, which may indicate leaks that could worsen over time. Additionally, if you notice discoloration on your ceiling or walls beneath the faucet, this can signal a more extensive issue that requires immediate attention.

Once you recognize these signs, prompt action is vital, as ignoring them can lead to greater hazards, including structural damage and more expensive repairs in the future. It’s important to seek help from a plumbing service that prioritizes customer service, ensuring your concerns are addressed effectively.

Consequences of Ignoring a Leaking Faucet

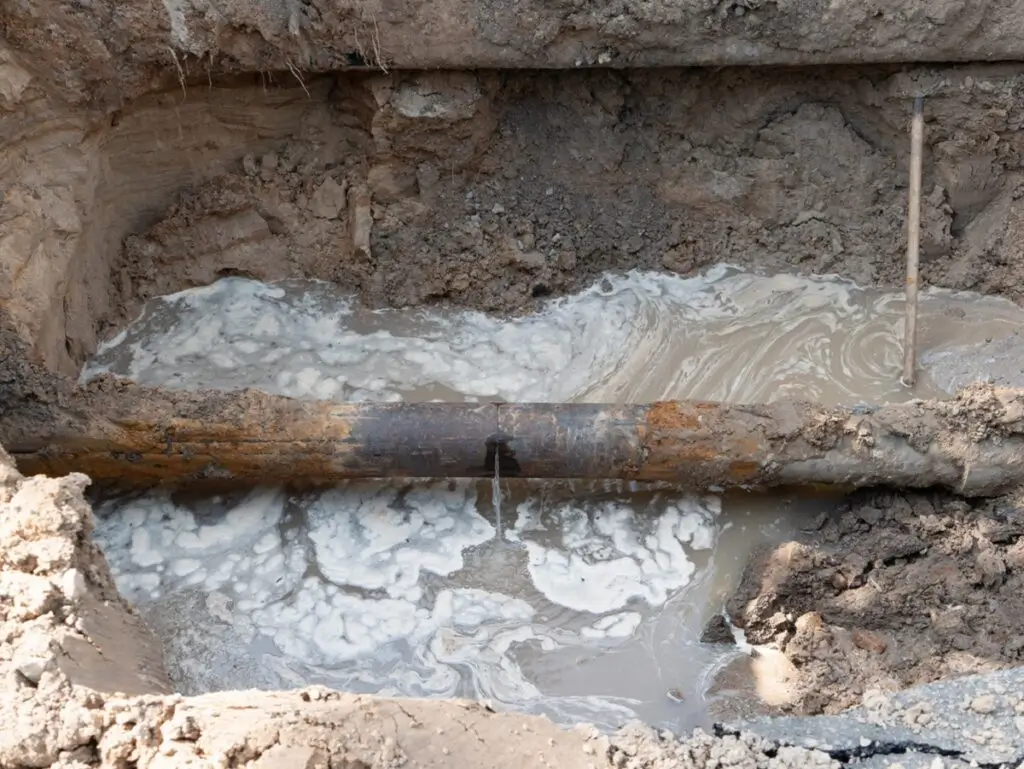
Ignoring a leaking faucet can lead to significant pressure build-up in your plumbing system, potentially resulting in more severe leaks or plumbing failures. If you neglect the issue, the water may cause extensive damage to your home’s drainage system, increasing the risk of costly repairs. Regular inspection of your plumbing can help identify these small problems before they escalate into major concerns that require immediate attention.

Moreover, failing to address a leaking faucet can contribute to higher water bills, as the constant dripping wastes valuable resources. You may need to submit a maintenance request to fix the leak and the damage it has caused to surrounding areas.

Cost Savings From Prompt Repairs

Prompt repairs on a leaking faucet can save you significantly on future costs related to your water supply. For instance, addressing a small valve issue immediately can prevent the risk of a larger plumbing failure, which could result in extensive damage and the need for costly repairs down the line. This proactive approach not only preserves your plumbing but also helps you avoid unnecessary expenses associated with renting a property that may become uninhabitable if severe water damage occurs.

Preparing for the Repair Process

To effectively address a leaking faucet, assemble the required tools and materials, which will be essential for your repair. Next, ensure you turn off the water supply properly to avoid emergencies. Lastly, creating a safe working environment is critical to prevent accidents. These preparations streamline the repair process and demonstrate your attention to detail, benefitting your landlord and saving costs.

Assembling Required Tools and Materials

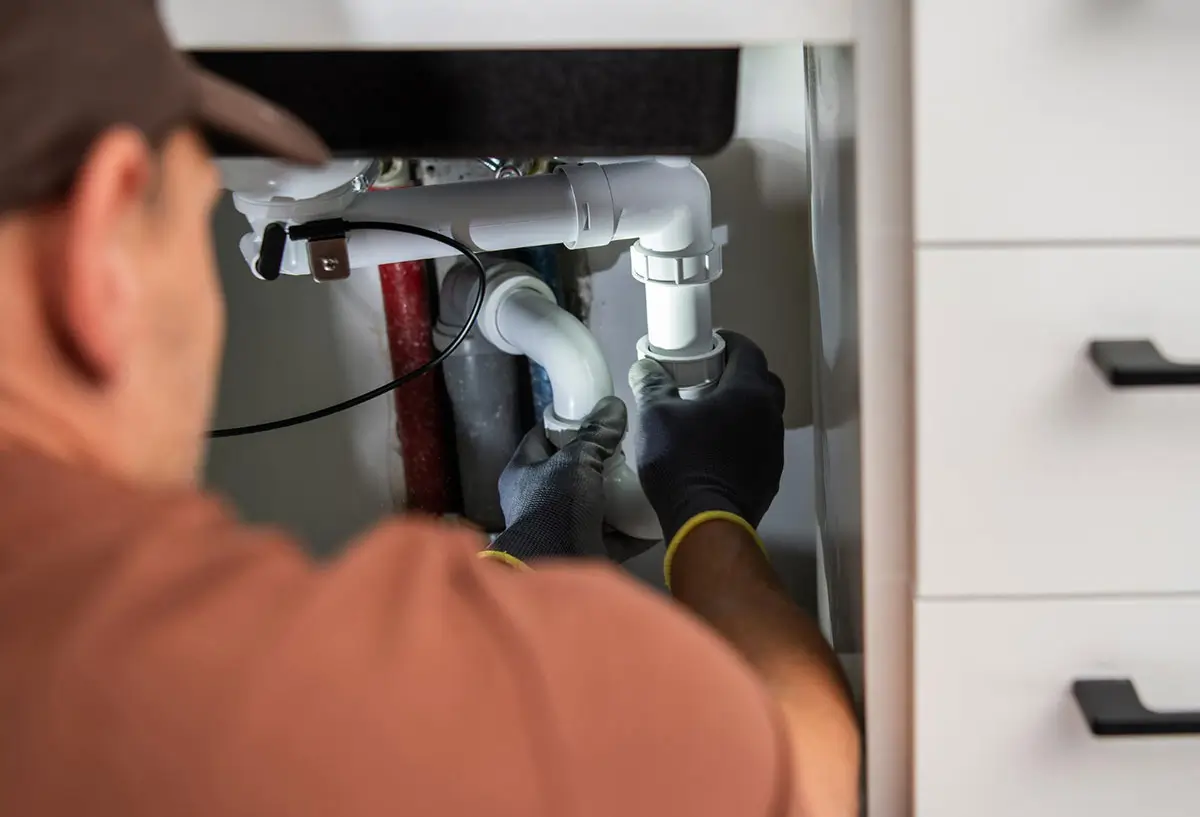
Gathering all the necessary tools and materials is essential when preparing for a kitchen faucet repair to ensure a smooth repair process. Collect an adjustable wrench, screwdriver, plumber’s tape, and replacement washers. Having these tools readily available will help you efficiently address the leaking faucet issue without interruptions, minimizing inconvenience to your property and reducing the need for follow-up repairs.

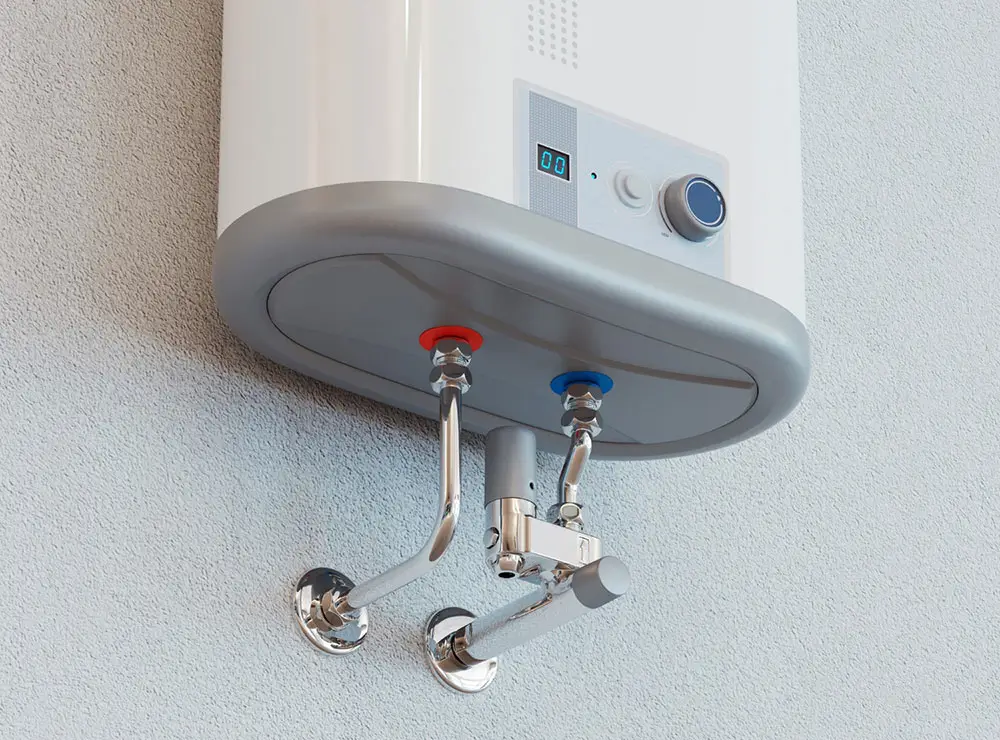
Turning Off the Water Supply Properly

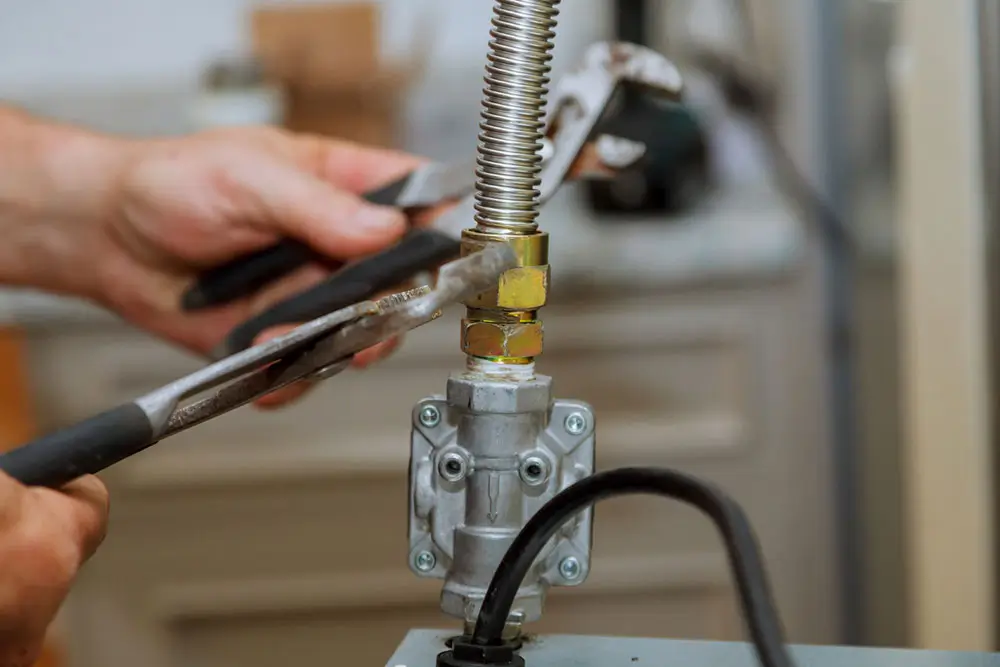
Locate the shut-off valve under the sink to turn off the water supply for urgent faucet repairs. This valve is typically a small knob or lever that controls the flow of water to the faucet. By turning the valve clockwise, you can prevent further water damage while working on the repair, protecting your property and your landlord’s interests.

If no shut-off valve is found under the sink, you may need to turn off the main water supply for your home. This is usually located near where the water line enters the house. In addition, if your property uses natural gas for heating or water heating, ensure that the gas valves are also checked so that you can avoid any hazards during the repair process.

Ensuring a Safe Working Environment

Ensuring a safe working environment is paramount before you proceed with your urgent leaking faucet repair. Start by removing any items from the area that could obstruct your movement or become damaged. This includes storing away cleaning supplies, personal belongings, and any pest control products that may be nearby. A clutter-free space will allow you to work efficiently and safely, minimizing any risk of accidents while you address the leak.

Additionally, check for potential hazards like gas leaks if your shower is connected to a gas water heater. If you detect any unusual smells or hear a hissing sound, prioritize your safety by evacuating the area and contacting emergency plumbing services immediately.

Diagnosing the Type of Faucet

To effectively address water leaks, you must first identify the type of faucet you are dealing with. Start by recognizing compression faucets, which use washers to seal leaks. Next, distinguish cartridge faucets, known for their single or double-handle design, which may contribute to mold growth if not properly maintained. Lastly, familiarize yourself with ball and disc faucets, often found in dishwashers, to understand their unique components and possible failures.

Identifying Compression Faucets

Identifying compression faucets is essential for tenants dealing with urgent leaks in bathroom fixtures. These faucets typically feature separate handles for hot and cold water, and rubber washers are used to create a seal that prevents leaks. If you notice water pooling on the flooring underneath or around the faucet, it may indicate that the washers are worn and need replacement, prompting immediate attention to prevent further damage.

In addition to everyday use, understanding how compression faucets operate can save you time and money during repairs. The washers in these models can often be replaced with minimal tools, helping you avoid costly plumber fees.

Distinguishing Cartridge Faucets

To distinguish cartridge faucets, look for the design features that set them apart from other types. These faucets typically have a single or double-handle configuration, allowing you to easily control water temperature and flow. If you notice water leaking from the handle or around the base, this often indicates issues with the cartridge, which might require removal and replacement to restore functionality.

Understanding cartridge faucets can also help identify possible plumbing issues elsewhere, such as complications related to the water heater or pipes. For example, persistent leaks may indicate significant problems in your plumbing system, potentially extending to the basement or roof areas.

Recognizing Ball and Disc Faucets

Recognizing ball and disc faucets is essential for tenants managing a leak issue. These faucets typically feature a single handle that controls water flow and temperature. Suppose you notice water leaking from the handle or the base. In that case, this often indicates a problem with the internal ball mechanism or the seals within the disc, prompting urgent repair to maintain the quality of life in your space.

It’s crucial to address leaks promptly, as ignoring them can lead to potential complaints from your landlord regarding water damage. Pay attention to changes in your sense of smell, as mold growth might develop due to prolonged moisture exposure. Identifying the type of faucet you are dealing with can significantly streamline the repair process and ensure you take the right steps to resolve the issue efficiently.

Step-by-Step Repair Instructions for Different Faucets

This section covers essential steps for repairing various types of faucets, including how to fix a leaking compression faucet, repair a dripping cartridge faucet, address leaks in ball-type faucets, and resolve issues with ceramic disc faucets. Each method is straightforward, equipping you with practical insights to tackle urgent repairs effectively and prevent further damage to your plumbing system.

Fixing a Leaking Compression Faucet

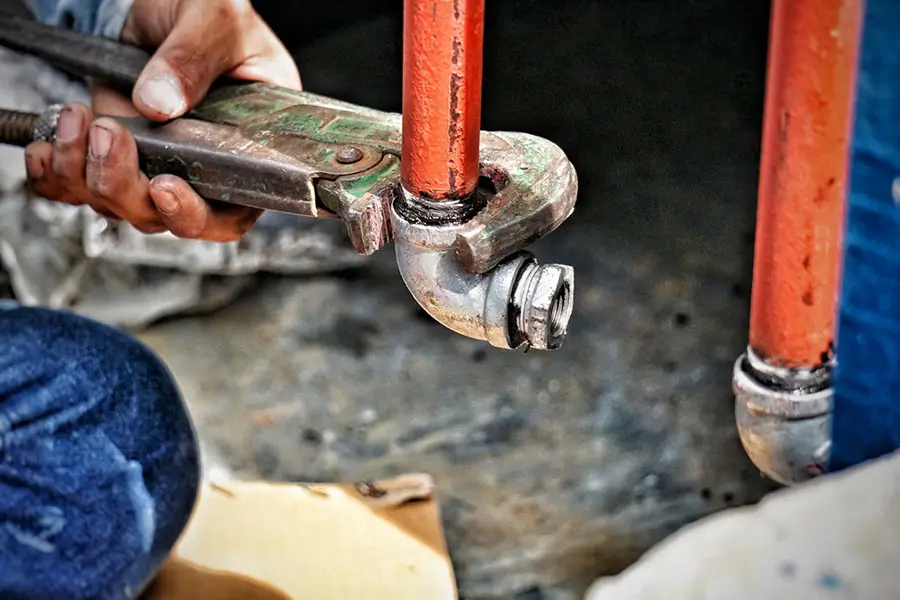
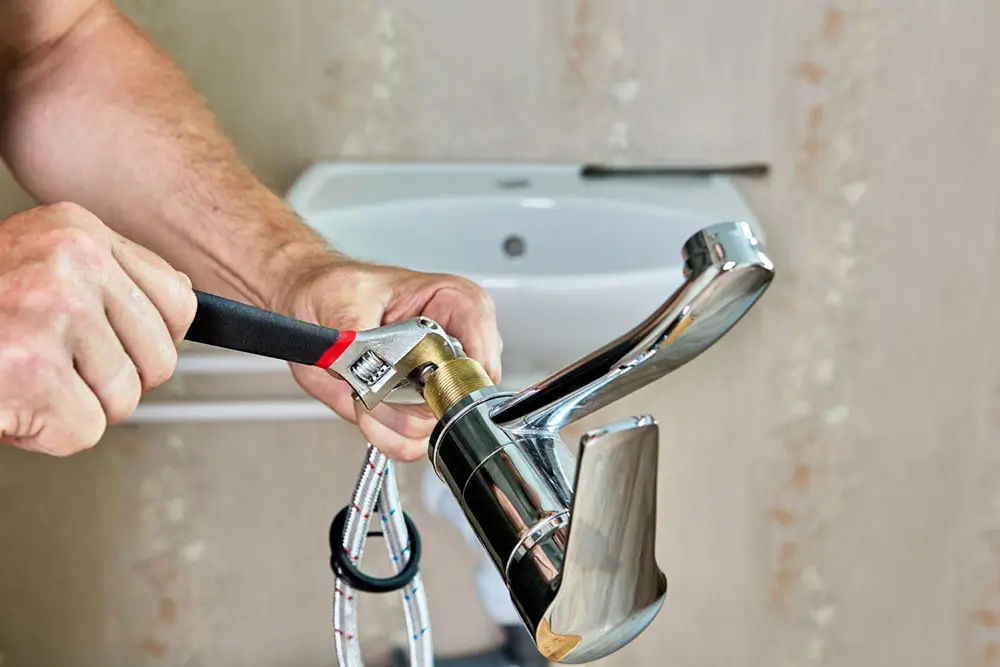
Turn off the water supply at the shut-off valve under the sink to fix a leaking compression faucet. Once the water is off, remove the faucet handle by loosening the screw, which is often hidden under a decorative cap. After taking off the handle, you can access the packing nut using an adjustable wrench; tightening it may resolve minor leaks, but if the leak persists, proceed to replace the rubber washer located inside the faucet. This step typically prevents water from seeping through when the faucet is closed.

After replacing the rubber washer, reassemble the faucet by reversing the steps you took to disassemble it. Be sure to turn the water supply back on slowly to check for any leaks. If everything is functioning properly, your compression faucet should operate without dripping. Regularly inspecting and maintaining your faucet can help you catch potential issues early, ensuring that your plumbing system remains in good working order.

Repairing a Dripping Cartridge Faucet

To repair a dripping cartridge faucet, turn off the water supply at the shut-off valve under the sink. Next, remove the faucet handle by loosening the screw that holds it in place, usually found beneath a decorative cap. Once the handle is off, you will access the cartridge, which may require pulling it straight out or using pliers if stuck. Inspect the cartridge for any signs of damage and replace it if necessary to eliminate the leak.

After replacing the cartridge, reassemble the faucet by reversing the steps taken during disassembly. Turn the water supply back on slowly to check for leaks at the handle and base.

Addressing Leaks in Ball-Type Faucets

To address leaks in ball-type faucets, start by turning off the water supply at the shut-off valve beneath the sink. Carefully remove the handle by loosening the screw typically found under a decorative cap. Once the handle is off, you can inspect the internal components, focusing on the ball mechanism and seals for any wear or damage causing the leak.

Replacing these parts will often resolve the leaking issue if you find wear on the ball assembly or seals. After installing new components, reassemble the faucet and slowly turn the water supply back on, checking for leaks around the handle and base.

Resolving Issues With Ceramic Disc Faucets

To resolve issues with ceramic disc faucets, you should first turn off the water supply at the shut-off valve under the sink. Carefully detach the handle by removing the screw beneath the decorative cap. Once the handle is removed, inspect the ceramic disc for cracks or debris hindering its proper sealing. If the disc is damaged, replacing it will typically eliminate the leakage, ensuring efficient water flow from your faucet.

After replacing the ceramic disc, reassemble the faucet by putting the handle back on and re-tightening the screws. Gradually turn the water supply back on, monitoring for leaks around the handle and base. Regular maintenance of your ceramic disc faucet can prevent future leaks and extend its lifespan, helping you maintain a functional and efficient plumbing system in your home.

Reassembling and Testing the Faucet

To repair your urgent leaking faucet, properly reassemble the components, ensuring each part is fitted snugly. Next, the water supply must be restored safely to avoid any accidents. Finally, check for leaks after the repair to confirm that your efforts have resolved the issue. These steps are essential for effectively maintaining your plumbing system and preventing future leaks.

Correctly Reassembling Faucet Components

After replacing any damaged parts in your faucet, it’s important to reassemble the components correctly to ensure optimal performance. Begin by aligning each piece properly, ensuring that washers and seals fit snugly in their designated places. This attention to detail will help prevent future leaks and maintain the integrity of your plumbing system.

Once you have reassembled the faucet, securely tighten all screws and fittings without over-tightening, which could cause damage. After ensuring everything is in place, carefully restore the water supply and check for leaks around the handle or base. This final step confirms that your repair is successful and that your faucet will function efficiently.

Restoring Water Supply Safely

Locate the shut-off valve you turned off earlier to restore the water supply safely. Gradually open the valve by turning it counterclockwise. This slow approach ensures that the water flows back into the faucet without causing a sudden pressure surge that could aggravate any remaining issues or lead to leaks.

Once you’ve restored the water supply, check each part of the faucet for leaks by observing for any dripping or pooling areas. Turn on the faucet gently and monitor its performance while running water to confirm that your repair has been successful. This careful process helps you identify any lingering issues promptly, allowing you to address them before they escalate into more significant plumbing problems.

Checking for Leaks After Repair

After reassembling your faucet, checking for leaks is crucial to ensure your repair is successful. Begin by gradually turning on the water supply; this helps avoid sudden pressure changes that could lead to further leaks. Pay close attention to the areas around the faucet handle and base, as these are common spots where leaks may occur after a repair.

If you notice any dripping or pooling water, you may need to disassemble the faucet again to examine the seals and connections. Taking these additional steps not only prevents future water waste but also ensures that you maintain the integrity of your plumbing. Addressing any lingering issues promptly contributes to a more efficient and functional faucet, improving your overall home plumbing system.

Preventative Measures and Maintenance Tips

Regular inspection of faucet components is essential for identifying potential leaks early. Proper use extends your faucet’s lifespan and ensures that it operates efficiently. Additionally, it is important to know when to consult a professional plumber, especially if issues persist despite your efforts. These preventative measures and maintenance tips will help keep your plumbing in optimal condition and prevent urgent repairs.

Regular Inspection of Faucet Components

Regular inspection of faucet components is an effective way to prevent leaks before they escalate. Taking a few minutes to check for wear and tear on washers, seals, and connections can save you from the hassle and cost of urgent repairs down the line. Look for signs such as mineral buildup or visible rust, indicating that replacement parts may be necessary to maintain optimal function.

By performing routine checks, you can identify small issues early on, ensuring that your plumbing system remains in good condition. If you notice any irregularities, such as dripping or decreased water flow, don’t hesitate to address them promptly.

Proper Use to Extend Faucet Lifespan

To extend the lifespan of your faucet, you should practice careful handling during use. Avoid applying excessive force when turning the faucet on or off, as this can lead to wear and tear on the internal components. Instead, use a gentle touch to maintain the seals and prevent leaks from developing over time.

Regularly cleaning your faucet can also significantly improve its longevity. Keeping the surface free from mineral deposits and grime enhances its appearance and helps prevent corrosion that could compromise functionality.

When to Consult a Professional Plumber

It’s important to know when to consult a professional plumber for your leaking faucet repair. If you notice persistent leaks despite your efforts to resolve the issue, or if the problem extends beyond the faucet, it’s best to seek expert assistance. A professional can thoroughly inspect and identify underlying plumbing problems that may not be immediately apparent, ensuring you receive an effective solution.

Additionally, if you lack the confidence or experience to perform the repair yourself, don’t hesitate to contact a qualified plumber. Attempting to fix complex faucet mechanisms without proper knowledge may lead to further damage and increased repair costs.

Conclusion

Understanding the urgency of leaking faucet repair is crucial for maintaining your plumbing system and preventing costly damage. You can effectively resolve issues and minimize water waste by recognizing the signs of leaks, promptly addressing them, and following a clear step-by-step guide. Regular inspections and proper maintenance extend your faucet’s lifespan and enhance water efficiency, benefitting your home and finances. Don’t hesitate to seek professional help when needed, ensuring that your plumbing remains in optimal condition for years.

Frequently Asked Questions

How can I determine where my faucet is leaking from?
To identify the source of a faucet leak, inspect the spout, handle, base, and valves for drips or moisture, suggesting a faulty O-ring or worn-out washer.
What tools are needed for a faucet repair?
Basic faucet repair requires adjustable wrenches, screwdrivers, O-rings, washers, plumber tape, and valve seat wrenches.
What are the common components to replace in a leaky faucet?
To fix a leaky faucet, you frequently need to replace the O-ring, washer, and valve seatthese are the primary culprits behind most drips.
How do I ensure the faucet repair is successful?
For a successful faucet repair, shut off the water supply, replace worn parts, and ensure all connections are tight to prevent future leaks.
Are there routine steps to prevent future faucet leaks?
To prevent future faucet leaks, routinely tighten fittings, replace worn washers and O-rings, and inspect for corrosion or mineral deposits.

Toilet Overflow Emergency Toilet Overflow Emergency

Effective Steps to Stop a Toilet Overflow Emergency

Have you ever watched in horror as the water level rises ominously after a flush, inching closer and closer to the brim? You’re not alone. Dealing with a toilet overflow emergency is a common yet stressful experience. This article will address how to halt a toilet overflow swiftly, safeguard your space from water damage, and prevent such emergencies. By grasping the immediate action of shutting the valve and removing excess water, alongside understanding the intricacies of unclogging and future prevention, you’ll emerge better equipped to handle such situations. This post provides practical guidance to help you avert a potential flood and minimize the fallout, ensuring your residence’s peace of mind and safety.

Understanding What Causes Toilet Overflows

Understanding the culprits is key to prompt resolution when faced with an overflowing toilet. Common overflow triggers include severe blockages that can cause a backup, turning a minor issue into a plumbing emergency. Additionally, malfunctioning tank mechanisms often contribute to unexpected leak scenarios. We’ll examine how obstructions in pipes necessitate swift action, often involving a pump, and explore the crucial role sump pumps play in managing excess sewage and preventing overflows.

Recognizing Common Overflow Triggers

One prevalent trigger for toilet overflows is a clog within the drain line. Suppose you notice water rising menacingly in the bowl after a flush. In that case, it’s likely that an obstacle, perhaps paper or other non-dissolvable items, is hindering the passage through your bathroom’s pipes. The obstruction prevents water and waste from flowing smoothly to the sewer or septic tank, necessitating immediate attention to mitigate the risk of water damage in your bathroom or basement.

Issues with the tank’s components can also instigate overflows. A malfunctioning flapper or a fill valve that doesn’t shut off could cause water to continuously run into the bowl, potentially leading to an overflow. You’re urged to inspect these tank mechanisms periodically to ensure they’re functioning correctly and to replace any worn parts without delay; this simple maintenance can prevent a full-scale bathroom emergency and protect your home from the perils of water damage.

How Blockages Lead to Emergencies

When a blockage occurs in the ducts connecting your toilet to the sewage system, the immediate result is often a toilet overflowing. The obstruction, typically caused by solid materials that your sink or toilet struggles to process, can quickly escalate to an urgent situation. An overflow not only leads to potential water damage but also can necessitate the costly intervention of water damage restoration services.

Your action, or sometimes inaction, has significant consequences when handling blockage-induced overflows. Resolving these emergencies may involve using a sump pump to efficiently remove excess water, mitigating the immediate threat to your property and precluding long-term damage. Keep in mind:

  • A swift response is crucial to prevent extensive water damage.
  • Adequate maintenance of bathroom facilities can help avert blockages.
  • Understanding the pivotal function of sump pumps is indispensable.

The Role of Tank Mechanisms in Overflows

When functioning correctly, tank mechanisms are crucial to preventing an overflowing toilet. They maintain the water level and ensure the efficient flush of your sewer line. However, if you encounter a fill valve that fails to close or a defective flapper, the continuous water flow into the toilet bowl can precipitate an overflow. Scheduling regular inspections and prompt sump pump repair with reputable plumbing services can safeguard against these issues, securing your home from unexpected plumbing disasters.

While it’s often overlooked, the tank’s float mechanism prevents overflows. Should it malfunction, the water level in the tank may rise too high, leading to an uncontrollable cascade into the bowl and the resultant flooding of your bathroom. Your vigilance in monitoring these components and swift action to enlist plumbing services for repairs can avert the costly outcomes of sewer line emergencies, keeping your home dry and your system functioning optimally.

Act Immediately to Stop the Water Flow

You must act with urgency and discernment amid plumbing emergencies like a toilet overflow. First, take a deep breath to stay calm, then assess the situation. If you spot rising water, quickly reach inside the tank and close the toilet flapper. Should the water persist, find the water supply valve behind the toilet to halt the flow. Feel free to use the main water shut-off if these measures don’t suffice. This decisive action can prevent the need for extensive emergency plumbing services or emergency plumbing repair, especially in cases involving burst pipes.

Stay Calm and Assess the Situation

As you confront the stress of a toilet overflow, your response could be the difference between a quick fix and needing an emergency plumber. Stay composed; your ability to assess the situation could save you from extensive emergency plumbing service costs. Observe whether the overflow is a one-time incident or a recurring nightmarethis discernment can inform the urgency of your need for professional assistance, potentially averting a full-blown plumbing emergency.

If the water level in the bowl seems defiant, resist the panic and focus on the task at hand. Assess if additional water flows into the bowl; if so, immediate action is necessary to prevent further damage. If left unaddressed, an emergency plumbing situation like this may eventually necessitate services such as water heater repair. Begin by shutting off the water supply to curtail the deluge, and then contact an emergency plumbing professional to resolve the underlying issue with proficiency and care.

Quickly Close the Toilet Flapper

If you’re experiencing a toilet overflow emergency, your first move should be to swiftly close the toilet flapper to halt the influx of water directly at its source. This action effectively prevents further contamination from wastewater and is an essential step before reaching out for emergency service. Dealing with uncontrollable water can be overwhelming, but remembering to close the flapper could save you from more severe damage and protect your home from the intrusion of unwanted waste and debris.

Shut Off the Toilet’s Water Supply Valve

Locating and quickly closing the toilet’s water supply valve is a crucial step to limit water damage and the potential growth of mold and bacteria in the event of an overflow. Usually found near the base of your toilet, this valve can be turned clockwise to shut off the water supply, immediately preventing more water from contributing to the overflow. This rapid response is essential, mainly if your bathroom floor isn’t tiled, and water could seep into adjacent rooms or affect materials susceptible to water damage.

While some may resort to a plunger in the initial panic, shutting the water supply first is wise to mitigate overflow risks. If the plunger is required after the immediate threat is averted, it can be used without the added pressure of continuous water flow. This strategic move helps maintain a cleaner environment. It keeps your bathroom ready for use without a delayed shower or the threat of significant plumbing complications that could arise from overwhelming water presence.

Use the Main Water Shut-Off if Necessary

When your toilet continues to overflow despite closing the flapper and the toilet’s water supply valve, your next immediate step is to turn off your home’s main water shut-off valve. This is particularly crucial if the overflow coincides with a power outage risk, as sump pumps or dehumidifiers that assist in coping with the water might malfunction without power. By halting the water supply at the main valve, you give yourself a buffer against water damage until a technician can address the underlying plumbing issue.

Remember, if you detect the scent of gas or suspect a gas leak during a plumbing crisis, avoid using the main water shut-off and immediately exit the premises before contacting emergency services. The main shut-off is usually located near the water meter or where the main water line enters your home; familiarity with this location in advance can save valuable time in a plumbing emergency.

Remove Excess Water Safely and Prevent Damage

Once you’ve stopped the overflow, your next steps are crucial in minimizing damage and restoring safety. Protect your floors and furnishings by barricading water spill areas, efficiently remove pooling toilet water with a wet/dry vacuum, and thoroughly sanitize to prevent the potential health risks of urine and other contaminants. Each action you take not only aids in the immediate restoration of your bathroom but also helps maintain a hygienic living space.

Protect Surrounding Areas From Water Spill

After you’ve stopped the overflow, direct your attention to preventing water damage to your home. Start by safeguarding the ceiling below if your bathroom is on an upper floor; water can seep through floor tiles and damage the plaster or drywall. Absorbent materials like towels and mops can help contain the spill. Still, for carpets, you may have to consider professional carpet cleaning services to prevent mold and preserve the quality of your flooring.

It’s also imperative to immediately remove standing water, especially around electronics and appliances, like your water heater, to prevent further damage and potential hazards. Conduct a background check on local water damage restoration companies as a precaution for future emergencies: knowing you have a trusted professional to call provides peace of mind. It ensures a timely response to protect your home.

Use a Wet/Dry Vacuum for Efficient Water Removal

After successfully stopping the water from flowing, your next step is to remove the accrued water swiftly and thoroughly. Employing a wet/dry vacuum provides an efficient means to do this, allowing you to extract water from the floor and surrounding areas to minimize water damage and the potential for mold growth. This tool is designed to handle such emergencies and is a viable solution to restore your bathroom’s sanitary conditions quickly.

Using a wet/dry vacuum, you can confidently clean up the clean-up process, as it effectively removes water and small debris that may have surfaced during the overflow. The device’s versatility and powerful suction capabilities ensure you address the affected area comprehensively, lessening your long-term safeguarding against moisture that can attract pests or cause structural issues.

Sanitize the Area to Prevent Contamination

After the water has been eliminated, you must move swiftly to sanitize the area, neutralizing the risk of contamination from bacteria and viruses that may have been present in the overflow. Use a disinfectant designed for bathroom clean-up products, which are formulated to handle pathogens commonly found in sewage. Spray or apply the disinfectant according to the label directions, ensuring you cover all affected surfaces, including the toilet exterior, floors, and even walls, if necessary.

Unclog the Toilet Effectively

Dealing with a toilet overflow often requires unclogging the blockage causing the issue. Effective plunging techniques can resolve many clogs, shifting the obstruction and restoring flow. For more stubborn clogs, a toilet auger becomes necessary to navigate pipes and dislodge deep-seated debris. Should you encounter minor blockages, safe, homemade solutions can offer a gentle alternative. Nonetheless, avoid corrosive chemicals that risk damaging your plumbing infrastructure.

Proper Techniques for Using a Plunger

Addressing a toilet overflow efficiently means knowing how to use a plunger correctly. Ensure the plunger you choose has a flange designed especially for toilets to create an effective seal around the opening. Position the plunger over the drain hole and push down gently to remove any trapped air, then use forceful thrusts to dislodge the clog; patience is key here, as it might take several attempts to clear the obstruction.

Managing a toilet plunger with precision underlines the difference between a quick resolution and prolonged frustration. For optimal results, immerse the plunger in water to soften the rubber before use, which ensures better pliability and seal. Once you discern movement in the water level with your plunges indicating the blockage is clearing, flush carefully to test drainage. If the clog persists, repeating this procedure may be necessary, or it could be time to consider using a toilet auger for more stubborn blockages.

When to Use a Toilet Auger

If your plunger fails to resolve the blockage causing your toilet to overflow, it’s time to consider using a toilet auger. This specialized plumbing tool reaches deeper into the toilet drain to dislodge obstructions that a plunger can’t touch. A toilet auger can navigate the intricate bends of the toilet trap and remove clogs caused by foreign objects or built-up waste, providing a more direct and forceful intervention.

You’ll find that a toilet auger, also known as a closet auger, is designed to protect the porcelain in your toilet bowl while efficiently clearing tough clogs. When you encounter a persistent overflow, the use of an auger often becomes the most practical solution.

Implement Preventive Measures for Future Overflows

After addressing the immediate crisis of a toilet overflow, turning your attention to prevention ensures the longevity of your plumbing system. Regular maintenance tips to keep drains clear will serve as your first line of defense while educating household members on what not to flush can significantly reduce the incidence of blockages. Moreover, installing anti-overflow devices offers added protection against future emergencies. Each of these strategies will be detailed further, equipping you with practical measures to safeguard your bathroom against overflow scenarios.

Regular Maintenance Tips to Keep Drains Clear

To maintain clear drains and prevent future toilet overflows, establish a routine of regular maintenance checks. This includes frequently inspecting and clearing the toilet’s siphon jets to ensure unimpeded flow. You should also routinely flush hot water down the toilet to dissolve any potentially accumulating deposits – a simple yet effective strategy to keep your plumbing running smoothly.

Furthermore, cautious use cannot be overstated; only flush waste and toilet paper specifically designed to disintegrate in water. Disposing of items like wipes, cotton swabs, and feminine hygiene products in the trash, rather than the toilet, can drastically reduce the chances of clogs and subsequent overflows.

Install Anti-Overflow Devices for Added Protection

To safeguard your home from the disruptions of toilet overflows, consider the installation of anti-overflow devices as a strategic measure. These devices, which include overflow sensors and toilet shut-off valves, automatically detect rising water levels and shut off the water supply, thereby preventing potential overflows. By integrating these tools into your bathroom’s plumbing system, you provide an additional layer of protection, ensuring peace of mind and mitigating the risks associated with water damage.

Know When to Seek Professional Help

When simple measures fail to stop a toilet overflow, you may face underlying problems beyond basic clogs. Seeking help from a licensed plumber can uncover complex issues and deliver professional solutions. This section helps you recognize when expert intervention is needed and guides you on choosing a reliable emergency plumbing service, highlighting the advantages of specialist assistance.

Identifying Problems Beyond Basic Clogs

When you’re faced with a recurring toilet overflow, it might signal underlying plumbing issues that a simple plunging won’t fix. It’s essential to recognize when problems such as sewer line blockages or a malfunctioning main drain require professional intervention. If persistent overflows accompany unwelcome odors or unusual gurgling sounds from fixtures, these are clear indications that you need the expertise of a licensed plumber who can properly diagnose and address complex plumbing challenges.

At times, structural damages like cracked or collapsed pipes might be the culprit behind a toilet overflow emergency. These situations demand immediate professional assessment to prevent extensive water damage and potential health hazards. You’ll benefit from a plumber’s specialized tools and skills to inspect your pipes with cameras, identify the root of the issue, and perform necessary repairs to restore your bathroom’s plumbing system efficiently and effectively.

Benefits of Consulting a Licensed Plumber

Engaging a licensed plumber provides you with an assurance of quality expertise during a toilet overflow emergency. These professionals bring specialized knowledge and advanced tools that go beyond the capabilities of a standard repair kit, addressing not just the symptom but the source of your plumbing woes. They can quickly diagnose complex blockages or sewer line issues that could be causing the overflows, saving you time and money from repeat DIY fixes that don’t quite hit the mark.

When you employ a licensed plumber, you leverage their exhaustive training and extensive experience, equipping your home with the most effective, long-lasting solutions. The security of knowing the repair adheres to current codes and standards is invaluable; this peace of mind is particularly crucial in emergency situations where precision and swift resolution are paramount.

Frequently Asked Questions

What are the common reasons behind toilet overflows?
Toilet overflows are commonly caused by clogs due to non-flushable items, blocked vent pipes, sewer line issues, or a malfunctioning float mechanism.
How can I quickly stop water from overflowing in my toilet?
To stop an overflowing toilet, quickly turn off the water valve behind the toilet, then remove the tank lid to lift the float ball. This should halt the water flow immediately.
What’s the safest way to clean up after a toilet overflow?
To safely clean up after a toilet overflow, promptly don protective gloves, ventilate the area, use a wet vacuum to remove standing water, disinfect with a bleach solution, and dry all surfaces thoroughly to prevent mold growth.
What are effective techniques for unclogging a toilet?
Effective techniques for unclogging a toilet include using a plunger, a plumber’s snake, hot water with dish soap, or a mixture of baking soda and vinegar followed by hot water. Each method may require repeated application for success.
When should I call a plumber for an overflowing toilet?
Call a plumber for an overflowing toilet if a plunger fails to clear a blockage, water rises, or repeated overflows occur, indicating a potential sewer line issue.

Emergency Gas Line Repair Emergency Gas Line Repair

Emergency Gas Line Repair Guide: Fast Solutions for Urgent Situations

A gas leak can be dangerous, often unnoticed, until it becomes a serious emergency. If you notice a sulfur-like odorusually similar to rotten eggsyou may face a gas leak situation. In this guide, you’ll learn how to recognize the signs of a leak, immediate actions to take during an emergency, and find qualified gas line services for urgent repairs. By understanding these key points, you can act quickly and effectively, ensuring the safety of your household and peace of mind during a crisis.

Recognizing the Signs of a Gas Leak

Common indicators of gas leaks in your home include unusual smells, sounds, or changes in your gas meter readings. You should also be aware of health symptoms related to gas exposure, which can manifest as headaches or respiratory issues. In the following sections, you will learn how to perform basic gas leak detection and when to request emergency plumbing services for effective solutions.

Common Indicators of Gas Leaks in Your Home

One of the most noticeable signs of a gas leak in your home is the presence of an unusual smell, often described as resembling rotten eggs. This distinct odor is added to natural gas to help you detect leaks early. Additionally, you may hear a hissing or whistling sound near gas appliances, indicating that gas is escaping from a damaged gas line. If you experience these signs, you should prioritize gas line repair to prevent further hazards.

It’s also essential to monitor your gas meter readings for unexplained increases in usage, as this can signal a leak. Debris around your gas pipes or appliances can sometimes disrupt connections, leading to potential leaks. If you suspect a gas leak, don’t hesitate to contact an emergency service specializing in gas pipe repair or gas line installation. They can assess the situation promptly and ensure your home remains safe and secure.

Health Symptoms Related to Gas Exposure

If you suspect a natural gas leak, it’s crucial to recognize the potential health symptoms associated with gas exposure. Common issues may include persistent headaches, dizziness, or nausea, often when gas levels exceed safe limits in your home. Should you experience any of these symptoms, it is essential to seek immediate assistance from professionals specializing in emergency gas line repair to ensure the safety of all occupants.

In some cases, prolonged exposure to natural gas can lead to more severe health effects, including respiratory problems or fatigue. If you notice these symptoms alongside other gas leak indicators, such as unusual odors or sounds, do not take any chances.

How to Perform a Basic Gas Leak Detection

To perform a basic gas leak detection, check your gas appliances, like your stove, for any signs of loose connections or corrosion. Pay close attention to any unusual odors, as the smell of rotten eggs often indicates a gas leak. Additionally, you should have a functioning carbon monoxide detector installed in your home, alerting you to harmful gas levels even if they are hard to detect with your senses alone.

Next, monitor your gas meter for unexpected increases in usage. If you notice a spike, it could suggest that gas is escaping somewhere along the line. When performing these checks, always err on the side of caution. If you suspect a leak or notice any of these warning signs, contact professionals for gas line repairs immediately to ensure your safety and your family’s safety.

Immediate Actions to Take During a Gas Emergency

In a gas emergency, your priority is safely evacuating the premises to ensure everyone’s safety. Next, it is crucial to contact emergency services and qualified professionals for rapid leak detection and repair. Avoid actions that could inadvertently ignite a gas leak, such as using appliances or electronic devices. These steps will help you manage the situation effectively and safeguard your home.

Safely Evacuating the Premises

In a gas emergency, your priority should be the safety of everyone in the home. Ensure all individuals evacuate the premises calmly and quickly, avoiding using any appliances that could create sparks, including your furnace or HVAC systems. Once outside, move safely from your home and avoid re-entering until emergency services confirm it is secure.

After evacuating, you should immediately contact qualified professionals for gas line plumbing assistance, as they are trained to deal with these urgent situations. If you know how to locate your gas valve, turn it off to minimize the gas flow, but only if it is safe. Keeping a carbon monoxide detector in your home will help you stay aware of dangerous levels of any byproducts in the event of a leak, providing further protection as you wait for expert help.

Contacting Emergency Services and Professionals

When you suspect gas line leaks in your home, contacting emergency services is your top priority. These professionals are trained to handle dangerous situations involving sulfur odors and can quickly assess the pressure levels in your gas lines to determine if there is a leak. They possess the expertise to respond rapidly, ensuring safety while initiating emergency repair procedures to mitigate hazards.

In addition to calling emergency services, contact licensed plumbing professionals specializing in gas line issues. Their knowledge and tools are essential for effectively locating and repairing leaks. Whether a subtle odor indicates a minor blowout or a significant leak, these experts are equipped to provide reliable solutions and restore safety to your environment.

Avoiding Actions That Could Ignite Gas

In a gas emergency, avoiding any actions that might ignite a gas leak is crucial, as this significantly increases the risk of an explosion or fire. Do not turn on or off any electrical devices, including lights or appliances, since even a tiny spark can trigger a dangerous situation. Additionally, avoid using matches or lighters, as these can create enough heat to ignite gas vapors, so keep these items away until professionals handle the situation.

Instead, prioritize your safety by evacuating the area without delay. Once outside, stay at a safe distance and ensure everyone is accounted for. This approach minimizes risk and allows you to calmly contact emergency plumbing services to facilitate a professional response to the gas leak.

Common Causes of Gas Line Issues

Gas line issues can arise from several factors that compromise safety and function. Aging or corroded gas pipelines may develop leaks over time, while damage from natural disasters or accidental impacts can cause significant hazards. Also, faulty installation or poor maintenance practices can lead to gas leaks, increasing the need for professional repair services. Understanding these causes will help you identify potential risks and respond promptly.

Aging or Corroded Gas Pipelines

Aging or corroded gas pipelines pose serious safety risks in your home. Environmental factors can cause these pipelines to deteriorate over time, leading to weak spots and potential leaks. It is crucial to regularly inspect your gas lines and seek professional assistance if you notice any signs of wear or corrosion, as immediate action can prevent hazardous situations and the need for emergency gas line repairs.

Additionally, if your home has older gas systems, the risk of leaks increases significantly. Corrosion can occur from exposure to moisture or chemicals in the soil, which may not be apparent until a significant problem arises.

Damage From Natural Disasters or Accidental Impact

Natural disasters such as earthquakes, floods, or severe storms can damage gas lines, leading to significant safety hazards in your home. These events can displace or fracture gas pipelines, resulting in leaks that require immediate attention. If you experience a natural disaster, it’s essential to assess your property and look for any signs of damage that could necessitate emergency gas line repair.

Accidental impacts, such as vehicle collisions or heavy machinery work near your property, can also compromise the integrity of gas lines. These situations can rupture or create weak spots within the pipelines, increasing the risk of gas leaks. If you notice any unusual smells, sounds, or changes in your gas meter readings after such incidents, do not hesitate to contact a qualified professional for emergency repairs to ensure safety and prevent hazardous situations.

Faulty Installation or Poor Maintenance Practices

Faulty installation of gas lines can create dangerous situations that may lead to leaks or other serious hazards. If the pipes are not correctly fitted or the wrong materials are used during installation, you could face significant risks. This scenario underscores the importance of hiring licensed professionals specializing in gas line installation, ensuring everything is set up according to safety codes and standards.

In addition to improper installation, poor maintenance practices can exacerbate gas line issues. Minor problems can escalate into significant leaks without regular inspections and prompt repairs, putting your home and family at risk. You should prioritize routine maintenance, which includes checking connections and monitoring for corrosion, as it plays a vital role in preventing emergency gas line repairs and maintaining a safe environment.

Fast Solutions for Urgent Gas Line Repairs

Utilizing emergency gas shut-off valves is the first step in managing a gas leak safely. You should also consider temporary measures to contain a leak until professional help arrives. Finally, scheduling immediate repair services with qualified experts ensures the issue is resolved effectively. These strategies will guide you through urgent situations and reinforce the safety of your home.

Utilizing Emergency Gas Shut-Off Valves

Utilizing emergency gas shut-off valves is crucial for immediately reducing the risk of fire or explosion in an emergency gas leak situation. You should locate these valves in your home, typically near the gas meter or where the gas line enters the house. By knowing how to operate these valves ahead of time, you can quickly turn off the gas supply, minimizing the potential dangers associated with a leak.

After you have secured the gas supply using the shut-off valve, it’s vital to contact professionals for gas line repairs as soon as possible. They have the expertise to assess the situation and perform the necessary repairs to restore safety in your home.

Temporary Measures to Contain a Leak

If you suspect a gas leak, one effective temporary measure to contain it is to seal off the area where you detect the leak. Use duct tape or plastic sheeting to cover any accessible openings, minimizing gas flow into living spaces until professional help arrives. Additionally, turning off the main gas valve, if it is safe, will significantly reduce the risk and limit the amount of gas that may escape.

While waiting for emergency services, ensure all windows and doors are opened to enhance ventilation. This helps disperse any gas buildup in the area, reducing the risk of ignition. Staying informed about these temporary containment strategies can keep you and your family safer until licensed professionals can address the leak effectively.

Scheduling Immediate Professional Repair Services

When you suspect a gas leak, scheduling immediate professional repair services is crucial for ensuring your safety. Contact licensed gas line specialists who can arrive promptly and assess the situation. Their experience allows them to quickly identify the source of the leak and implement effective repairs, giving you peace of mind during a stressful time.

Additionally, when you contact a professional service, be prepared to provide details about the signs you observed, such as unusual smells or sounds. This information can help technicians arrive with the right tools and knowledge to address your specific concerns effectively.

Selecting a Qualified Gas Line Repair Specialist

When selecting a qualified gas line repair specialist, verify licenses and certifications to ensure they meet industry standards. Consider asking potential companies specific questions about their experience with emergencies. Understanding their track record in urgent scenarios will help you gauge their ability to effectively handle your gas line repair needs. These steps are crucial for ensuring your safety and peace of mind.

Verifying Licenses and Certifications

Verifying a gas line repair specialist’s licenses and certifications is crucial when selecting them. This step ensures they have the necessary training and qualifications to safely and effectively perform gas line repairs. You can check local regulations to understand the specific licensing requirements in your area, which can help you identify professionals who are compliant with safety standards.

Also, ask for proof of insurance when considering a gas line repair service. A licensed and insured technician protects you from financial liability in case of accidents or damages during the repair process.

Questions to Ask Potential Repair Companies

When selecting a gas line repair specialist, ask about their experience with emergency gas line situations. Inquire how long they have been in the industry and whether they have handled repairs similar to yours. This information can reassure you that they have the necessary skills and knowledge to address your urgent needs effectively.

Additionally, potential repair companies should be asked about their response times and availability for emergency calls. Understanding how quickly they can arrive at your location is vital, as gas line issues require immediate attention. Prompt response times can prevent further hazards and ensure your home remains safe, making this an essential factor in your decision-making process.

Importance of Experience With Emergency Situations

When selecting a gas line repair specialist, the importance of experience in emergency situations cannot be overstated. Professionals with a proven track record in managing urgent gas line issues are more likely to respond swiftly and effectively, minimizing risks to your safety. Their hands-on experience equips them with the skills to identify problems quickly and implement safe solutions, which is critical when dealing with potentially hazardous gas leaks.

Preventing Future Gas Emergencies

To safeguard your home from potential gas emergencies, consider implementing regular inspection and maintenance tips, upgrading to safer gas line materials, and installing gas leak detectors. These proactive measures ensure that you promptly identify issues and enhance safety, protecting your family from the risks associated with gas leaks. By prioritizing these strategies, you can significantly reduce the likelihood of future emergencies.

Regular Inspection and Maintenance Tips

You must schedule regular inspections of your gas lines and appliances to prevent future gas emergencies. These inspections help identify potential issues before they escalate into serious problems, ensuring your system operates safely and efficiently. By engaging a qualified technician to check for signs of wear, corrosion, or loose connections, you can safeguard your home and create a proactive maintenance routine that gives you peace of mind.

Clear access to your gas lines and appliances also facilitates timely repairs and inspections. Keep the area around gas meters and connections free from debris or obstacles, allowing professionals to perform thorough assessments when needed.

Upgrading to Safer Gas Line Materials

Upgrading to safer gas line materials can significantly reduce the risk of leaks and enhance the overall safety of your home. Consider installing flexible, corrosion-resistant polyethylene pipes, which offer better durability than traditional metal options. These materials decrease the chances of leaks and withstand environmental factors that can cause damage, ensuring your gas system remains reliable over time.

Additionally, utilizing modern fittings and connectors made from high-quality materials can further secure your gas lines against potential leaks. When you work with licensed professionals for installation, they can recommend the best materials suited to your specific needs.

Installing Gas Leak Detectors in Your Home

Installing gas leak detectors in your home offers a significant layer of protection, helping you identify gas leaks before they become serious hazards. Make sure to place these devices near gas appliances, basements, or anywhere gas lines are present, as this optimizes their effectiveness in detecting leaks. By investing in reliable gas leak detectors, you gain peace of mind knowing that you have an early warning system in place should a gas leak occur.

When selecting a gas leak detector, choose a model that meets safety standards and has a clear alarm system for easy notification. Regularly test your detectors to ensure they function correctly, and replace batteries as needed to maintain their efficacy.

Conclusion

Understanding the importance of emergency gas line repair is crucial for ensuring the safety of your home and loved ones. Recognizing the signs of a gas leak and knowing how to respond quickly can prevent hazardous situations from escalating. You can significantly reduce risks and protect your household by implementing regular maintenance, utilizing modern materials, and installing gas leak detectors. Prioritize your safety by taking proactive measures and being prepared for urgent gas line issues.

Frequently Asked Questions

How do you identify signs of a potential gas leak?
Identifying potential gas leaks involves detecting a sulfur-like odor, hearing a hissing sound near gas lines, and observing a white cloud or dust near a gas source. If you notice these signs, acting immediately for safety is critical.
What steps should be taken immediately upon suspecting a gas leak?
Upon suspecting a gas leak, immediately evacuate the area, avoid causing sparks by not using electronics or switches, and call emergency services once safely outside.
Are there safe DIY repairs for a minor gas line issue?
For safety reasons, it’s best to leave gas line repairs to licensed professionals due to the high risk of leaks and potential hazards.
How do I choose a qualified emergency gas line repair service?
Selecting a qualified emergency gas line repair service requires verifying licensure, insurance, and positive customer reviews to ensure safety and proficiency.
What are the long-term risks of neglecting a gas line problem?
Neglecting gas line issues can lead to hazardous leaks, fires, severe health risks, and costly structural damages, endangering occupants’safety and incurring significant repair expenses.

Water Heater Emergency Water Heater Emergency

Water Heater Emergency? Quick Repair Tips

A water heater malfunction can bring your daily routine to a screeching halt. This article offers quick fixes for your water heater emergency, guiding you through steps like safely shutting off the power and water supply and draining the unit to mitigate damage. You’ll learn to troubleshoot common issues and perform basic repairs to restore hot water. More importantly, we’ll help you discern when it’s time to call in a professional plumber. Armed with this knowledge, you can address the immediate crisis and minimize disruption in your home.

Assess the Situation and Identify Water Heater Problems

When faced with a water heater issue, swift action can prevent extensive damage. Begin by scouring the area for signs of leakage around your water heater. Water pooling at the base could signal urgent repairs. Subsequently, verify the status of the pilot light; a dark pilot light necessitates a prompt ignition. These steps are pivotal in diagnosing water heater malfunctions and steering toward effective solutions.

Look for Visible Leaks Around the Water Heater Unit

If you observe moisture or a pool of water around your water heater, it’s essential to address this promptly to avoid potential water damage or mold growth. A visible leak suggests a need for immediate attention; perhaps it’s a faulty valve or a crack in the tank. Recognizing these signs early on can save you from a more severe water heater failure and costly repairs.

By systematically checking for wet spots or drips on the pipes leading to and from the unit, you’ll be able to pinpoint the source of the leak. It’s prudent to take note of the following during your inspection:

  • Examine the cold water inlet and hot water outlet connections.
  • Inspect the pressure relief valve; an unusual trickle could indicate a problem.
  • Survey the bottom of the tank where subtle leakage often goes unnoticed.

Remember, even a minor leak can hint at underlying issues with your water heater. Taking swift action mitigates water waste and spares you from the headache of emergency repairs down the road. If you find any leaks, document them and consult a professional for an accurate diagnosis and a lasting fix.

Check if the Pilot Light Is Lit or Turned Off

A glance at the pilot light could reveal if your water heater has ceased functioning effectively. Should this light be extinguished, your unit won’t heat water, as it’s essential for ignition. This common predicament might be remedied by simply reigniting the pilot light following the manufacturer’s instructions. Nevertheless, if relighting efforts fail or the light frequently snuffs out, this could indicate a more severe issue, such as a faulty thermocouple or a clogged pilot orifice.

Promptly addressing a pilot light that won’t stay lit is critical to restoring your water heater’s functionality and ensuring comfort. Follow these steps if you’re comfortable attempting to light the pilot on your own:

  • Locate the instructions on your water heater, which are usually found on the tank itself.
  • Turn off the gas and wait as recommended to clear residual gas fumes.
  • Follow the instructions to relight the pilot, paying close attention to safety precautions.

Nevertheless, engaging with a professional is essential if you need clarification, are uncomfortable dealing with gas appliances, or if the pilot light issue persists after several attempts. An expert can assess and resolve underlying problems that are not immediately apparent, ensuring your safety and the system’s proper functioning.

Safely Turn Off the Power and Water Supply to the Heater

In a water heater emergency, taking immediate safety measures is crucial. You must find and swiftly switch off the gas or electric supply to mitigate any risks. Similarly, closing the cold water inlet valve will halt the water flow to your unit, preventing the potential worsening of the issue. In the forthcoming discussions, you’ll learn the necessary steps to securely power down your heater and manage the cold water supplycritical knowledge for any urgent maintenance situation.

Find and Switch Off the Gas or Electric Supply

Your safety is the top priority in a water heater emergency. You should promptly locate and turn off the heater’s energy source, which means either shutting down the electricity at the breaker box or closing the gas valve. This step is crucial to prevent potential hazards like gas leaks or electrical issues while the water heater is being inspected or repaired.

For those with a gas water heater, the gas shutoff valve is typically found near the base of the water tank; turning it to the ‘off’ position will cut the fuel supply. On the other hand, electric water heater owners should go to their home’s circuit breaker panel and switch off the breaker designated for the water heater. Taking this action helps ensure a safer environment if you need to investigate issues or if a professional is on their way to assist with repairs.

Close the Cold Water Inlet Valve to Stop Water Flow

Should you encounter an emergency with a water heater, it’s essential to close the cold water inlet valve promptly. This action will cease water flow into your heater, preventing further leakage or damage. You’ll typically find this valve above the water heater; turning it clockwise will secure it in the closed position. Prioritize this step to control the situation until a professional can evaluate and address the issue.

By shutting the cold water inlet valve, you’re taking a critical step in damage control, stemming the tide that can lead to more serious issues like flooding or structural harm. After turning off the valve, you’ve effectively contained the emergency, allowing you to assess the next steps for repair safely. Keep in mind that it’s wise to consult with a professional immediately after performing this stopgap measure to ensure a complete and safe resolution to your water heater’s malfunction.

Drain the Water Heater to Prevent Further Damage

In a water heater emergency, efficiently draining your unit can avert further complications. You’ll need to securely attach a hose to the drain valve, ensuring a controlled water evacuation. Simultaneously, it’s vital to safely open the pressure relief valve to release any built-up pressure. Addressing these pivotal elements swiftly can prevent damage while setting the stage for a successful repair.

Properly Attach a Hose to the Drain Valve for Draining

To properly drain your water heater in an emergency, you must securely attach a hose to the drain valvethis is crucial to prevent water from spilling uncontrollably, which could exacerbate water damage. Ensure the hose is fastened tightly and leads to an appropriate drain or an exterior area where water can safely discharge. If you lack a floor drain, consider routing the hose out through a door or into a large bucket, though you should be ready to empty the bucket frequently to keep the area dry.

Once attached and you are certain that the hose has a clear path for the water to exit, proceed to open the drain valve. This operation requires care; slowly turn the valve to avoid any abrupt hot water release that could pose a safety risk. As the water heater empties, it relieves pressure and reduces the risk of further damage to the unit or your property, a preventative measure that could save you time and expense in the long run.

Safely Open the Pressure Relief Valve to Release Pressure

When dealing with a water heater problem, it’s imperative to safely open the pressure relief valve before attempting to drain the tank. This critical step ensures that pressure within the tank is released, reducing the risk of injury or damage during draining. As you approach this task, wear protective gear, such as gloves and eye protection, to guard against hot water or steam that may escape when the valve is opened.

Operate the pressure relief valve cautiously; slowly lift the lever until you hear a hissing sound indicating the pressure release. Verifying the valve is functioning correctly is essential, as a malfunctioning pressure relief valve can be a safety hazard. Should any irregularities arise during this procedure, you are advised to suspend your efforts and contact a professional, prioritizing your safety and the integrity of the water heater system.

Troubleshoot Common Issues With Your Water Heater

Confronting a water heater emergency necessitates efficient troubleshooting. If you encounter excessively hot or cold water, fine-tuning the thermostat settings may quickly rectify the issue. Similarly, sediment accumulation within the tank can impair functionality, necessitating a thorough cleaning. These topics will guide you through adjusting your system’s temperature and maintaining its cleanliness, ensuring optimal performance and longevity.

Adjust the Thermostat Settings if the Water Is Too Hot or Cold

If you’re experiencing water that is too hot or cold, check your water heater’s thermostat firstthis is a common cause of temperature inconsistency. A simple adjustment could restore the desired warmth within your home. Ensure the thermostat is set to the recommended temperature, usually around 120 degrees Fahrenheit, to balance comfort with energy efficiency.

If the temperature swing is drastic or the water remains lukewarm despite adjusting the thermostat, you might be dealing with a faulty thermostat or heating element. In these cases, contacting a professional who can accurately diagnose and remedy the issue is crucial. This will restore your water heater’s optimal functioning and avert potential hazards related to incorrect temperature settings.

Inspect the Tank for Sediment Buildup and Clean if Necessary

If you discover a reduction in your water heater’s efficiency during routine maintenance, sediment buildup in the tank could be the culprit. An accumulation of minerals and debris forms over time, especially in areas with hard water, which can insulate the bottom of the tank where the heating element is located, hindering heat transfer and causing your unit to work harder. Cleaning out this sediment is crucial, as it not only restores efficiency but also extends the lifespan of your heater.

If you hear rumbling or popping noises emanating from your water heater, this, too, may signal the presence of sediment. Flushing the tank annually is a preventative practice that can help eliminate this buildup before it escalates into a concerning issue. Engaging in this simple yet effective maintenance procedure or having a professional undertake it ensures your unit’s performance remains consistent and your hot water supply remains reliable.

Perform Basic Repairs to Restore Hot Water Quickly

Certain basic repairs can restore your hot water without delay in the event of a water heater malfunction. For electric heaters, replacing a faulty heating element is a common remedy. Additionally, a system reset, achieved by pressing the reset button on the unit, might be all that’s needed. These practical steps are vital to swiftly recovering from water heater setbacks.

Replace a Faulty Heating Element for Electric Heaters

If your electric water heater is producing lukewarm or no hot water at all, a faulty heating element could be the culprit. Replacing the heating element is a repair you can undertake if you’re familiar with electrical systems and adhere to safety protocols. Ensure the power supply is disconnected to safely navigate this repair, as working with electric components demands caution and precise handling.

Once you’ve secured the necessary replacement part, consult your water heater’s manual for specifications and guidance. You’ll need to access the unit’s panels, remove the faulty element, and install the new one. Then, reconnect the power and check to see if the problem has been resolved. If heated water flows again, you’ll know you’ve successfully restored a critical component of your home’s comfort system.

Reset the System Using the Reset Button on the Unit

If your water heater unexpectedly stops providing hot water, initiating a system reset can often be a swift and effective solution. Locate the reset button behind a panel on your unit and press it. This can help troubleshoot minor malfunctions that may have tripped the unit’s high-temperature cutoff. This simple step could be all required to restore service, efficiently addressing one of the most common issues you might face with your appliance.

After pressing the reset button, listen for a click indicating the system has been reset, and wait to see if your water heater resumes regular operation. Should your water heater fail to restart or you encounter the same problem shortly after, this could suggest more intricate issues, signaling it might be time to seek the expertise of a qualified technician to ensure your device is safely and effectively mended.

Know When to Call a Professional Plumber for Help

As you grapple with a water heater emergency, understanding when to seek expert plumbing assistance is essential. Tackling some quick repairs may be within your skill set, but recognizing the signs that necessitate calling a professional can save time and prevent further damage. Choose a reputable local plumber who can respond to emergency repairs promptly. The upcoming sections will guide you through the indicators for professional help and tips for selecting a trustworthy plumber, emphasizing practical insights for rapid resolution and peace of mind.

Recognize Signs That Require Expert Plumbing Assistance

When your attempts at troubleshooting fail, and the water heater symptoms persistsuch as inconsistent water temperatures, unusual noises, or repeated pilot light failuresit’s time to call in a plumbing expert. A professional plumber is equipped to handle complex issues that go beyond basic repairs, ensuring that the intricate system of your water heater is thoroughly examined and correctly fixed, safeguarding your home from further water damage and costly energy inefficiency.

If you face a water heater leak that refuses to abate or if the unit shows signs of corrosion and water discoloration, these are clear indicators that professional plumbing assistance is required. Engaging a plumber immediately can prevent the situation from escalating into a full-blown emergency, ensuring a properly functioning water heater and the peace of mind that comes with expert intervention.

Choose a Reputable Local Plumber for Emergency Repairs

Choosing a reputable local plumber for emergency repairs is pivotal when facing a water heater crisis. Look for plumbers with stellar reviews and a track record of fast, reliable service. Their prompt arrival and adept resolution are central to protecting your home from water damage and restoring your comfort without delay. Above all, a professional with notable expertise ensures that repairs are thorough and durable, offering more than just a quick fix.

As you select a plumber, verify their certifications and ensure they are fully insured to safeguard against any mishaps during the repair process. Here’s a straightforward list to help you assess potential service providers:

  • Review the plumber’s customer testimonials and ratings.
  • Check for proper licensing and insurance coverage.
  • Confirm their availability to respond to emergencies.

Your chosen plumber should be skilled and transparent about the services and costs involved. An up-front pricing policy and a clear explanation of the repairs needed reflect their honesty and reliability, assisting you in making an informed decision in a stressful scenario.

Conclusion

Acting swiftly in a water heater emergency minimizes damage and restores functionality. Accurate recognition of telltale signs, such as leaks or extinguished pilot lights, and knowledge of basic repairs can save both time and resources. However, when advanced issues arise, engaging with a skilled, well-reviewed plumber who can guarantee a dependable solution is prudent. Understanding these critical steps underscores the necessity of being prepared to handle water heater complications efficiently, ensuring your home’s safety and warmth.

Frequently Asked Questions

How do I identify the problem with my water heater?
To diagnose water heater issues, check for leaks, pilot light failures, strange noises, or inconsistent water temperatures, pinpointing common malfunctions.
What steps should I take to turn off my water heater safely?
To turn off your water heater safely, start by powering down the unit, shutting off the circuit breaker for electric heaters or the gas supply for gas models, and finally, closing the water valves.
Why is draining the water heater important in an emergency?
Draining a water heater in emergencies prevents damage, reduces the risk of scalding, tackles contamination, and conserves clean water for essential use.
Which common water heater issues can I troubleshoot myself?
You can often troubleshoot common water heater issues by relighting a pilot light, adjusting the thermostat, or checking circuit breakers.
When should I call a professional plumber for water heater repairs?
Call a professional plumber for water heater repairs if you notice inconsistent water temperatures, leaks, discolored water, strange noises, or a complete lack of hot water.

Home Pipe Maintenance: Keeping Your System Flowing

Are you familiar with the feeling of sinking when water pressure dwindles or when an unexpected leak surfaces? This blog will arm you with effective DIY pipe inspection techniques for homeowners, ensuring you keep a vigilant eye on your home’s plumbing health. Delve into practical strategies for identifying visible damage and understanding hidden pipe issues. You’ll understand routine maintenance’s importance and discern when to call in the experts. By investing your time here, you’ll develop the skills to prevent costly repairs and maintain a robust plumbing system.

Understanding Your Home’s Plumbing System

As you delve into DIY pipe inspection in your home, a foundational understanding of the plumbing system is essential. The key initial steps are identifying the main water supply lines and locating shut-off valves. These components are critical in managing your home’s water flow and addressing potential issues quickly. The upcoming sections will guide you through pinpointing these elements, equipping you with the knowledge to maintain and inspect your plumbing effectively.

Identify the Main Water Supply Lines

Locating your home’s main water supply lines is a practical first step in DIY pipe inspection. These lines are the arterial highways delivering water to your entire dwelling. Becoming familiar with their placement allows you to swiftly control the water flow in case of a leak or when maintenance is needed. Remember, these supply lines usually feature robust materials capable of withstanding high pressure and are often located in basements, crawl spaces, or utility areas. Understanding how to spot and access the main shut-off valve is vital: this single control can halt water to your entire house. Becoming proficient in locating this valve before an emergency arises will ensure that you can act quickly to prevent widespread damage. The main shut-off valve is often found near the point where the main water line enters the home or near the water meter outside:

  • Check near the perimeter of your house, where water supply lines typically enter.
  • Inspect your basement or crawl space for a large valve on a prominent pipe.
  • If your home is on a slab, the valve may be near your water heater or within a garage.
  • The shut-off might be located in a utility closet or outside an access panel for homes with no basement.

Locate Shut-Off Valves Throughout the House

Beyond the main shut-off valve, your home’s plumbing network likely includes individual shut-off valves at various fixtures; these are your first defense against localized leaks or issues. Familiarize yourself with the shut-off valves for sinks, toilets, and water-using appliances like washing machines and dishwashers. Their proper use can prevent a small problem from escalating, saving you time and the expense of repairs. It’s a simple step: locate them, test them to ensure they turn quickly and teach family members their locations and usage.

Create a diagram with the shut-off valve locations for systematic inspection and maintenance. This map serves as a quick reference during emergencies, streamlining your response and minimizing the risk of water damage. Below is a suggested list to help you start:

  • Look for valves under kitchen and bathroom sinks that control the hot and cold water supply.
  • Behind toilets, typically where the water line meets the wall or floor.
  • Near appliances like your water heater, washing machine, and dishwasher.
  • Don’t overlook outdoor fixtures, which should have valves inside your home.

Periodically check these valves to ensure their functionality, as they can seize up over time. This proactive approach will give you confidence and control when performing DIY pipe inspections and routine plumbing maintenance.

Gathering Essential Tools for Inspection

Embarking on a successful DIY pipe inspection requires a reasonable selection of plumbing tools and safety equipment. As you assemble basic supplies, consider the significance of each tool’s role in the inspection process. Ensuring proper safety equipment is on hand safeguards your well-being and brings a professional edge to your DIY endeavor. The ensuing sections offer insights into the tools and gear essential for your plumbing inspection tasks.

Assemble Basic Plumbing Tools Needed

When you prepare for a DIY pipe inspection, having the right tools is not only helpful but also imperative for a thorough and safe procedure. You’ll need a quality pipe wrench to tackle stubborn fittings and a plumber’s snake to clear any obstructions you might encounter. Equipping yourself with these basic necessities enables you to confidently handle common plumbing tasks and swiftly address any complications that may arise during your inspection.

Moreover, having a reliable flashlight or a headlamp provides visibility in those darker, hard-to-reach spaces, ensuring no issue goes unnoticed. As you engage with your home plumbing system, remember that a well-chosen toolkit empowers you to diagnose and potentially remedy minor problems before they escalate to costly emergencies. Therefore, equip yourself thoughtfully and embrace the role of a savvy and prepared homeowner.

Ensure Proper Safety Equipment Is on Hand

When undertaking a DIY pipe inspection, your safety should be as important as the task at hand. You’ll need sturdy gloves to protect your hands from sharp edges and grime and safety goggles to guard against any unexpected spray or debris. These precautions are essential in preventing injuries and enabling you to work more effectively within the confines of your home’s plumbing system.

Additionally, be sure to equip yourself with non-conductive tools if you’ll be working near any electrical sources or appliances, as water and electricity are dangerous. With safety gear in place, you can focus on the job without undue concern for personal harm, thereby ensuring a safer and more efficient DIY plumbing experience.

Inspecting Pipes for Visible Damage

Turning your focus to visible damage can prevent minor plumbing issues from escalating. Inspect leak-prone areas around fixtures and joints, and stay vigilant for signs of corrosion or wear on your pipes. These inspections can inform you of the structural integrity of your plumbing system and guide you in preventative maintenance. By examining these areas, you are taking a proactive stance to ensure the longevity of your home’s plumbing.

Check for Leaks Around Fixtures and Joints

You should vigilantly examine where leaks commonly occur, particularly around fixtures such as faucets and pipe joints. Visual cues, like moisture or discoloration, often indicate leakage. If you detect any dampness or anomalies on your fixtures or pipes, immediate attention is warranted, preventing the problem from worsening and causing extensive damage to your home.

During your inspection, carefully apply pressure to suspect pipe joints and observe for any give or seepage, which could signal a compromised seal. This practical tactic helps you to spot issues that might only be evident with closer scrutiny. By identifying these early signs of pipe deterioration or damage, you empower yourself to address them promptly, safeguarding your home’s structural integrity and avoiding costly repairs.

Look for Signs of Corrosion or Wear

During your pipe inspection, pay special attention to discoloration, puckering, or flaking on the pipe surfaces. These marks can indicate corrosion, a common issue that arises from chemical reactions between the pipes and water or exposure to corrosive household products. In the undesirable event that you encounter such wear, it’s essential to consider the age of your plumbing and the material of your pipes. This gestalt influences the urgency and type of repair required.

If you observe warping or bulging in your pipes, this may reflect internal damage or persistent pressure issues. Regular monitoring for these indicators is wise, as they can lead to leaks and bursts, offering a forewarning to take action. Dealing with these matters promptly spares you from the disruption and costs of extensive water damage repairsa proactive approach places you ahead in maintaining your home’s plumbing health.

Detecting Hidden Pipe Issues

Moving beyond the visible, detecting hidden issues in your home’s plumbing is a nuanced skill. Leveraging your water meter can reveal leaks that would otherwise go unnoticed, a pragmatic approach in preemptive maintenance. Furthermore, attuning your ear to the acoustic signals of your pipes may alert you to anomalies that require your attention. These techniques provide invaluable insights into the health of your plumbing system, facilitating timely interventions.

Use a Water Meter to Spot Unseen Leaks

When dealing with the complexity of residential plumbing, the water meter is your unsung ally in identifying covert leaks. Observing the meter when all water use is suspended lets you detect unexpected fluctuations that signify leakage. This effective strategy allows you to pinpoint water loss, a critical step that leads to early resolution and prevents substantial waste and increased bills.

You may be concerned about stealthy leaks that bypass regular inspections. In such cases, record the water meter reading, refrain from using water for a few hours, and then recheck the reading. If you notice a discrepancy, this is a clear signal that a hidden leak exists within your home’s plumbing system, prompting a more detailed investigation.

Listen for Unusual Sounds in Pipes

As you venture deeper into DIY pipe inspections, heed the acoustic nuances your home’s plumbing emits. Unexpected noises such as whistling, banging, or hissing can betray the presence of air in the pipes, high water pressure, or a concealed leak. Recognizing these sounds early allows you to address potential issues before they exacerbate, reflecting diligent homeownership and preventive maintenance.

Attentiveness to unusual sounds originating from your walls or floors can help you uncover hidden problems within your plumbing system. For instance, a constant ticking or dripping sound when no water is used in the house might signify a leak in the pipes. Your proactive listening can lead to early detection, saving you from the inconvenience and cost of major repairs.

Maintaining Drainage Systems Effectively

Maintaining robust drainage systems is crucial in DIY pipe inspection and ensures the longevity of your home’s plumbing. Tackling debris in gutters and downspouts prevents blockages that can lead to water damage while keeping indoor drains clear to avoid disruptive clogs. This section helps you understand practical steps to protect and optimize your drainage, from the roof down to the sewer lines, maintaining a seamless flow throughout your home.

Clear Debris From Gutters and Downspouts

Ensuring your gutters and downspouts are debris-free is critical for maintaining the integrity of your home’s exterior drainage system. These channels, designed to direct water away from your foundation, can become clogged with leaves, twigs, and other detritus, leading to overflows that may cause water damage. Regular cleaning, especially after storms or during fall when leaves drop, prevents blockages and protects your property.

When you’re inspecting your gutters and downspouts, look for signs of sagging or separation from the house: these are indicators that repairs or reinforcement may be necessary. To keep them functioning optimally:

  • Use a sturdy ladder to reach your gutters safely.
  • Wear gloves to remove debris by hand or with a gutter scoop.
  • Flush the gutters and downspouts with a hose to ensure water flows freely.

Mindful attention to these areas prolongs their lifespan and reduces the risk of costly water-related repairs to your home’s structure and foundation. Regularly clearing these pathways allows you to manage your property’s drainage confidently, knowing you’re taking proactive steps to safeguard against water damage.

Keep Indoor Drains Free of Clogs

Keeping your indoor drains free of clogs is a pivotal aspect of home maintenance that you can confidently manage. Regular checks for buildup and proactive clearing of materials such as hair, soap scum, and grease help maintain the unhindered flow of water. A simple routine that includes pouring boiling water down the drain weekly or using a mixture of baking soda and vinegar can dissolve minor blockages and prevent plumbing headaches.

Take note of slow-draining sinks and tubs, as these scenarios often signal an impending clog. Addressing these signs early can spare you from more extensive and disruptive repairs. For instance, employing a plunger or a plumber’s snake can be an effective method for dislodging obstructions, allowing you to restore full functionality to your drainage system without needing costly intervention.

Knowing When to Seek Professional Help

While embracing the DIY spirit can serve you well in basic pipe inspection and maintenance, recognizing problems that transcend your repair capabilities is crucial. Finding a qualified plumber for assistance is the next practical step if you encounter complex issues. This section will address when it’s time to transition from a do-it-yourself approach to professional intervention and how to select a reliable plumbing expert to efficiently address your home’s needs.

Recognize Problems Beyond DIY Repair

Suppose you’re delving into DIY pipe inspection and encounter shallow water pressure, recurrent clogs in multiple drains, or water stains on walls and ceilings. In that case, these red flags signal problems that may exceed a standard fix. These persistent issues generally hint at systemic troubles within your pipes, potentially demanding advanced techniques and equipment you might not possess. Acknowledging the limits of your DIY expertise is not a defeat; it’s a strategic decision to preserve your home’s plumbing integrity and avoid accidental worsening of the issue.

Partnering with a professional plumber becomes essential when you observe signs like persistent sewer backups, water pooling in unexpected places, or the ominous sounds of water running when no taps are open. Such symptoms often indicate complex problems within your home’s plumbing networkfor example, sewer line defects or hidden pipe ruptures. When safety or the complexity of remedial actions makes DIY inspection untenable, seeking professional assistance ensures that comprehensive techniques, such as video pipe inspection or hydraulic tests, are deployed to effectively diagnose and remedy the underlying causes.

Find a Qualified Plumber for Assistance

When you’re faced with plumbing complexities that defy a straightforward DIY approach, securing the services of a qualified plumber is your most prudent course of action. Look for a licensed professional with a solid reputation and the necessary experience to handle intricate plumbing issues. An adept plumber will provide swift resolutions and ensure that any repairs comply with local codes and standards, ultimately prolonging the lifespan and efficiency of your home’s plumbing system.

To select a skilled plumber, solicit recommendations from friends or investigate online reviews to gauge customer satisfaction. You want a plumbing expert who is not only technically proficient but also communicates clearly about the issues and proposed solutions. Once you engage a plumber, observe their assessment methodology and tools usedthis can provide you with valuable insights that may be helpful in your ongoing DIY maintenance efforts.

Conclusion

Actively inspecting your home’s plumbing through DIY methods is an invaluable preventative maintenance, reducing the risk of costly future repairs. By becoming familiar with your main water supply lines and shut-off valves and recognizing signs of damage, you empower yourself to take swift, informed action when needed. Regularly employing simple tools and techniques to check for leaks and clogs aids in maintaining the efficiency and longevity of your plumbing system. Understanding when to engage a professional plumber ensures that more complex issues are addressed properly, safeguarding your home’s plumbing health.

Frequently Asked Questions

How can I differentiate between pipe materials in my plumbing system?
Distinguish pipe materials in your plumbing by observing color, weight, and surface texture and checking for markings often imprinted by manufacturers indicating material types, such as PVC, PEX, or copper.
What tools are necessary for a basic home pipe inspection?
For a rudimentary home pipe inspection, you will require a flashlight, an adjustable wrench, a plunger, and leak detection dye to spot potential problems efficiently.
What visible signs indicate pipe damage?
Visible signs of pipe damage include discoloration, warping, visible rust or corrosion, moisture on walls, and unexplained puddles or damp spots.
How can I detect issues with pipes that aren’t immediately apparent?
Detecting issues with non-visible pipes demands a proactive approach: engage a plumber for inspections, use leak detection equipment, and monitor water pressure and bills for unusual changes that may signify hidden problems.
When should I call a plumbing professional?
You should contact a plumbing professional if you encounter persistent leaks, burst pipes, sewer backups, or lack of water pressure. These issues require expert skills to prevent costly damage and ensure safety.

DIY Pipe Inspection Tips for Every Home

Pipe maintenance is often overlooked, yet it’s crucial for ensuring the durability and safety of your plumbing system. This comprehensive guide will address essential seasonal pipe maintenance, covering checklists for spring, summer, fall, and winter, along with strategies for creating a year-round maintenance plan. Following these guidelines, you can prevent issues like mildew from stagnant water, avoid costly repairs caused by snow damage, and ensure effective facility management practices. Engage with this content to enhance the safety and longevity of your home’s plumbing system.

Understanding the Importance of Seasonal Pipe Maintenance

Seasonal pipe maintenance prevents unnecessary repair costs and ensures your plumbing system operates efficiently. Regularly clearing debris and checking your thermostat settings can extend the lifespan of your pipes and fixtures. This practice protects your home from potential water damage and ensures that your sink and roof drainage systems function effectively throughout the year.

Preventing Unnecessary Repair Costs

Investing time in seasonal pipe maintenance can effectively prevent unnecessary repair costs, especially when focusing on critical areas like your attic and chimney. Ensuring that your drains are clear and functioning correctly minimizes the risk of water backflow and potential leaks, which can lead to costly repairs and water damage. Additionally, checking for mold growth can save you from expensive remediation efforts and health issues from prolonged exposure to damp environments.

Regularly inspecting your plumbing system, including the fireplace and chimney, is essential for maintaining efficiency and reducing expenses. Regular maintenance lets you identify problems before they escalate, such as pipe cracks or blockages that could lead to overflows.

Extending the Lifespan of Your Plumbing System

Implementing effective seasonal maintenance practices is essential to extending the lifespan of your plumbing system. One effective approach is to ensure adequate pipe insulation, particularly in areas prone to freezing temperatures. Proper insulation can help prevent your pipes from cracking or bursting, saving you from costly repairs and enhancing the overall efficiency of your plumbing system.

Ensuring Efficient Water Flow All Year

Check your plumbing valves and sensors regularly to ensure efficient water flow throughout the year. This practice helps maintain optimal water pressure and prevent disruptions in your plumbing system. A well-functioning valve enables smooth water flow while reducing the risk of leaks, which can lead to significant damage and costly repairs.

Additionally, consider the role of refrigerant in your HVAC system, as it is crucial for maintaining indoor comfort. Keeping your system efficient supports your heating and cooling needs and improves fire safety. If you notice any irregularities, don’t hesitate to request service, as prompt attention can help avoid more significant issues.

Protecting Your Home From Water Damage

Protecting your home from water damage begins with vigilant seasonal pipe maintenance. Attention to your plumbing system can prevent backups, often caused by clogs in pipes or drains. Regularly clearing out debris and ensuring your toilet paper does not contribute to blockages can save you from significant repair costs associated with leaks and flooding. Investing in these home improvement practices safeguards your property and enhances your comfort and peace of mind.

Your home’s construction is vital to its vulnerability to water damage. Areas prone to moisture, such as basements and crawl spaces, should be routinely inspected for potential issues. By addressing these concerns early on, you can avoid costly damages from mold growth or structural integrity loss.

Spring Pipe Maintenance Checklist

As spring arrives, it’s crucial to focus on seasonal pipe maintenance to ensure your plumbing system operates smoothly. Start by inspecting pipes for winter damage and cleaning gutters and downspouts to promote proper drainage in your landscape. Next, test water pressure and flow rates, check for leaks and drips, and consider scheduling a professional plumbing inspection. This proactive approach will help maintain the integrity of your water heater, sump pump, and shower, ultimately safeguarding your home.

Inspecting Pipes for Winter Damage

As you inspect your pipes for winter damage, check areas where drainage issues may have occurred. Look for any signs of cracks or leaks, particularly in exposed pipes that may have been affected by freezing temperatures. Ensuring that your water supply lines are intact and free from damage will help maintain proper pressure throughout your plumbing system, allowing your household to function smoothly.

Additionally, pay close attention to any damage around the curb, particularly if you have landscaping features like mulch that could hold moisture. Moist areas can lead to mold and deterioration over time, impacting your plumbing’s efficiency.

Cleaning Gutters and Downspouts

Cleaning your gutters and downspouts is an essential home maintenance task critical to your home plumbing system. Regularly removing leaves, debris, and blockages ensures that rainwater flows freely away from your home. This prevents water accumulation around your foundation, which can lead to leaks, mold growth, and expensive repairs. Utilize a vacuum or a specialized gutter cleaning tool to make this task more efficient and effective.

A thorough cleaning helps maintain proper drainage and protects your pumps from potential issues caused by overflow or clogs. By addressing your gutters and downspouts during your spring maintenance checklist, you are taking proactive steps to safeguard your home against water-related damage. As a result, you will enjoy a more efficient and reliable plumbing system throughout the rainy season.

Testing Water Pressure and Flow Rates

Testing water pressure and flow rates is critical to your spring maintenance checklist. Using a pressure gauge on faucets and spigots, you can determine if the pressure meets the recommended levels for your property. If it is too low, it may indicate blockages or leaks in your plumbing system that need immediate attention.

Checking for Leaks and Drips

Checking leaks and drips in your home plumbing system is crucial to your spring maintenance checklist. While inspecting pipes, look for any signs of moisture around joints and fixtures, as even minor leaks can lead to significant water damage over time. Moreover, addressing these issues early protects your property and can positively impact your home insurance premiums by demonstrating responsible upkeep.

Scheduling a Professional Plumbing Inspection

Scheduling a professional plumbing inspection is vital to your spring pipe maintenance checklist. An experienced plumber can thoroughly examine your plumbing system for signs of frost damage, which can be particularly problematic in regions with harsh winters. They will check for mineral buildup in your water heating system, which can reduce efficiency and lead to increased energy costs over time. Investing in a professional assessment ensures that potential issues are identified and addressed before they escalate into costly repairs.

Summer Pipe Maintenance Essentials

Monitoring outdoor water usage during the summer is essential for conserving resources and maintaining your plumbing system’s efficiency. You should also preserve sprinkler systems and outdoor faucets to prevent leaks and ensure they function effectively. Addressing sewer line issues promptly can save you from considerable headaches, while protecting pipes from heat expansion helps avoid costly damages. Finally, regularly checking for signs of water damage is crucial to safeguard your home and plumbing fixtures. These aspects will ensure your home remains comfortable and efficient throughout the warmer months.

Monitoring Outdoor Water Usage

Monitoring outdoor water usage is crucial to your plumbing maintenance checklist during the summer months. You can start by inspecting all hoses and irrigation systems for leaks that can waste significant amounts of water. Additionally, using food coloring to detect leaks in your hose connections can be an effective method; simply add a few drops of food coloring and observe if it seeps through, indicating a problem that needs fixing.

Maintaining Sprinkler Systems and Outdoor Faucets

Maintaining your sprinkler systems and outdoor faucets is essential to ensure they operate efficiently during the summer months. Regularly check for leaks or blockages that could waste water, as this affects your landscaping and can lead to higher utility bills. If you notice any issues, using a drain cleaner designed explicitly for outdoor plumbing can help clear clogs and enhance water flow, contributing to the longevity of your systems.

Adjusting your watering schedule based on humidity levels is essential to prevent overwatering, which can drown your plants and waste resources. Consider protecting your outdoor faucets from potential winter damage during seasons of heavy snow removal.

Addressing Sewer Line Issues Promptly

Addressing sewer line issues promptly is essential to prevent unpleasant odors and moisture accumulation in your home. If you notice any unusual smells or slow drains, it may indicate a blockage or damage in your sewer line, which can worsen over time. Using a rooter service can effectively clear clogs and identify underlying problems, helping to ensure that your plumbing system operates smoothly and efficiently.

Protecting Pipes From Heat Expansion

Protecting your pipes from heat expansion is essential to prevent water damage, especially during the hotter months. When temperatures rise, pipes can expand, increasing the risk of leaks and ruptures. Seal any cracks or gaps around your pipes with caulk to mitigate this hazard. This simple step, often overlooked during spring cleaning, can significantly enhance the structural integrity of your plumbing system and prevent costly repairs.

Checking for Signs of Water Damage

Checking for signs of water damage is essential, especially during the summer when humidity levels can rise. Inspect areas such as your basement, where moisture can accumulate unnoticed. Look for discoloration on walls or ceilings, which can indicate leaks or water intrusion, and monitor your plumbing fixtures, like a flush toilet, for any signs of sediment buildup that may lead to clogs or further damage.

Also, pay attention to your home’s exterior; wind-driven rain can introduce unwanted moisture that may affect your pipes. Regularly assess your plumbing system for any bubbling paint or warped surfaces, as these can indicate ongoing water damage. Identifying these issues early allows you to take corrective action and prevent more serious problems, ultimately protecting your home from costly repairs.

Fall Pipe Maintenance Checklist

Prepare your plumbing for the cooler temperatures ahead with effective fall pipe maintenance. Start by insulating exposed pipes and faucets to prevent freezing, then flush your water heater to remove sediment and reduce corrosion. Drain and store garden hoses to avoid damage and seal gaps in your home to minimize cold air entry and enhance pest control. Addressing these areas will significantly reduce the risk of plumbing issues this season.

Preparing Pipes for Cooler Temperatures

Preparing your pipes for cooler temperatures is essential to prevent wear and tear and potential issues such as water hammer in your plumbing system. Start by insulating exposed pipes in areas like your basement and bathroom, where freezing temperatures can easily affect them. Using foam pipe insulation or heat tape can maintain proper temperature and protect your pipes from the cold.

Insulating Exposed Pipes and Faucets

Insulating exposed pipes and faucets is vital to prevent freezing during the fall and winter. Using foam insulation or heat tape, you can effectively shield these areas from cold temperatures, reducing the risk of pipe bursts that can lead to costly plumbing repairs. This proactive step not only safeguards your plumbing system but also contributes to water conservation by avoiding leaks that can arise from frozen pipes, ensuring that your home remains efficient throughout the colder seasons.

Flushing Water Heaters to Remove Sediment

Flushing your water heater to remove sediment is a vital aspect of preventive maintenance that can significantly enhance efficiency. Over time, sediment buildup can impair the heating element, increasing energy usage and potentially causing overheating. This increases your utility bills and can bring about safety concerns, such as elevated risks of carbon monoxide leaks in gas water heaters. By performing this simple maintenance task annually, you help maintain the longevity of your unit and safeguard any warranties associated with your water heater.

To flush your water heater effectively, turn off the power supply and shut off the cold water inlet. Attach a garden hose to the drain valve and direct it to a floor drain or outside. As you open the valve, sediment will flow out, ensuring the system runs smoothly and your pipes remain clear.

Draining and Storing Garden Hoses

Draining and storing your garden hoses is a crucial step in your fall pipe maintenance checklist. Begin by disconnecting the hoses from their spigots and allowing them to drain completely to prevent freezing in the colder months. Any residual water left in the hoses can expand and cause ruptures, leading to expensive replacements and affecting your overall plumbing system.

Once drained, carefully coil the hoses and store them in a dry, sheltered location away from direct sunlight. This storage method helps preserve their integrity and functionality for the next season. Additionally, inspect your outdoor faucets for any leaks around the relief valve, essential for maintaining efficient water flow through your drains and preventing water damage caused by frozen pipes.

Sealing Gaps to Prevent Cold Air Entry

Sealing gaps around windows, doors, and other entry points is essential in preventing cold air from entering your home during the fall and winter. Drafts can negatively affect indoor air quality, leading to discomfort and potential health issues due to fluctuating temperatures. Using weatherstripping or caulk to seal these gaps, you can maintain a more stable environment, reduce your heating costs, and enhance the overall efficiency of your plumbing system.

Winter Pipe Maintenance Strategies

To effectively manage winter plumbing challenges, focus on preventing frozen pipes with proper insulation, maintaining a consistent indoor temperature, and letting faucets trickle to relieve pressure. It’s also essential to know how to shut off water quickly in case of emergencies and to plan for potential plumbing service needs. Each of these strategies will enhance your home’s winter readiness.

Preventing Frozen Pipes With Proper Insulation

Properly insulating exposed plumbing, especially in attics, basements, and exterior walls, is essential to prevent frozen pipes during winter. Foam insulation sleeves or heat tape can provide an effective barrier against extreme cold, minimizing the risk of pipes freezing and bursting. Addressing these vulnerable spots in your home safeguards against costly repairs and enhances your overall plumbing system’s efficiency.

In addition to insulation, maintaining a consistent indoor temperature is crucial in avoiding frozen pipes. You should keep your thermostat set at a stable temperature, even when you’re away, to ensure that pipes remain warm enough to prevent freezing. These preventative measures bring peace of mind during winter, knowing that your plumbing system is protected against harsh weather conditions.

Maintaining a Consistent Indoor Temperature

Maintaining a consistent indoor temperature is essential during winter to protect your plumbing system from freezing. Keeping the thermostat stable, even when you are away, ensures that the heat reaches all areas of your home, particularly those with exposed pipes. Consider setting your thermostat below 55°F to create a buffer against extreme cold for added reassurance.
Additionally, ceiling fans can help circulate warm air throughout your home, preventing cold spots that may lead to pipe freezing. Leaving cabinet doors open in less frequently used rooms, like basements or attics, can promote airflow around plumbing fixtures, ensuring your pipes remain insulated from frigid temperatures.

Letting Faucets Trickle to Relieve Pressure

Letting your faucets trickle during freezing conditions is a simple yet effective winter maintenance strategy to relieve pressure in your plumbing system. By allowing a small stream of water to flow, you can prevent pressure buildup in pipes that may otherwise freeze and burst. This small action protects your plumbing and maintains water circulation, which can help ensure your fixtures remain operational throughout the winter months.

Knowing How to Shut Off Water Quickly

Knowing how to shut off water quickly is essential to preventing extensive water damage during winter plumbing emergencies. Locate your main water shut-off valve, usually near your water meter or basement, and familiarize yourself with its operation. In case of a pipe burst or significant leak, closing this valve can minimize water flow and protect your home from flooding.

Planning for Emergency Plumbing Services

To effectively prepare for winter plumbing emergencies, it is crucial to have a reliable emergency plumbing service on speed dial. As temperatures drop, the risk of pipe bursts and other plumbing issues increases significantly, making it essential to have a trusted professional ready to respond quickly. Research local plumbers and read reviews to ensure you select a service that specializes in urgent plumbing situations and has a reputation for prompt and effective resolutions.

Creating a Year-Round Pipe Maintenance Plan

To effectively maintain your plumbing system throughout the year, it’s essential to schedule regular maintenance tasks tailored to each season. Utilize a seasonal maintenance checklist to ensure that every critical task is noticed. Keeping records of these activities helps track your progress and identify patterns. You can also use technology to remind yourself of due dates while involving family members in upkeep, which fosters collective responsibility for your home’s plumbing health.

Scheduling Regular Maintenance Tasks

Scheduling regular maintenance tasks is essential for preserving the health of your plumbing system throughout the year. By creating a seasonal checklist, you can ensure that critical inspections and repairs are noticed. For example, you can flush your water heater every spring to remove sediment buildup, which enhances efficiency and extends the unit’s lifespan.

Utilizing a Seasonal Maintenance Checklist

Utilizing a seasonal maintenance checklist is vital to preserving the health of your plumbing system year-round. By documenting essential tasks for each season, you can systematically address potential issues before they escalate into costly repairs. For instance, ensuring you flush your water heater in the spring can prevent sediment buildup, significantly enhancing efficiency and prolonging its lifespan.

Conclusion

A comprehensive approach to seasonal pipe maintenance safeguards your plumbing system against costly repairs and water damage. By regularly inspecting pipes, checking for leaks, and maintaining proper insulation, you enhance the efficiency and longevity of your plumbing infrastructure. This proactive strategy ensures efficient water flow and protects your home from the dangers of moisture-related issues. Committing to seasonal maintenance fosters a healthier living environment and preserves the integrity of your significant investmentyour home.

Frequently Asked Questions

Why is seasonal pipe maintenance important?
Seasonal pipe maintenance helps prevent costly repairs and water damage and ensures efficient year-round plumbing system performance.
How can I extend the lifespan of my plumbing system?
Regular maintenance, like insulating pipes in cold areas and inspecting for leaks or cracks, can significantly extend the lifespan of your system.
What are some tips for preventing water damage?
Regularly clear debris from drains, check for leaks, and ensure good ventilation to prevent backups and water damage.
How does pipe insulation help during winter?
Insulating pipes prevents them from freezing and bursting, reducing the risk of significant water damage and repair costs.
How can I ensure efficient water flow all year?
Regularly check plumbing valves and sensors and ensure your HVAC system is functioning properly to maintain optimal water pressure and efficient flow.

Comprehensive Guide to Essential Seasonal Pipe Maintenance

Pipe maintenance is often overlooked, yet it’s crucial for ensuring the durability and safety of your plumbing system. This comprehensive guide will address essential seasonal pipe maintenance, covering checklists for spring, summer, fall, and winter, along with strategies for creating a year-round maintenance plan. Following these guidelines, you can prevent issues like mildew from stagnant water, avoid costly repairs caused by snow damage, and ensure effective facility management practices. Engage with this content to enhance the safety and longevity of your home’s plumbing system.

Understanding the Importance of Seasonal Pipe Maintenance

Seasonal pipe maintenance prevents unnecessary repair costs and ensures your plumbing system operates efficiently. Regularly clearing debris and checking your thermostat settings can extend the lifespan of your pipes and fixtures. This practice protects your home from potential water damage and ensures that your sink and roof drainage systems function effectively throughout the year.

Preventing Unnecessary Repair Costs

Investing time in seasonal pipe maintenance can effectively prevent unnecessary repair costs, especially when focusing on critical areas like your attic and chimney. Ensuring that your drains are clear and functioning correctly minimizes the risk of water backflow and potential leaks, which can lead to costly repairs and water damage. Additionally, checking for mold growth can save you from expensive remediation efforts and health issues from prolonged exposure to damp environments.

Regularly inspecting your plumbing system, including the fireplace and chimney, is essential for maintaining efficiency and reducing expenses. Regular maintenance lets you identify problems before they escalate, such as pipe cracks or blockages that could lead to overflows.

Extending the Lifespan of Your Plumbing System

Implementing effective seasonal maintenance practices is essential to extending the lifespan of your plumbing system. One effective approach is to ensure adequate pipe insulation, particularly in areas prone to freezing temperatures. Proper insulation can help prevent your pipes from cracking or bursting, saving you from costly repairs and enhancing the overall efficiency of your plumbing system.

Ensuring Efficient Water Flow All Year

Check your plumbing valves and sensors regularly to ensure efficient water flow throughout the year. This practice helps maintain optimal water pressure and prevent disruptions in your plumbing system. A well-functioning valve enables smooth water flow while reducing the risk of leaks, which can lead to significant damage and costly repairs.

Additionally, consider the role of refrigerant in your HVAC system, as it is crucial for maintaining indoor comfort. Keeping your system efficient supports your heating and cooling needs and improves fire safety. If you notice any irregularities, don’t hesitate to request service, as prompt attention can help avoid more significant issues.

Protecting Your Home From Water Damage

Protecting your home from water damage begins with vigilant seasonal pipe maintenance. Attention to your plumbing system can prevent backups, often caused by clogs in pipes or drains. Regularly clearing out debris and ensuring your toilet paper does not contribute to blockages can save you from significant repair costs associated with leaks and flooding. Investing in these home improvement practices safeguards your property and enhances your comfort and peace of mind.

Your home’s construction is vital to its vulnerability to water damage. Areas prone to moisture, such as basements and crawl spaces, should be routinely inspected for potential issues. By addressing these concerns early on, you can avoid costly damages from mold growth or structural integrity loss.

Spring Pipe Maintenance Checklist

As spring arrives, it’s crucial to focus on seasonal pipe maintenance to ensure your plumbing system operates smoothly. Start by inspecting pipes for winter damage and cleaning gutters and downspouts to promote proper drainage in your landscape. Next, test water pressure and flow rates, check for leaks and drips, and consider scheduling a professional plumbing inspection. This proactive approach will help maintain the integrity of your water heater, sump pump, and shower, ultimately safeguarding your home.

Inspecting Pipes for Winter Damage

As you inspect your pipes for winter damage, check areas where drainage issues may have occurred. Look for any signs of cracks or leaks, particularly in exposed pipes that may have been affected by freezing temperatures. Ensuring that your water supply lines are intact and free from damage will help maintain proper pressure throughout your plumbing system, allowing your household to function smoothly.

Additionally, pay close attention to any damage around the curb, particularly if you have landscaping features like mulch that could hold moisture. Moist areas can lead to mold and deterioration over time, impacting your plumbing’s efficiency.

Cleaning Gutters and Downspouts

Cleaning your gutters and downspouts is an essential home maintenance task critical to your home plumbing system. Regularly removing leaves, debris, and blockages ensures that rainwater flows freely away from your home. This prevents water accumulation around your foundation, which can lead to leaks, mold growth, and expensive repairs. Utilize a vacuum or a specialized gutter cleaning tool to make this task more efficient and effective.

A thorough cleaning helps maintain proper drainage and protects your pumps from potential issues caused by overflow or clogs. By addressing your gutters and downspouts during your spring maintenance checklist, you are taking proactive steps to safeguard your home against water-related damage. As a result, you will enjoy a more efficient and reliable plumbing system throughout the rainy season.

Testing Water Pressure and Flow Rates

Testing water pressure and flow rates is critical to your spring maintenance checklist. Using a pressure gauge on faucets and spigots, you can determine if the pressure meets the recommended levels for your property. If it is too low, it may indicate blockages or leaks in your plumbing system that need immediate attention.

Checking for Leaks and Drips

Checking leaks and drips in your home plumbing system is crucial to your spring maintenance checklist. While inspecting pipes, look for any signs of moisture around joints and fixtures, as even minor leaks can lead to significant water damage over time. Moreover, addressing these issues early protects your property and can positively impact your home insurance premiums by demonstrating responsible upkeep.

Scheduling a Professional Plumbing Inspection

Scheduling a professional plumbing inspection is vital to your spring pipe maintenance checklist. An experienced plumber can thoroughly examine your plumbing system for signs of frost damage, which can be particularly problematic in regions with harsh winters. They will check for mineral buildup in your water heating system, which can reduce efficiency and lead to increased energy costs over time. Investing in a professional assessment ensures that potential issues are identified and addressed before they escalate into costly repairs.

Summer Pipe Maintenance Essentials

Monitoring outdoor water usage during the summer is essential for conserving resources and maintaining your plumbing system’s efficiency. You should also preserve sprinkler systems and outdoor faucets to prevent leaks and ensure they function effectively. Addressing sewer line issues promptly can save you from considerable headaches, while protecting pipes from heat expansion helps avoid costly damages. Finally, regularly checking for signs of water damage is crucial to safeguard your home and plumbing fixtures. These aspects will ensure your home remains comfortable and efficient throughout the warmer months.

Monitoring Outdoor Water Usage

Monitoring outdoor water usage is crucial to your plumbing maintenance checklist during the summer months. You can start by inspecting all hoses and irrigation systems for leaks that can waste significant amounts of water. Additionally, using food coloring to detect leaks in your hose connections can be an effective method; simply add a few drops of food coloring and observe if it seeps through, indicating a problem that needs fixing.

Maintaining Sprinkler Systems and Outdoor Faucets

Maintaining your sprinkler systems and outdoor faucets is essential to ensure they operate efficiently during the summer months. Regularly check for leaks or blockages that could waste water, as this affects your landscaping and can lead to higher utility bills. If you notice any issues, using a drain cleaner designed explicitly for outdoor plumbing can help clear clogs and enhance water flow, contributing to the longevity of your systems.

Adjusting your watering schedule based on humidity levels is essential to prevent overwatering, which can drown your plants and waste resources. Consider protecting your outdoor faucets from potential winter damage during seasons of heavy snow removal.

Addressing Sewer Line Issues Promptly

Addressing sewer line issues promptly is essential to prevent unpleasant odors and moisture accumulation in your home. If you notice any unusual smells or slow drains, it may indicate a blockage or damage in your sewer line, which can worsen over time. Using a rooter service can effectively clear clogs and identify underlying problems, helping to ensure that your plumbing system operates smoothly and efficiently.

Protecting Pipes From Heat Expansion

Protecting your pipes from heat expansion is essential to prevent water damage, especially during the hotter months. When temperatures rise, pipes can expand, increasing the risk of leaks and ruptures. Seal any cracks or gaps around your pipes with caulk to mitigate this hazard. This simple step, often overlooked during spring cleaning, can significantly enhance the structural integrity of your plumbing system and prevent costly repairs.

Checking for Signs of Water Damage

Checking for signs of water damage is essential, especially during the summer when humidity levels can rise. Inspect areas such as your basement, where moisture can accumulate unnoticed. Look for discoloration on walls or ceilings, which can indicate leaks or water intrusion, and monitor your plumbing fixtures, like a flush toilet, for any signs of sediment buildup that may lead to clogs or further damage.

Also, pay attention to your home’s exterior; wind-driven rain can introduce unwanted moisture that may affect your pipes. Regularly assess your plumbing system for any bubbling paint or warped surfaces, as these can indicate ongoing water damage. Identifying these issues early allows you to take corrective action and prevent more serious problems, ultimately protecting your home from costly repairs.

Fall Pipe Maintenance Checklist

Prepare your plumbing for the cooler temperatures ahead with effective fall pipe maintenance. Start by insulating exposed pipes and faucets to prevent freezing, then flush your water heater to remove sediment and reduce corrosion. Drain and store garden hoses to avoid damage and seal gaps in your home to minimize cold air entry and enhance pest control. Addressing these areas will significantly reduce the risk of plumbing issues this season.

Preparing Pipes for Cooler Temperatures

Preparing your pipes for cooler temperatures is essential to prevent wear and tear and potential issues such as water hammer in your plumbing system. Start by insulating exposed pipes in areas like your basement and bathroom, where freezing temperatures can easily affect them. Using foam pipe insulation or heat tape can maintain proper temperature and protect your pipes from the cold.

Insulating Exposed Pipes and Faucets

Insulating exposed pipes and faucets is vital to prevent freezing during the fall and winter. Using foam insulation or heat tape, you can effectively shield these areas from cold temperatures, reducing the risk of pipe bursts that can lead to costly plumbing repairs. This proactive step not only safeguards your plumbing system but also contributes to water conservation by avoiding leaks that can arise from frozen pipes, ensuring that your home remains efficient throughout the colder seasons.

Flushing Water Heaters to Remove Sediment

Flushing your water heater to remove sediment is a vital aspect of preventive maintenance that can significantly enhance efficiency. Over time, sediment buildup can impair the heating element, increasing energy usage and potentially causing overheating. This increases your utility bills and can bring about safety concerns, such as elevated risks of carbon monoxide leaks in gas water heaters. By performing this simple maintenance task annually, you help maintain the longevity of your unit and safeguard any warranties associated with your water heater.

To flush your water heater effectively, turn off the power supply and shut off the cold water inlet. Attach a garden hose to the drain valve and direct it to a floor drain or outside. As you open the valve, sediment will flow out, ensuring the system runs smoothly and your pipes remain clear.

Draining and Storing Garden Hoses

Draining and storing your garden hoses is a crucial step in your fall pipe maintenance checklist. Begin by disconnecting the hoses from their spigots and allowing them to drain completely to prevent freezing in the colder months. Any residual water left in the hoses can expand and cause ruptures, leading to expensive replacements and affecting your overall plumbing system.

Once drained, carefully coil the hoses and store them in a dry, sheltered location away from direct sunlight. This storage method helps preserve their integrity and functionality for the next season. Additionally, inspect your outdoor faucets for any leaks around the relief valve, essential for maintaining efficient water flow through your drains and preventing water damage caused by frozen pipes.

Sealing Gaps to Prevent Cold Air Entry

Sealing gaps around windows, doors, and other entry points is essential in preventing cold air from entering your home during the fall and winter. Drafts can negatively affect indoor air quality, leading to discomfort and potential health issues due to fluctuating temperatures. Using weatherstripping or caulk to seal these gaps, you can maintain a more stable environment, reduce your heating costs, and enhance the overall efficiency of your plumbing system.

Winter Pipe Maintenance Strategies

To effectively manage winter plumbing challenges, focus on preventing frozen pipes with proper insulation, maintaining a consistent indoor temperature, and letting faucets trickle to relieve pressure. It’s also essential to know how to shut off water quickly in case of emergencies and to plan for potential plumbing service needs. Each of these strategies will enhance your home’s winter readiness.

Preventing Frozen Pipes With Proper Insulation

Properly insulating exposed plumbing, especially in attics, basements, and exterior walls, is essential to prevent frozen pipes during winter. Foam insulation sleeves or heat tape can provide an effective barrier against extreme cold, minimizing the risk of pipes freezing and bursting. Addressing these vulnerable spots in your home safeguards against costly repairs and enhances your overall plumbing system’s efficiency.

In addition to insulation, maintaining a consistent indoor temperature is crucial in avoiding frozen pipes. You should keep your thermostat set at a stable temperature, even when you’re away, to ensure that pipes remain warm enough to prevent freezing. These preventative measures bring peace of mind during winter, knowing that your plumbing system is protected against harsh weather conditions.

Maintaining a Consistent Indoor Temperature

Maintaining a consistent indoor temperature is essential during winter to protect your plumbing system from freezing. Keeping the thermostat stable, even when you are away, ensures that the heat reaches all areas of your home, particularly those with exposed pipes. Consider setting your thermostat below 55°F to create a buffer against extreme cold for added reassurance.
Additionally, ceiling fans can help circulate warm air throughout your home, preventing cold spots that may lead to pipe freezing. Leaving cabinet doors open in less frequently used rooms, like basements or attics, can promote airflow around plumbing fixtures, ensuring your pipes remain insulated from frigid temperatures.

Letting Faucets Trickle to Relieve Pressure

Letting your faucets trickle during freezing conditions is a simple yet effective winter maintenance strategy to relieve pressure in your plumbing system. By allowing a small stream of water to flow, you can prevent pressure buildup in pipes that may otherwise freeze and burst. This small action protects your plumbing and maintains water circulation, which can help ensure your fixtures remain operational throughout the winter months.

Knowing How to Shut Off Water Quickly

Knowing how to shut off water quickly is essential to preventing extensive water damage during winter plumbing emergencies. Locate your main water shut-off valve, usually near your water meter or basement, and familiarize yourself with its operation. In case of a pipe burst or significant leak, closing this valve can minimize water flow and protect your home from flooding.

Planning for Emergency Plumbing Services

To effectively prepare for winter plumbing emergencies, it is crucial to have a reliable emergency plumbing service on speed dial. As temperatures drop, the risk of pipe bursts and other plumbing issues increases significantly, making it essential to have a trusted professional ready to respond quickly. Research local plumbers and read reviews to ensure you select a service that specializes in urgent plumbing situations and has a reputation for prompt and effective resolutions.

Creating a Year-Round Pipe Maintenance Plan

To effectively maintain your plumbing system throughout the year, it’s essential to schedule regular maintenance tasks tailored to each season. Utilize a seasonal maintenance checklist to ensure that every critical task is noticed. Keeping records of these activities helps track your progress and identify patterns. You can also use technology to remind yourself of due dates while involving family members in upkeep, which fosters collective responsibility for your home’s plumbing health.

Scheduling Regular Maintenance Tasks

Scheduling regular maintenance tasks is essential for preserving the health of your plumbing system throughout the year. By creating a seasonal checklist, you can ensure that critical inspections and repairs are noticed. For example, you can flush your water heater every spring to remove sediment buildup, which enhances efficiency and extends the unit’s lifespan.

Utilizing a Seasonal Maintenance Checklist

Utilizing a seasonal maintenance checklist is vital to preserving the health of your plumbing system year-round. By documenting essential tasks for each season, you can systematically address potential issues before they escalate into costly repairs. For instance, ensuring you flush your water heater in the spring can prevent sediment buildup, significantly enhancing efficiency and prolonging its lifespan.

Conclusion

A comprehensive approach to seasonal pipe maintenance safeguards your plumbing system against costly repairs and water damage. By regularly inspecting pipes, checking for leaks, and maintaining proper insulation, you enhance the efficiency and longevity of your plumbing infrastructure. This proactive strategy ensures efficient water flow and protects your home from the dangers of moisture-related issues. Committing to seasonal maintenance fosters a healthier living environment and preserves the integrity of your significant investmentyour home.

Frequently Asked Questions

Why is seasonal pipe maintenance important?
Seasonal pipe maintenance helps prevent costly repairs and water damage and ensures efficient year-round plumbing system performance.
How can I extend the lifespan of my plumbing system?
Regular maintenance, like insulating pipes in cold areas and inspecting for leaks or cracks, can significantly extend the lifespan of your system.
What are some tips for preventing water damage?
Regularly clear debris from drains, check for leaks, and ensure good ventilation to prevent backups and water damage.
How does pipe insulation help during winter?
Insulating pipes prevents them from freezing and bursting, reducing the risk of significant water damage and repair costs.
How can I ensure efficient water flow all year?
Regularly check plumbing valves and sensors and ensure your HVAC system is functioning properly to maintain optimal water pressure and efficient flow.

Plumber using a wrench to tighten a pipe fitting Plumber using a wrench to tighten a pipe fitting

Transforming Pipe Maintenance With Cutting-edge Technologies

Are you tired of the constant stress caused by outdated pipe maintenance methods? Many households face frequent disruptions from aging pipes, resulting in costly repairs and a need for effective solutions. In this blog post, we will explore how cutting-edge technologies are transforming the landscape of pipe maintenance. Key topics include trenchless technology for less invasive pipe replacement, smart sensors for proactive maintenance, and robots for efficient inspections. By understanding these advancements, you’ll discover how to minimize pressure on your home systems and enhance your overall efficiency in managing pipe issues.

Understanding the Limitations of Traditional Pipe Maintenance Methods

Traditional pipe maintenance methods often face several challenges, especially stormwater management and natural gas flow. These outdated practices can lead to inefficiencies, increased pipe system stress, and potential storm drain failures. The following sections will detail the common pitfalls of these techniques and the impact of relying on older strategies, highlighting the need for innovative solutions involving materials like resin.

Common Challenges in Conventional Techniques

Conventional techniques for maintaining steel and cast iron pipes often encounter significant challenges that can compromise their effectiveness. For instance, traditional curing methods typically require extensive downtime, meaning that you may experience prolonged disruption to service and functionality. This inefficiency can increase the risk of deterioration in aging cast iron pipe systems, leading to costly replacements or repairs.

Moreover, many older maintenance strategies lack the flexibility needed to adapt to modern demands, such as managing increased stormwater flow or enhancing the durability of pipe networks. You must utilize advanced materials and techniques to avoid facing the limitations imposed by past practices, resulting in suboptimal performance and persistent risks. Embracing innovative solutions can help you overcome these obstacles and ensure the longevity and reliability of your infrastructure.

Impact of Outdated Practices on Efficiency

Outdated practices in pipe maintenance, especially in wastewater systems, can significantly reduce productivity and lead to inefficiencies. For example, traditional methods may need to adequately address the challenges of aging iron pipes, which can result in frequent repairs and service interruptions. This impacts your ability to maintain a reliable infrastructure, ultimately diminishing the overall performance of your plumbing system.

Moreover, reluctance to embrace innovation, such as advanced pipe lining techniques, can exacerbate problems associated with aging pipes. With these modern solutions, you may be able to handle continuous maintenance costs and declining system efficiency. Adapting to contemporary maintenance approaches enhances your infrastructure’s reliability and optimizes your resources for managing wastewater effectively.

Introducing the Latest Technologies in Pipe Maintenance

Cutting-edge solutions in pipe maintenance are revolutionizing the construction industry, providing improved accessibility and performance. Advanced tools like trenchless pipe technology enhance efficiency while minimizing erosion and disruption. In the following sections, you will learn about the latest advancements and how they address common maintenance challenges, ensuring your infrastructure remains reliable and effective.

Overview of Cutting-Edge Solutions

Trenchless technology has emerged as a viable methodology for pipe maintenance, offering significant advantages over traditional methods. This approach minimizes the disruption of soil and surrounding structures, enabling rehabilitation with a lower environmental impact. By employing advanced techniques such as horizontal directional drilling, you can effectively replace or repair underground piping systems without requiring extensive excavation.

Moreover, innovative coating solutions complement these trenchless methods by providing lasting protection against corrosion and wear. These coatings enhance the durability of pipes, extending their lifespan and reducing the frequency of maintenance required. By integrating these cutting-edge technologies into your infrastructure strategy, you can ensure efficient and effective pipe maintenance while addressing common challenges aging systems face.

How Advanced Tools Enhance Performance

Advanced tools transform how you manage pipe maintenance, mainly through trenchless technology. This method allows for efficient repairs and replacements without extensive excavation, reducing the disruption caused during emergencies. Using trenchless techniques can significantly minimize downtime, ensuring that your infrastructure remains functional and addressing issues like drain cleaning swiftly and effectively.

The use of advanced evaluation tools also enhances the overall performance of your pipe systems. You can identify potential issues before they escalate with real-time diagnostics, allowing timely intervention. This proactive approach boosts efficiency and reduces emergency repairs and associated costs, helping you maintain a reliable plumbing network and ensure your infrastructure functions optimally.

Harnessing Smart Sensors for Proactive Maintenance

Smart sensors are transforming pipeline maintenance by enabling real-time monitoring applications that detect leaks and assess the condition of water systems. These innovations utilize predictive analytics to prevent failures, enhancing the longevity of your drinking water infrastructure. In the following sections, you’ll learn how these technologies improve efficiency and reliability while minimizing the need for disruptive pipe-bursting techniques.

Real-Time Monitoring Applications

Real-time monitoring applications transform how you manage your pipeline systems by providing continuous oversight of critical infrastructure. These advanced systems utilize smart sensors that enhance leak detection capabilities, allowing you to identify potential problems promptly. For instance, when sensors detect unusual patterns in water flow or pressure, they can signal early warnings, significantly reducing the risk of larger issues that may require costly trenchless pipe repair solutions.

In addition to leak detection, these monitoring systems help prevent debris buildup that can compromise the adhesion of protective coatings and lead to system failures. Using real-time data, you can proactively schedule maintenance and address minor concerns before they escalate into major repairs. This proactive approach ensures the longevity of your concrete pipes and promotes a reliable plumbing infrastructure that efficiently meets modern demands.

Predictive Analytics to Prevent Failures

Predictive analytics are critical in preventing failures in your piping systems by leveraging automation and real-time data analysis. By continuously monitoring conditions, these advanced tools can identify factors contributing to issues like corrosion or pressure anomalies before they escalate. For instance, in water treatment facilities, predictive analytics can alert your team to potential blockages in drainage systems, allowing for timely intervention that minimizes costly repairs.

Implementing predictive analytics enhances the longevity of your infrastructure and reduces the need for invasive measures such as digging for repairs. This proactive approach allows you to allocate resources more efficiently and prioritize maintenance tasks based on actual conditions rather than assumptions. By relying on data-driven insights, you can improve the overall performance of your pipeline systems while ensuring reliable service for your community.

Utilizing Robots and Drones for Inspection and Repair

Utilizing robots for pipeline assessments brings notable advantages, including minimizing downtime and enhancing the efficiency of trenchless repair methods. Drones are particularly effective in inspecting hard-to-reach areas, ensuring a thorough evaluation of sewage systems with varying diameters. In the following sections, you will learn how these cutting-edge technologies improve sustainability and streamline maintenance processes.

Advantages of Robotics in Pipeline Assessment

Utilizing robotics in pipeline assessment offers significant advantages in sewer repair and pipe inspection. With the ability to navigate through confined spaces and hard-to-reach areas, robots can quickly identify issues without requiring extensive excavation, reducing both interruptions and costs associated with traditional methods. By employing advanced technologies such as drones equipped with high-resolution cameras, you gain a comprehensive view of your sewer infrastructure, enabling timely detection of leaks and damages.

Incorporating materials like polyurethane through robotic applications enhances the effectiveness of repairs. For instance, robots can apply protective coatings directly to the affected areas, improving the durability of your pipes and extending their lifespan. This proactive approach minimizes the likelihood of future failures. It streamlines the entire maintenance process, allowing you to focus resources on critical infrastructure needs and ensuring a reliable sewer system for your community.

Drone Technology for Hard-to-Reach Areas

Drone technology is crucial in inspecting hard-to-reach areas, significantly enhancing your ability to conduct thorough evaluations of pipe systems, particularly in drains. Equipped with high-resolution cameras, these machines can efficiently navigate challenging terrains and lengths, capturing detailed images that help identify issues such as cracks or corrosion without the need for extensive excavation. This capability allows you to address potential problems early on, reducing the likelihood of costly trenchless pipe repairs.

Utilizing drones improves the efficiency of inspections and contributes to a safer maintenance process. Avoiding manual entry into confined spaces minimizes risks associated with traditional inspection methods. By integrating advanced materials, such as fiberglass, in your repairs, you can enhance the durability of your pipes, ensuring they withstand environmental stressors. This approach helps you maintain a reliable drainage system and optimize resource allocation in your infrastructure management.

Implementing Artificial Intelligence and Machine Learning

AI-powered diagnostics and machine learning algorithms are revolutionizing how you approach pipe maintenance. By leveraging advanced technologies, you can achieve quick problem-solving through precise inspections and enhance safety measures within plumbing services. Additionally, machine learning helps optimize maintenance schedules, ensuring efficient sewer cleaning and timely application of epoxy solutions to reinforce your infrastructure.

AI-Powered Diagnostics for Quick Problem-Solving

AI-powered diagnostics play a critical role in enhancing your pipe maintenance strategies by offering rapid identification of issues in real time. For instance, these advanced systems analyze data from sensors to detect anomalies in pressure or flow rates, alerting you to potential leaks or blockages before they escalate into major problems. With timely interventions based on accurate data, you can reduce emergency repair costs and extend the lifespan of your infrastructure.

Implementing AI technologies allows you to optimize your maintenance schedules based on predictive insights rather than relying on outdated practices. This will enable you to prioritize urgent repairs, ensuring your plumbing systems remain operational and reliable. With AI-driven tools streamlining the diagnostic process, you improve efficiency and enhance overall safety, allowing your team to focus on other critical tasks without constant monitoring of system conditions.

Machine Learning Algorithms Optimizing Maintenance Schedules

Machine learning algorithms are transforming how you schedule maintenance for your pipe systems by analyzing historical data to predict when and where issues are likely to occur. By utilizing patterns from past performance, these algorithms can suggest optimal times for preventative maintenance, reducing the risk of unexpected failures and costly emergency repairs. This proactive approach helps you allocate resources more efficiently, ensuring that maintenance tasks align with the actual condition of your infrastructure.

For example, if your system shows a pattern of increased corrosion in certain pipe sections, machine learning can alert you to schedule checks or repairs specifically for those areas. This ensures that repairs are timely and reduces unnecessary maintenance in less critical areas, ultimately saving you time and money. By embracing these advanced technologies, you enhance the reliability of your plumbing systems, allowing you to focus more on strategic improvements rather than reactive measures.

Steps to Integrate New Technologies Into Existing Systems

Focus on three key areas to transform your pipe maintenance practices effectively. Start by evaluating your current infrastructure needs to identify gaps and opportunities for improvement. Next, ensure your teams are adequately trained to adopt new technologies, facilitating smooth transitions. Finally, consider planning for future technological advances to stay ahead of industry trends and maintain optimal efficiency.

Evaluating Current Infrastructure Needs

To evaluate your current infrastructure needs effectively, you should begin by conducting a thorough assessment of your existing pipe systems. Analyzing factors such as age, material composition, and recent maintenance history will provide better insights into potential vulnerabilities and performance issues. This knowledge equips you to identify areas that require immediate attention and sets the stage for integrating new technologies that optimize your infrastructure’s reliability and efficiency.

In addition, engaging with your team and gathering feedback on operational challenges can highlight specific pain points in your maintenance processes. For instance, if certain sections of your system frequently require repairs, this could indicate the need for advanced monitoring solutions or more durable materials. By aligning your integration efforts with the actual needs of your infrastructure, you can prioritize investments in cutting-edge technologies that address real-world challenges and enhance overall system performance.

Training Teams for Technological Adoption

Training your teams in the latest technologies for pipe maintenance is crucial for successful integration and long-term reliability. For instance, ensuring your technicians are familiar with advanced tools such as smart sensors and drone technology can minimize disruptions during inspections and repairs. Fostering a culture of continuous learning by providing workshops and hands-on training sessions can enhance their understanding of effectively utilizing these innovative tools.

Consider implementing a structured training program tailored to your team’s specific needs to facilitate this transition. Engaging with industry experts for training sessions can provide your staff with first-hand knowledge about the implications of cutting-edge technologies in maintaining pipe systems. By prioritizing training, you empower your workforce to embrace modernization confidently, ultimately enhancing the efficiency and reliability of your pipe maintenance operations.

Planning for Future Technological Advances

To plan for future technological advances in pipe maintenance, it’s important to stay informed about emerging innovations in the industry. Regularly attending workshops, webinars, and industry conferences can provide you with valuable insights into the latest tools and techniques. By actively engaging with experts and peers, you can identify best practices and assess how these advancements can be integrated into your existing systems.

Consider developing a long-term technology roadmap that aligns with your infrastructure goals. This roadmap should include timelines for evaluating new solutions and training your team on their implementation. By fostering a culture that embraces change and encourages experimentation with advanced technologies, you will position your organization to efficiently adapt and optimize your pipe maintenance processes for years to come.

Conclusion

Transforming pipe maintenance with cutting-edge technologies is essential for enhancing efficiency and reliability in modern plumbing systems. By embracing innovative methods such as trenchless technology, smart sensors, and AI-driven diagnostics, you can proactively address issues, reduce costs, and extend the lifespan of your infrastructure. Investing in employee training and future technological advances ensures that your team can effectively manage the challenges of aging systems. Ultimately, leveraging these advanced tools positions your organization for sustainable success, safeguarding the integrity of vital water management systems.

Frequently Asked Questions

What is trenchless technology in pipe maintenance?
Trenchless technology allows pipe repair or replacement without extensive excavation, reducing disruption and environmental impact.
What are the limitations of traditional pipe maintenance methods?
Traditional methods often cause long downtimes and inefficiency and cannot easily handle modern demands like stormwater management or aging infrastructure.
How do outdated pipe maintenance practices affect efficiency?
Due to aging infrastructure, outdated practices lead to frequent repairs, reduced productivity, and increased maintenance costs.
What are smart sensors in pipe maintenance?
Smart sensors provide real-time data, enabling proactive maintenance and detecting issues early to reduce the risk of costly failures.

Sewer line detection Sewer line detection

Early Detection: Recognizing Signs of Sewer Line Issues

Understanding the Importance of Early Detection

Recognizing sewer line issues early can prevent significant damage to your home. A broken sewer pipe can lead to problematic plumbing fixtures, like bathtubs, overflowing or backing up. Additionally, sewage problems pose health risks, potentially attracting rodents and causing contamination. Timely repairs safeguard your family’s health and provide financial benefits by saving you from costly emergency repairs.

How Sewer Line Issues Affect Your Home

Sewer line issues can significantly disrupt your home’s daily operations. A clogged sewer line can cause toilets and sinks to back up, leading to unsanitary conditions and costly clean-up efforts. Moreover, a cracked sewer line can compromise the structural integrity of your property, resulting in extensive damage that may require expensive trenchless sewer repair methods or even a full sewer line installation to resolve.

Ignoring early signs of sewer problems can lead to a cascade of complications. For instance, untreated sewage leaks can create unhealthy living environments and attract pests like rodents. By addressing issues quickly, you protect your family’s health and avoid the financial burden associated with emergency repairs or extensive damage repairs that may arise from prolonged neglect of a malfunctioning sewer system.

Health Risks Associated With Sewage Problems

A broken sewer line can lead to serious health hazards in your home. When sewage seeps into your living spaces, it creates an environment ripe for bacterial growth, leading to potential illnesses for you and your family. A clogged sewer line may initially seem like a minor inconvenience, but the longer it goes untreated, the higher the risk of exposure to harmful pathogens that can compromise your family’s health.

A sewer line leak can also attract pests, such as rodents and insects, which pose further health risks. These pests can transmit diseases and create additional health concerns within your home.

Financial Benefits of Timely Repairs

Timely sewer line repairs can significantly reduce your overall maintenance costs. By identifying leaks early through regular inspection, you can prevent a minor sewer line clog from escalating into a major issue that requires extensive work and expense. Investing in pest control measures alongside prompt repairs can save you from the additional costs associated with infestations arising from sewage leaks, safeguarding your finances and living environment.

Common Indoor Signs of Sewer Line Issues

Unpleasant Odors Emanating From Drains

Unpleasant odors emanating from your drains signal potential issues with your sewer line. These foul smells, often caused by bacteria buildup, can indicate a clog or corrosion in the pipes, leading to backups that disrupt your home’s plumbing. If you notice persistent, strong odors, it’s essential to perform leak detection immediately to prevent further complications.

Ignoring these odors can lead to serious health concerns, as stagnant water in the drains can harbor harmful bacteria. Additionally, unpleasant smells may hint at a more extensive problem within your sewer line, necessitating professional intervention.

Slow or Clogged Drains Throughout the House

Slow or clogged drains can clearly indicate underlying sewer line issues in your home. Frequent backups in your bathroom or kitchen sinks often signify problems with drainage that need immediate attention. These persistent clogs may not only cause inconvenience but also point to increased pressure building within your sewage system, leading to potential pipe damage or even creating sinkholes in your yard.

Addressing slow or clogged drains early is essential to prevent complications that can escalate into major repairs. If you notice that water in your sinks drains slower than usual or there is a recurring issue with multiple fixtures, consider scheduling a professional inspection.

Gurgling Noises in Pipes and Toilets

Gurgling noises in your pipes and toilets often indicate underlying sewer line issues that require attention. These sounds can suggest that air is trapped in the plumbing system due to a blockage, which may lead to water flow problems, impacting your shower and other fixtures. If neglected, this condition could escalate into clogs, resulting in floods or sewage backups and compromising your home and health.

Paying close attention to gurgling can help you avoid mold growth and insects attracted to damp environments caused by plumbing issues. This symptom warns that your sewage system is not operating correctly.

Frequent Sewage Backups in Basements or Lower Levels

Frequent sewage backups in your basement or lower levels can indicate underlying sewer line problems that require immediate attention. Often, these backups result from clogged pipes or issues with the septic tank, causing wastewater to flow back into your home. If you experience repeated backups, it’s crucial to investigate potential blockages and assess the condition of your sewer system to avoid extensive damage.

Mold Growth on Walls and Ceilings

Mold growth on walls and ceilings often indicates water damage from sewer line issues. If you notice discoloration or fuzzy patches, particularly in damp areas, it could signal that a clogged drain or leak in a pipe is allowing moisture to accumulate. This situation can compromise the structural integrity of your home while also posing health risks to your family.

Addressing mold promptly is crucial to prevent further complications. If you suspect mold is linked to a drain line problem, it’s advisable to consult a professional who can assess the situation and identify the source of the moisture.

Outdoor Symptoms Indicating Sewer Problems

Lush Grass Patches in Specific Yard Areas

Lush grass patches in specific areas of your yard can indicate broken sewer lines. When sewer systems malfunction, untreated wastewater may leak into the soil, providing excess nutrients that can result in greener, more vibrant patches of grass. This unusual growth signals that there could be an issue with the sewer lines, potentially linked to clogs that lead to backups, affecting the performance of your sinks and toilets.

Standing Water or Damp Spots on the Lawn

Standing water or damp spots on your lawn can clearly indicate underlying sewer line issues, particularly related to your mainline sewer. Such conditions may arise when wastewater seeps into the soil due to cracked or broken sewer pipes, creating unsightly and unsanitary pools of water in your yard. If you notice these symptoms, it’s crucial to act quickly and request service to assess the situation, as prolonged exposure to wastewater can lead to significant health risks and property damage.

Addressing the problem promptly can save you from costly plumbing services. Engaging a professional to inspect your sewer lines can identify hidden issues and prevent a minor problem from escalating into a major repair.

Cracks in the Foundation or Sidewalks

Cracks in the foundation or sidewalks of your property can indicate significant sewer line problems. These cracks often result from soil erosion caused by leaking wastewater, which can compromise the structural integrity of your home. If you notice any fissures forming, it’s essential to investigate the condition of your sewer lines to prevent further damage and costly repairs.

Ignoring cracks in your foundation could lead to more serious issues over time, including sinkholes or further structural damage. Early detection of these signs allows you to take proactive measures, such as scheduling a professional inspection.

Influx of Rodents or Insects Near Home Exterior

An influx of rodents or insects near your home’s exterior can be a warning sign of underlying sewer line issues. These pests are often attracted to sewage leaks that provide a consistent water source and organic material for nesting and breeding. If you notice an increased presence of these unwanted guests around your property, it may indicate that your sewer system is malfunctioning and needs immediate attention.

Addressing pest issues promptly is crucial for your home’s comfort and your family’s health. The presence of rodents and insects can spread diseases and create an unsanitary living environment.

Sunken Areas or Sinkholes Developing in the Yard

Sunken areas or sinkholes in your yard can signal serious sewer line issues that require immediate attention. These depressions often result from soil erosion caused by leaking wastewater, indicating that your sewer pipes may be compromised. If you notice these changes in your landscape, it’s essential to investigate the underlying cause to prevent further structural damage to your property.

Acting promptly when you observe sinkholes can save you from extensive repairs. If left untreated, these areas can expand, leading to costly damage and posing safety risks for your family.

Leading Causes of Sewer Line Damage

Tree Roots Invading Sewer Pipes

Tree roots invading sewer pipes is a common and significant cause of sewer line damage. As trees grow, their roots naturally seek moisture, often leading to your sewer pipes. If you’re noticing slow drains or recurring clogs, it may indicate that tree roots have infiltrated your sewer line, creating blockages that disrupt the wastewater flow.

Addressing tree roots proactively is vital for maintaining your plumbing system’s integrity. Consider scheduling regular inspections to identify any root intrusion early on. Professional services can use hydrojetting or rooters to clear the blockage if you suspect root damage. Taking timely action prevents costly repairs and ensures your home’s plumbing system operates efficiently.

Aging and Corroded Pipe Materials

Aging and corroded pipe materials can severely impact the functionality of your sewer system. If your home has older plumbing, you might notice signs of wear, such as frequent clogs or slow drainage. These issues often stem from pipes made of outdated materials, such as cast iron or clay, which are more prone to deterioration over time.

Recognizing these signs early is crucial for preventing more significant problems. For instance, if you observe rust or discoloration around your drains, it could indicate that the piping is degrading. You should consider scheduling a professional inspection to assess the condition of your sewer lines and explore options for replacement or repair before a minor issue leads to a more complicated and expensive repair process.

Blockages From Grease, Debris, and Foreign Objects

Blockages from grease, debris, and foreign objects are among the most common causes of sewer line damage. Cooking grease disposed of down the drain can solidify, creating stubborn clogs in your pipes. Similarly, flushing items like sanitary products, wipes, or other foreign objects leads to blockages that disrupt the efficient flow of wastewater, potentially causing backups and costly repairs.

To prevent these issues in your home, be mindful of what you dispose of down your drains. Always collect cooking grease, dispose of it in the trash, and educate your family about proper waste disposal practices.

Ground Shifting Due to Soil Erosion or Construction

Ground shifting due to soil erosion or construction activities can lead to serious sewer line damage, impacting the functionality of your plumbing system. As soil erodes or is disturbed, it can create gaps or misalignments in the pipes, resulting in leaks or blockages that disrupt wastewater flow. Inspect your sewer lines if you notice changes in your yard, such as sinkholes or uneven surfaces, as these can be signs of underlying issues.

Monitoring your property for signs of ground shifting is essential for maintaining the integrity of your sewer system. After heavy rains or nearby construction projects, check for any new depressions, cracks, or unusual water pooling in your yard. Addressing these concerns promptly can save you from costly repairs and ensure the continued safety and functionality of your home’s plumbing network.

Damage From Severe Weather or Natural Disasters

Severe weather conditions like heavy rainfall, storms, and flooding can significantly damage your sewer lines. These natural disasters can lead to overwhelmed systems, resulting in backups and leaks that compromise the integrity of your plumbing. If you live in an area prone to such weather, looking for signs of damage following severe events, such as unusual odors or slow drains, is crucial to address potential issues promptly.

Additionally, natural disasters like earthquakes can cause ground shifting, leading to misalignments in your sewer pipes. This misalignment can create leaks and blockages that disrupt the flow of wastewater. By being vigilant after severe weather or earthquakes, you can quickly detect changes in your plumbing system and take action, ensuring your home remains safe and functional.

Taking Immediate Action Upon Detection

Scheduling a Professional Sewer Line Assessment

When you notice signs of sewer line issues, scheduling a professional sewer line assessment is crucial for early detection and resolution. A trained technician can utilize specialized tools, such as video inspection equipment, to identify the root cause of the problem and determine the best course of action. Investing in a professional evaluation gives you peace of mind and ensures that minor issues do not escalate into major, costly repairs.

Avoiding DIY Solutions That May Exacerbate Issues

When faced with potential sewer line issues, it’s tempting to consider DIY solutions as a cost-effective approach. However, these do-it-yourself methods can often exacerbate the problem, leading to more extensive and costly repairs. For instance, using chemical drain cleaners may fail to resolve the clog and damage your pipes, causing leaks or ruptures that further compromise your plumbing system.

Preparing for Possible Repair or Replacement

If you suspect your sewer line may require repair or replacement, preparing in advance can help streamline the process. First, gather relevant information regarding your observed symptoms, such as slow drains, gurgling sounds, or unpleasant odors. Documenting these signs will assist the professionals in diagnosing the issue efficiently, ultimately saving you time and potential costs associated with prolonged problems.

Preventing Future Sewer Line Problems

Implementing Regular Maintenance Routines

Regular maintenance routines for your sewer line can significantly extend its lifespan and enhance your home’s plumbing efficiency. Schedule periodic inspections with a professional to check for potential issues, such as tree root intrusion or pipe corrosion, which can lead to more substantial problems if left unattended. By addressing these minor concerns early, you not only prevent costly repairs but also ensure the smooth operation of your sewer system. You should also be mindful of what you allow to enter your drains. Avoid disposing of grease, food particles, or foreign objects that can cause blockages. Educating your family members about proper waste disposal practices ensures a collaborative effort in maintaining your sewer line.

Being Mindful of What Goes Down the Drains

Being mindful of what goes down your drains is crucial to preventing sewer line problems. Everyday items like cooking grease, coffee grounds, and non-flushable wipes can create significant blockages, leading to slow drains and backups in your plumbing system. You can protect your plumbing system and your home by adopting proper disposal habits, such as placing grease in the trash and educating your family about what to flush.

Planting Trees Away From Sewer Lines

When planting trees near your home, it’s essential to consider their proximity to sewer lines. Roots can infiltrate and damage pipes, leading to significant sewer line issues over time. By choosing to plant trees at least 10 to 20 feet away from sewer lines, you can minimize the risk of root intrusion that can cause costly blockages and repairs.

In addition to selecting the right distance, you should consider planting species with a less invasive root system. Opting for trees known for their shallow or non-invasive roots can further protect your sewer lines.

Upgrading to Durable, Modern Pipe Materials

Upgrading to durable, modern pipe materials prevents future sewer line problems. Materials such as PVC and HDPE offer superior corrosion and root intrusion resistance compared to older pipe types like clay or cast iron. Investing in these advanced options safeguards your plumbing system from common issues, ensuring long-lasting performance and reducing the likelihood of expensive repairs.

Conclusion

Early detection of sewer line issues is vital to safeguarding your home and health. Recognizing signs such as unpleasant odors, slow drains, and frequent backups allows you to act before minor problems escalate into costly repairs or health hazards. Prompt attention not only protects your family but also enhances the efficiency of your plumbing system. By fostering awareness and proactive measures, you maintain a safe and functional environment for your household.

Frequently Asked Questions

What are early signs of sewer line issues?
Common signs include slow drains, unpleasant odors, and frequent backups in toilets and sinks. Outdoor indicators may include soggy patches in your yard or noticeable rodent activity.
How do sewer line issues affect my home?
Sewer problems can cause backups, resulting in unsanitary conditions, structural damage, and potential health risks. Prolonged issues may lead to costly repairs or replacements.
What health risks are associated with sewer line problems?
Sewage leaks can promote bacterial growth, leading to illnesses. They also attract pests like rodents and insects, which pose additional health concerns.
What causes sewer line damage?
Common causes include tree roots invading pipes, shifting soil, aging pipes, and debris or grease buildup that creates clogs.

Open sewer manhole with hoses for maintenance Open sewer manhole with hoses for maintenance

Understanding the Cost of Sewer Line Services

Are you struggling with unpleasant odors and bacteria buildup in your home’s sewer system? You’re not alone. Many homeowners face these issues, but eco-friendly sewer cleaning methods offer an effective and safe solution for your family. This article will compare traditional cleaning techniques with greener alternatives, outline the benefits of eco-friendly sewer cleaning, and guide you on implementing these practices at home. By focusing on these solutions, you can improve your home’s health and avoid costly emergencies related to sewer problems.

Recognizing the Role of Sewer Maintenance in Home Health

Sewer maintenance is pivotal in your family’s well-being, affecting everything from health to comfort. Recognizing warning signs of sewer problems, such as slow drains or unusual odors, can prevent bigger issues. Additionally, understanding the connection between sanitary sewer systems and indoor air quality is vital. This section will address how trenchless technology and specialized nozzles can effectively manage organic matter, ensuring a clean and healthy home environment.

How Sewer Issues Affect Your Family’s Well-Being

Ignoring sewer issues can lead to significant health concerns for your family. For instance, a small leak in your bathroom can allow harmful bacteria and debris to enter your home, impacting indoor air quality and potentially causing illness. Staying proactive with sewer maintenance, including leak detection, can help you identify and resolve these problems before they escalate into more serious situations.

Furthermore, debris accumulation in your sewer lines can lead to slow drainage, fostering mold growth and unpleasant odors. This can create an uncomfortable living environment and harm your family’s well-being. By opting for eco-friendly sewer cleaning methods, you ensure the efficient removal of debris and promote a healthier home atmosphere for everyone.

Identifying Warning Signs of Sewer Problems

Awareness of the warning signs of sewer problems can be your first defense against potential hazards. For instance, if you notice slow drains throughout your home, this could indicate a clog in your sewer lines that needs immediate attention. An eco-friendly drain cleaner, particularly those containing hydroxide, can help break down blockages without compromising your home’s ecosystem or releasing harmful chemicals into your environment.

Unpleasant odors and gurgling sounds from your drains are also red flags indicating underlying sewer issues. These symptoms often suggest that waste and organic matter accumulate, leading to further complications if left unaddressed.

The Connection Between Sewers and Indoor Air Quality

The connection between sewer systems and indoor air quality is often underestimated. When sewer problems occur, such as clogs in pipes or backups, they can release harmful gases and odors that affect your home’s air. Utilizing hydrojetting services can effectively clear blockages and prevent such issues, ensuring that unpleasant smells and hazardous air do not compromise your family’s health.

Additionally, chemical reactions caused by the buildup of organic matter in your sewer lines can release toxins into your home’s atmosphere. Regular maintenance through eco-friendly sewer cleaning methods, such as hydrojetting, prevents drips and leaks in your shower and maintains a cleaner, safer indoor environment.

Comparing Traditional and Eco-Friendly Sewer Cleaning Techniques

Conventional sewer cleaning methods can pose risks, including corrosion of pipes and the potential for harsh chemicals to enter the soil. These approaches often rely on heavy-duty cleaners that struggle to eliminate soap scum and other organic buildup. In contrast, eco-friendly solutions provide significant benefits, from reducing environmental impact to safeguarding your home’s plumbing system. This section will explore the drawbacks of traditional cleaning techniques and highlight the advantages of switching to sustainable practices.

Drawbacks of Conventional Sewer Cleaning Methods

Conventional sewer cleaning methods often rely on harsh chemicals like acetic acid, which can erode pipes and compromise the efficiency of your sewer line. These aggressive substances can create more problems than they solve, as frequent use may lead to damage that requires costly repairs or replacements. This approach not only puts your plumbing system at risk but also affects the overall health of your home’s environment.

Additionally, traditional methods can lead to water contamination and harmful runoff, adversely impacting local ecosystems. The reliance on heavy-duty pumps to force through clogs can exacerbate these issues, creating a cycle of dependence on aggressive cleaning that does not address the root cause of the blockages.

Benefits of Switching to Eco-Friendly Solutions

Switching to eco-friendly sewer cleaning solutions can significantly reduce the risks associated with traditional methods. For example, using a high-pressure hose for hydrojetting effectively removes waste from clogged sewer lines without the need for harsh chemicals that can damage your plumbing. This method prevents potential blockages and ensures that your home’s environment remains safe and healthy for your family.

In addition to improving the overall health of your plumbing system, eco-friendly solutions contribute to a sustainable environment. Eliminating corrosive substances you help reduce soil contamination and protect local water sources from harmful runoff. Opting for green alternatives meets your household’s needs and promotes a healthier community for everyone.

Environmental Impact of Cleaning Choices

The environmental impact of your cleaning choices regarding drain cleaning and sewer line repair is significant. Conventional methods often rely on harsh chemicals that can lead to water damage and soil contamination, posing risks to local ecosystems. By selecting eco-friendly solutions, you can minimize these effects, helping to preserve natural resources and maintain the longevity of your plumbing system.

Advantages of Eco-Friendly Sewer Cleaning Methods

Promoting a Healthier Living Environment

By opting for eco-friendly cleaning agents over traditional chemical drain cleaners, you contribute to a healthier living environment for your family. Unlike harsh acids that can damage your plumbing system, these sustainable alternatives effectively break down waste while safeguarding your pipes. For instance, using a hydro jet provides a safe and efficient way to clear clogs without introducing harmful substances into your home or the surrounding environment.

Moreover, prioritizing eco-friendly plumbing services enhances indoor air quality by reducing the release of toxic fumes associated with conventional cleaning methods. You minimize potential hazards by eliminating the need for corrosive chemicals, allowing your household to breathe cleaner air. This not only fosters a more comfortable living space but also underscores your commitment to sustainability and the well-being of your family.

Preserving Natural Resources and Reducing Pollution

When you choose environmentally friendly sewer cleaning methods, you significantly contribute to preserving natural resources. Simple mixtures like vinegar combined with baking soda can effectively clean drains without introducing harmful chemicals into the ecosystem. This approach minimizes pollution and protects local waterways from contamination caused by conventional cleaning agents, enhancing the long-term sustainability of your community.

Moreover, eco-friendly practices in sewer maintenance reduce the overall environmental impact of waste disposal. Traditional methods often lead to toxic runoff that adversely affects soil and water quality. By adopting sustainable techniques, you help ensure that your household contributes less to pollution while promoting healthier living conditions for your family and neighbors. This commitment to sustainability fosters a cleaner environment, benefiting everyone in your community.

Enhancing Sewer System Efficiency and Longevity

Implementing eco-friendly sewer line cleaning methods, such as hydro jetting, significantly enhances the efficiency and longevity of your home’s plumbing infrastructure. Unlike traditional methods that may introduce harmful substances into your pipes, hydro jetting uses high-pressure water to remove blockages, including oil and grease buildup, without causing damage. This means fewer repairs and a reduced likelihood of future clogs, resulting in a smoothly operating sewage system.

Moreover, by maintaining a clean sewer system, you support the overall health of your community’s streams and local waterways. When you choose sustainable practices for sewer line cleaning, you protect your home while contributing to environmental preservation.

Exploring Eco-Friendly Sewer Cleaning Techniques

High-Pressure Water Jetting and Its Benefits

High-pressure water jetting is an effective solution for maintaining clean sewer lines while prioritizing eco-friendly practices. This technique uses high-pressure water streams to break down clogs and remove mineral deposits that can accumulate over time, promoting optimal drainage in your home. Using this method reduces the need for harsh chemicals, ensuring that your plumbing system, including sinks and other critical areas, remains intact and functional.

Additionally, high-pressure water jetting contributes to water conservation by preventing the need for frequent repairs that can lead to leaks and inefficient water use. Unlike traditional methods that might rely on substances like sodium bicarbonate to treat clogs, water jetting tackles issues directly at the source. This proactive approach not only enhances the lifespan of your plumbing infrastructure but also ensures a healthier environment for your family, free from the risks associated with chemical cleaners.

Utilizing Biodegradable Cleaning Agents

Utilizing biodegradable cleaning agents presents a practical solution for maintaining your sewer system while prioritizing your family’s health. These agents effectively break down organic materials without introducing harmful substances, allowing you to address common plumbing issues without the risks associated with harsh chemicals like sodium hydroxide. By choosing biodegradable options, you can enhance water efficiency in your home and reduce carbon footprints, contributing to a healthier environment for your family and community.

Incorporating biodegradable cleaning solutions into your routine plumbing maintenance offers significant benefits, such as reducing the likelihood of pipe corrosion and extending the lifespan of your plumbing infrastructure. For example, opting for plant-based cleaners not only effectively removes clogs but also ensures that harmful runoff is minimized. By embracing these eco-friendly plumbing solutions, you proactively protect your home’s environment and support water conservation efforts.

Mechanical Cleaning Without Harmful Chemicals

Mechanical cleaning methods, such as augering, are effective for maintaining your sewer pipelines without harmful chemicals. Utilizing specialized tools to remove sediment and blockages ensures that your plumbing system remains intact and functional while safeguarding your family’s health. This approach enhances the efficiency of your sewer lines and minimizes the risks associated with conventional chemical cleaners.

In addition to preserving your plumbing infrastructure, mechanical cleaning offers the benefit of being environmentally responsible. By choosing this method, you can effectively address clogs and buildup without introducing harmful substances into your home’s environment. This eco-friendly solution provides a sustainable way to keep your sewer system operating smoothly, ensuring a healthy living space for you and your family.

Incorporating Natural Enzyme Treatments

Incorporating natural enzyme treatments into your sewer maintenance routine can greatly enhance the health of your home. These treatments contain beneficial bacteria and enzymes that effectively break down organic matter, grease, and waste without harmful chemicals. By using enzyme-based cleaners regularly, you can prevent buildup that leads to clogs and slow drains, ensuring smoother operation of your plumbing system while creating a safer environment for you and your family.

Furthermore, natural enzyme treatments prioritize sustainability, as they are biodegradable and safe for the environment. When you choose these eco-friendly solutions, you help reduce the introduction of harsh pollutants into your home and local waterways. By opting for enzyme treatments, you not only support a healthier plumbing system but also contribute to the overall well-being of your community, making it a worthwhile investment in your family’s health.

Implementing Eco-Friendly Sewer Maintenance at Home

Implementing eco-friendly sewer maintenance at home involves taking strategic preventative measures to avoid clogs, utilizing DIY methods for sustainable sewer care, and recognizing when to seek professional help. Each of these aspects is essential for maintaining a healthy home environment. Understanding these techniques ensures your sewer system functions efficiently, minimizing environmental impact and promoting your family’s well-being.

Preventative Measures to Avoid Clogs

Regular maintenance is essential to effectively avoid clogs in your home’s plumbing system. One practical step is to monitor what goes down your drains; avoid disposing of grease, food particles, or non-biodegradable materials. A fine mesh strainer can help catch larger debris before it enters your sewer system, preventing buildup that could lead to clogs and subsequent repairs.

Another proactive measure is to periodically flush your drains with hot water and eco-friendly cleaning solutions. This simple practice helps break down accumulated grease or organic matter and keeps your pipes flowing smoothly. Establishing a routine for DIY maintenance not only prevents clogs but also promotes the overall efficiency of your plumbing system, ultimately maximizing your home’s health.

DIY Methods for Sustainable Sewer Care

Adopting DIY methods for sustainable sewer care can significantly enhance the long-term health of your plumbing system. For example, regularly pouring vinegar and baking soda down your drains can effectively break down grease and organic buildup. This simple, eco-friendly solution not only cleans your pipes but also minimizes the risk of clogs, ensuring that your sewer system functions optimally.

In addition to using natural cleaners, you can implement preventive practices such as regularly checking and maintaining your drains. A fine mesh screen over your sink and shower drains prevents debris and food particles from entering your sewage system. These small, proactive steps contribute to a healthier home environment while reducing reliance on harsh chemicals and professional interventions, promoting overall family well-being.

Knowing When to Seek Professional Help

Knowing when to seek professional help for your sewer system is vital for maintaining a healthy home environment. If you notice persistent slow drains, foul odors, or gurgling sounds, these symptoms may indicate serious blockages that require immediate attention. Enlisting the expertise of a qualified sewer maintenance professional ensures that your sewer cleaning is performed using eco-friendly methods that protect both your plumbing system and the environment.

Additionally, if you’ve tried DIY methods without success or if your sewer problems are recurring, it’s a clear sign that professional intervention is necessary. Professionals are equipped with the appropriate tools and knowledge to diagnose underlying issues effectively.

Choosing the Right Eco-Friendly Sewer Cleaning Professional

What to Look for in an Eco-Conscious Service Provider

When selecting an eco-conscious sewer cleaning professional, prioritize companies committed to environmentally friendly practices. This can include asking about their methodologies, such as using biodegradable cleaners, hydrojetting techniques, and their approach to minimizing harmful chemical use. Ensuring that your service provider adheres to sustainable practices benefits your plumbing system and contributes to the overall health of your home environment.

Additionally, look for certifications or affiliations with environmental organizations to verify their commitment to eco-friendly sewer cleaning. A reputable professional should be transparent about their techniques and the materials they use and provide examples of past projects that emphasize sustainability.

Questions to Ask Potential Companies

When choosing an eco-friendly sewer cleaning professional, inquire about their green practices. Ask how they ensure the use of biodegradable cleaning agents and what methods they employ to minimize environmental impact. Understanding their commitment to sustainable techniques will help determine if their approach aligns with your family’s health needs and values.

Additionally, it’s important to ask about their experience with eco-friendly solutions in sewer cleaning. Request examples of past projects where they implemented sustainable methods and how those choices positively impacted their clients’ homes. This knowledge not only shows their expertise but also assures you that they prioritize both the efficiency of your plumbing system and the well-being of your household.

Verifying Certifications and Eco-Friendly Practices

When seeking an eco-friendly sewer cleaning professional, verifying their certifications is essential. Look for companies that hold certifications from recognized environmental organizations, which indicates a commitment to sustainable practices. Engaging with certified professionals ensures that they know about eco-friendly solutions and follow industry best practices that prioritize your plumbing system and the environment.

Additionally, inquire about the specific eco-friendly practices they implement in their work. A reputable service provider should be transparent about using biodegradable cleaners, hydrojetting techniques, and strategies for minimizing harmful chemicals. By doing your due diligence, you can select a sewer cleaning expert dedicated to maximizing your home’s health while employing environmentally responsible methods.

Conclusion

Maximizing home health through eco-friendly sewer cleaning is essential for maintaining a safe and comfortable living environment. By promptly recognizing and addressing sewer issues, families can prevent health hazards and improve indoor air quality. Sustainable practices protect plumbing systems and promote environmental conservation and community well-being. Embracing these eco-friendly solutions empowers you to create a healthier home for your family while safeguarding the planet for future generations.

Frequently Asked Questions

How does sewer maintenance impact home health?
Regular sewer maintenance prevents issues like slow drains, bad odors, and harmful bacteria buildup, helping maintain a healthier living environment for your family.
What are some warning signs of sewer problems?
Slow drains, unpleasant odors, and gurgling indicate that your sewer system needs attention.
How do sewer problems affect indoor air quality?
Sewer blockages can release harmful gases and odors into your home, negatively impacting air quality and your family’s health.
What are the risks of traditional sewer cleaning methods?
Traditional methods often use harsh chemicals that can corrode pipes, damage plumbing systems, and lead to environmental harm through soil and water contamination
What are the advantages of eco-friendly sewer cleaning?
Eco-friendly methods, like hydro jetting, effectively remove blockages without using harmful chemicals, protecting your plumbing and the environment.